
User Requests
The User Requests feature allows administrators to manage the intake of new users and the return of inactive ones. This centralized dashboard ensures that every person gaining access to the platform is vetted, assigned the correct permissions, and linked to a valid sponsor where necessary.
As an administrator, you can use this page to approve or deny pending requests, view historical review notes, and set account expiration dates to maintain system security.
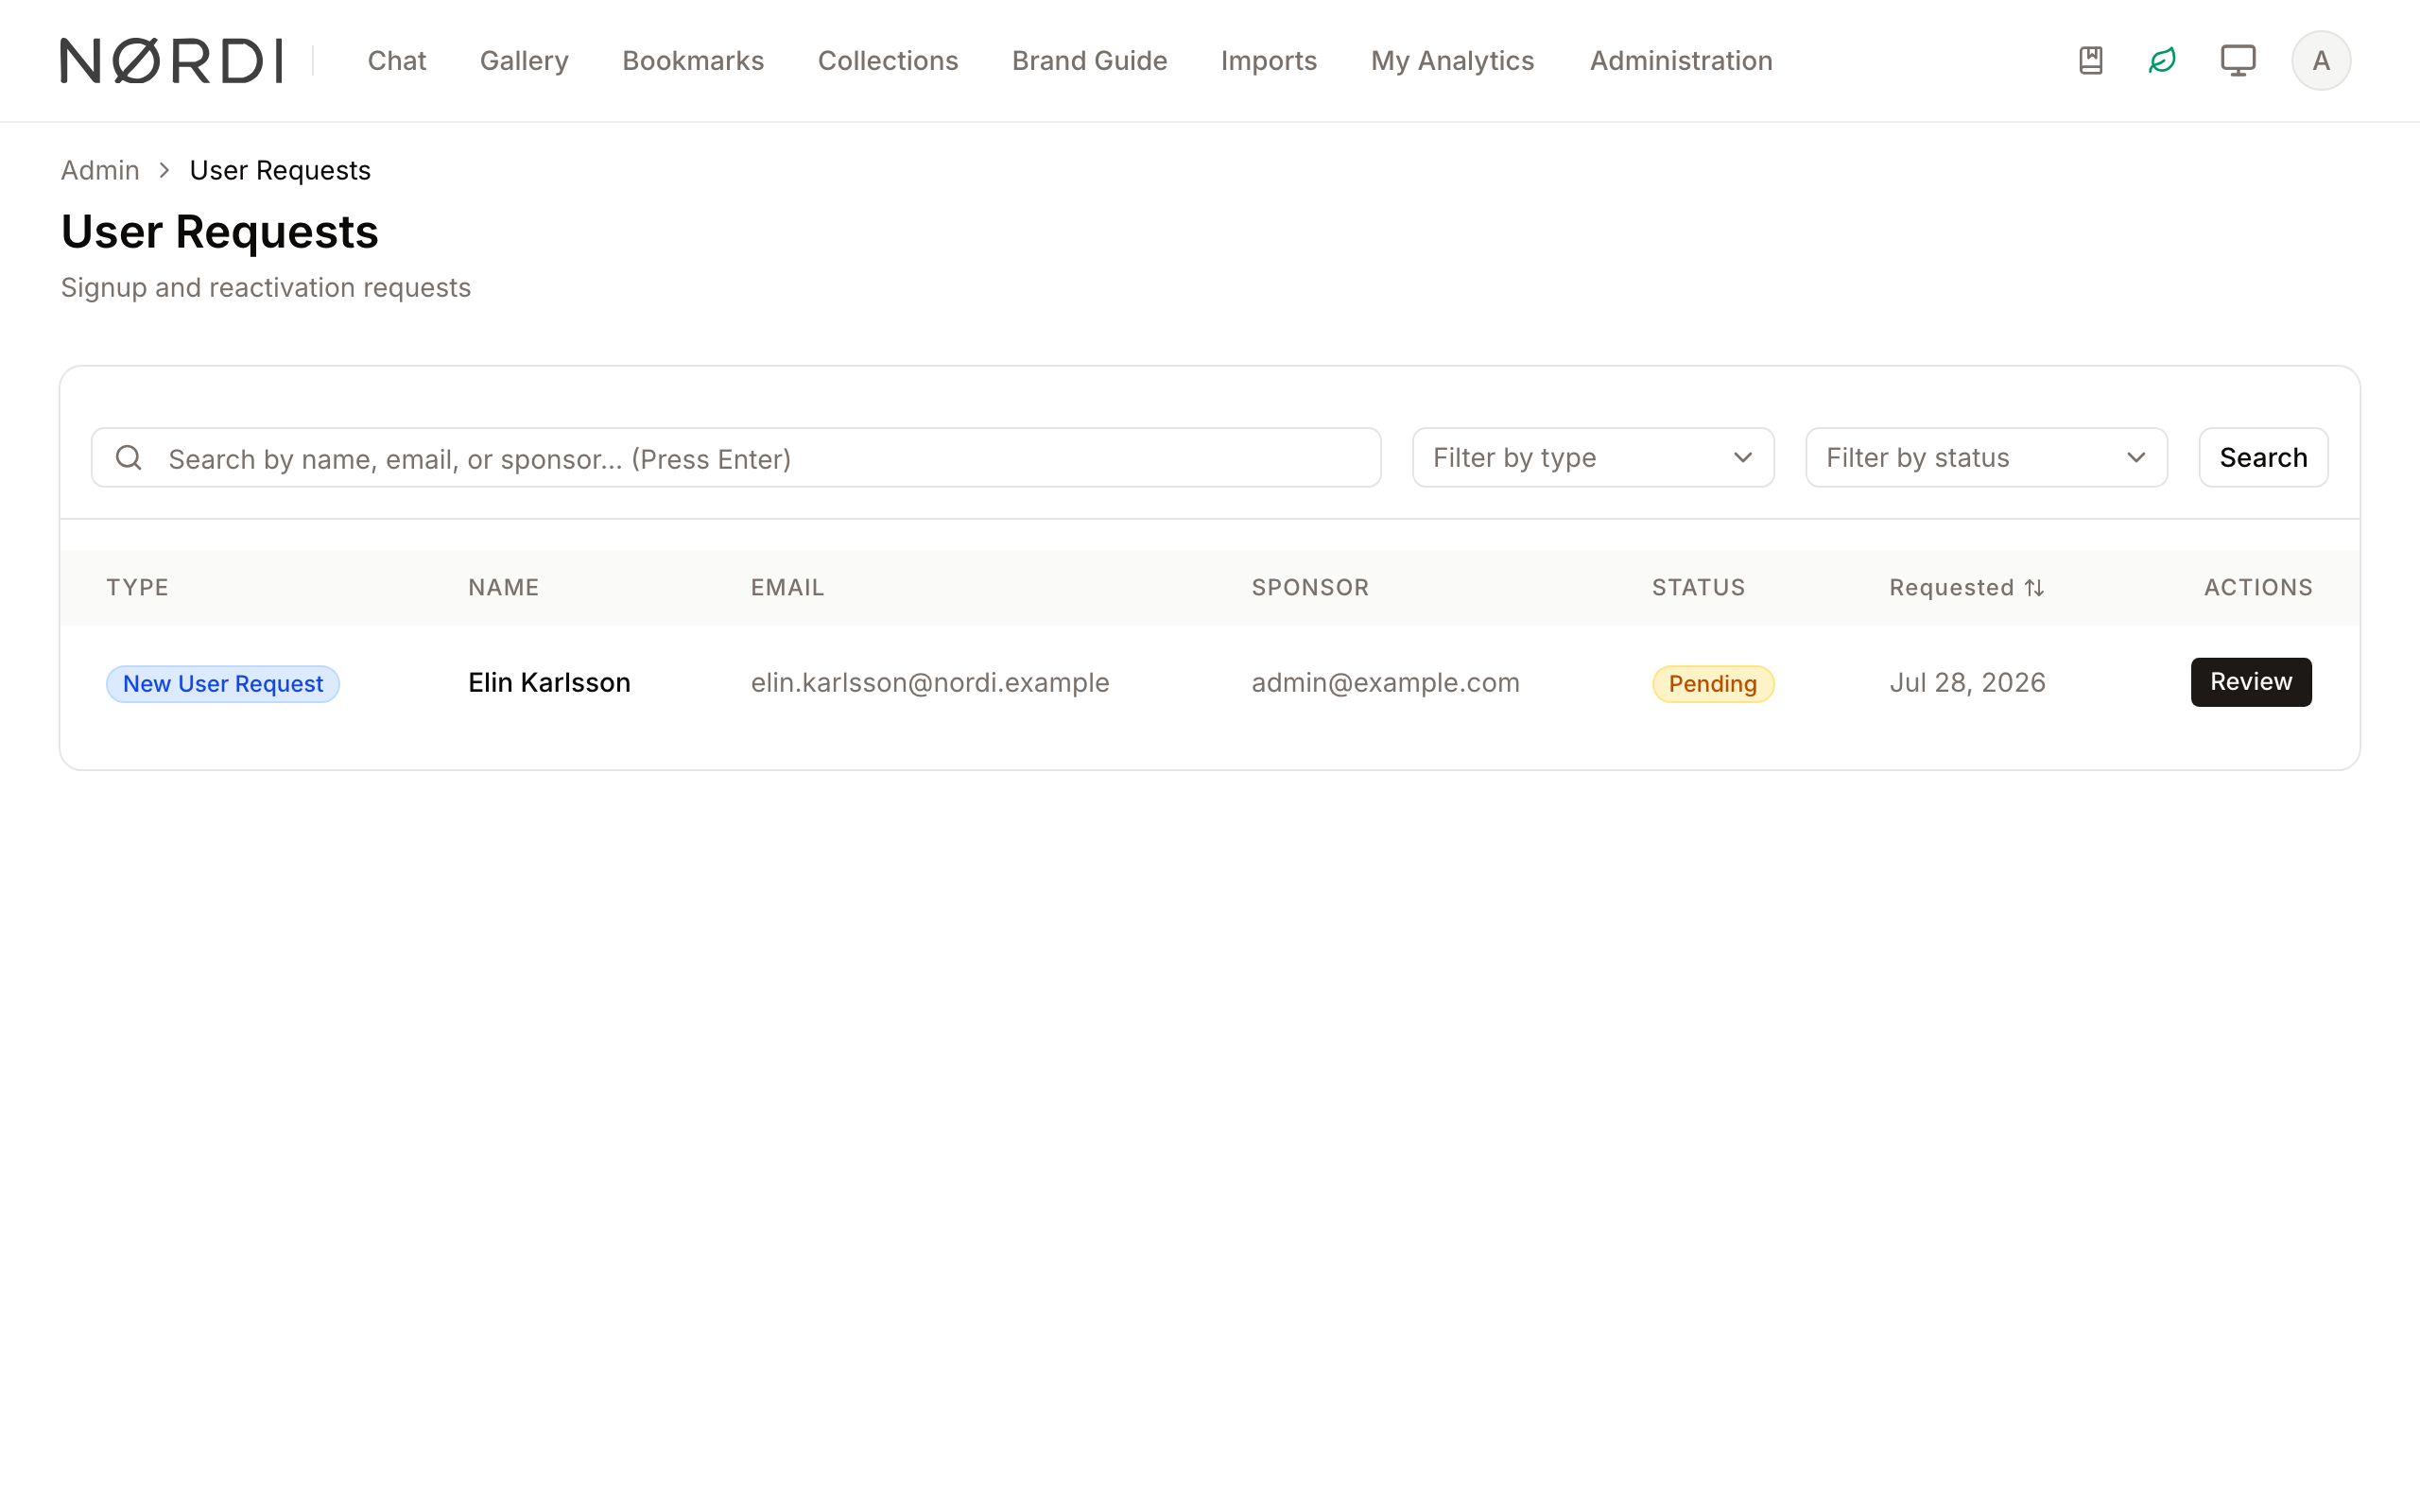
Page Overview
- Purpose: To act as a gatekeeper for platform access by reviewing registration and reactivation applications.
- When to use it: Use this page when you receive notifications of new sign-ups or when an existing user needs their account re-enabled.
- What you can do here:
- Filter requests by type (New User vs. Reactivation).
- Search for specific requesters by name, email, or sponsor.
- Review the "Reason for Access" provided by the user.
- Assign roles and set account expiry dates during approval.
- Provide feedback to users via review notes.
Page Layout
- Top bar: Displays the page title and a brief description of the management tasks.
- Main area: Contains the search and filter bar at the top, followed by a table listing all requests with columns for Type, Name, Email, Sponsor, Status, and Request Date.
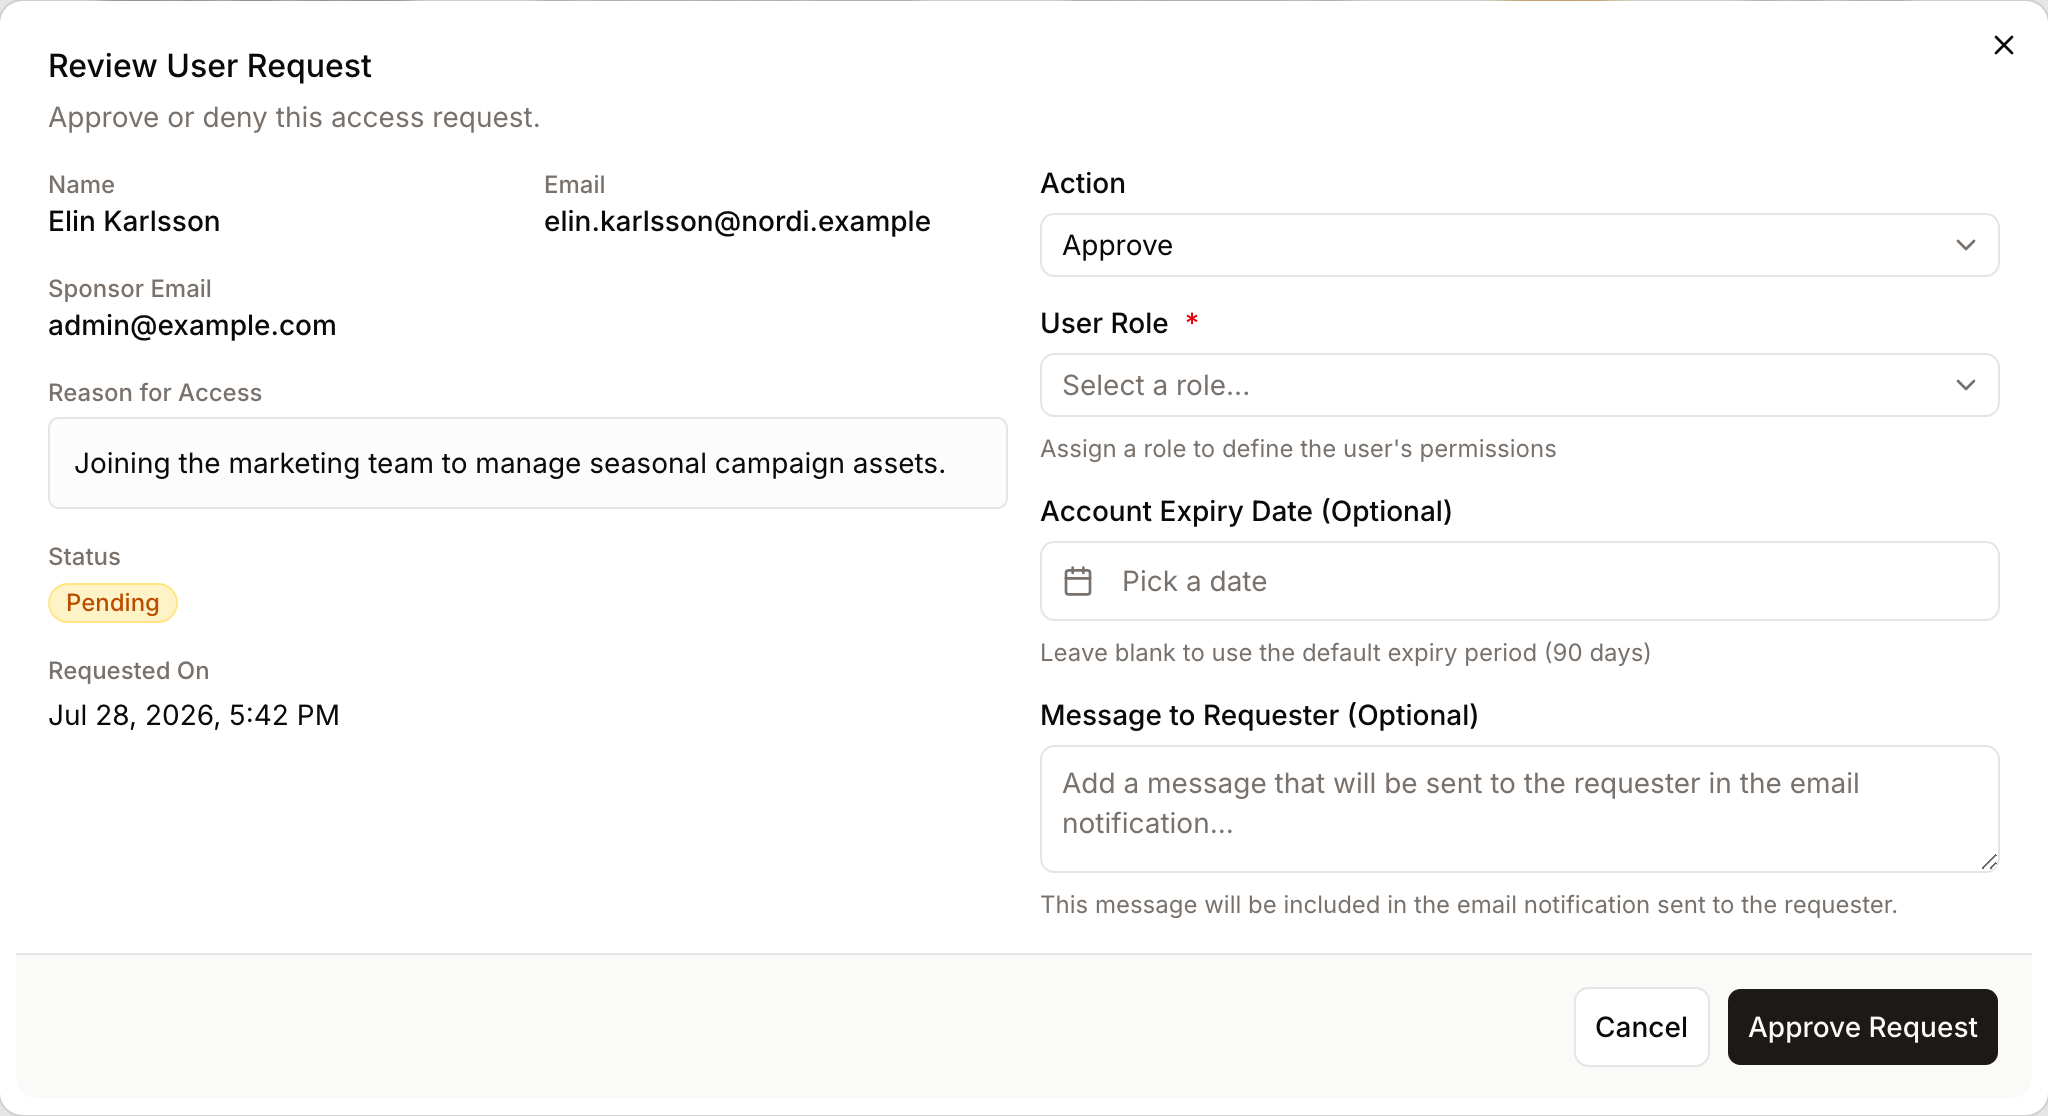
- Review Dialog: A pop-up window that appears when you click "Review" or the "View" icon, containing the full details of the request and the decision-making form.
Main Features
Request Filtering and Search
- What it's for: Quickly locating specific requests among a large volume of entries.
- Typical use: Filtering the list to show only "Pending" requests to identify work that needs immediate attention.
- Result: The table updates in real-time to show only the records matching your search text or selected filters.
Request Review and Decisioning
- What it's for: Formally approving or denying a user's request for access.
- Typical use: Checking a user's "Reason for Access" and "Sponsor Email" before granting them a specific role in the system.
- Result: The user's status changes from "Pending" to "Approved" or "Denied," and they are notified of the decision.
Expiry Management
- What it's for: Setting a hard date for when a user's access should automatically end.
- Typical use: Granting temporary access to a contractor or guest user.
- Result: The account will be scheduled for deactivation on the selected date.
Detailed Feature Documentation
Search and Filter Bar
- Purpose: To narrow down the list of requests based on specific criteria.
- Where to find it: Located at the top of the main card in the center of the page.
- What you'll see: A search field, two dropdown menus for Type and Status, and a Search button.
How to use it:
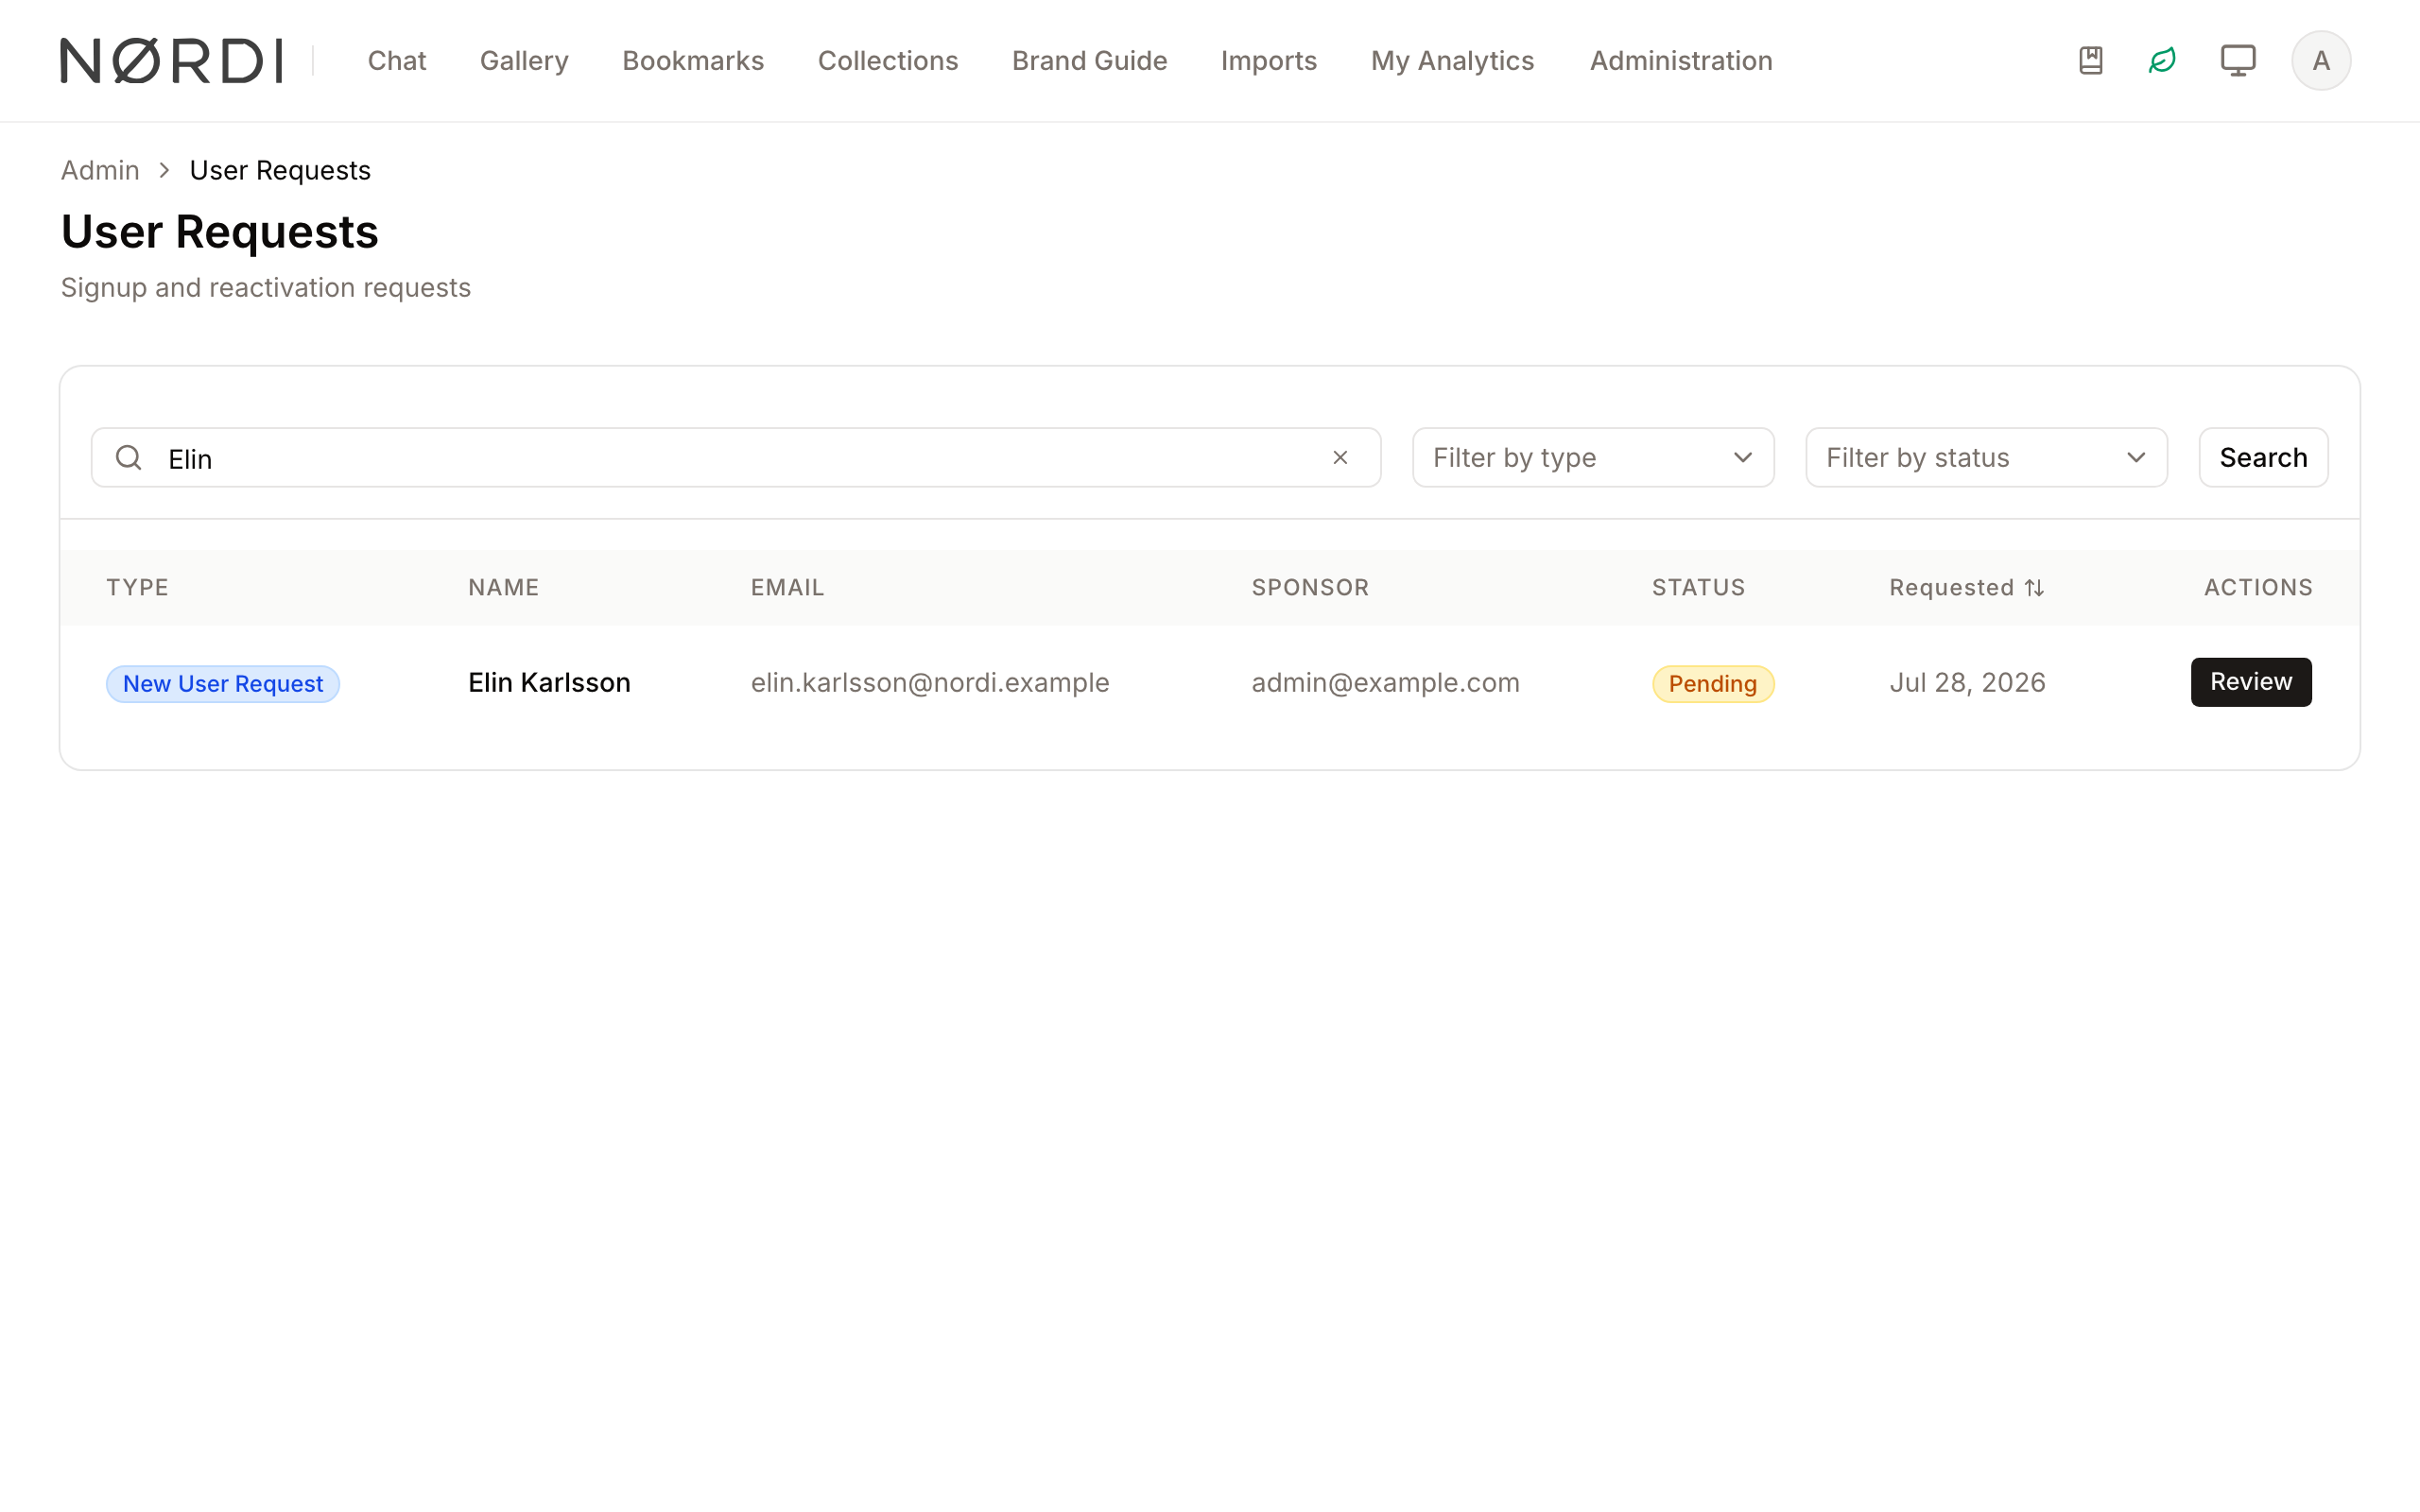
- Type a name or email into the Search by name, email, or sponsor... field.
- Select a value from the Filter by type dropdown (e.g., "New User").
- Select a value from the Filter by status dropdown (e.g., "Pending").
- Click Search to refresh the list.
- Click the X icon in the search bar to clear your search text.
Review Dialog
- Purpose: To view the full context of a request and submit an approval or denial.
- Where to find it: Click the Review button (for pending items) or the Eye icon (for processed items) in the Actions column.
- What you'll see: A window showing the user's details, their reason for the request, and (if pending) fields to select an action, role, and expiry date.
How to use it:
- Click Review on a pending request.
- Read the Reason for Access or Reason for Reactivation.
- Select "Approve" or "Deny" from the Action dropdown.
- If approving a new user, select a role from the User Role dropdown.
- (Optional) Click the Account Expiry Date field to select a date from the calendar.
- (Optional) Enter a message in the Message to Requester box.
- Click Approve Request or Deny Request to finalize.
Complete Workflows
Workflow: Approving a New User
- Goal: Grant a new user access to the system with a specific role.
- Prerequisites: The request must be in "Pending" status.
Steps:
- Locate the user in the table and click Review.
- Verify the Sponsor Email (look for an orange alert icon if the sponsor is not found in the system).
- Ensure the Action dropdown is set to Approve.
- Select the appropriate permission level from the User Role dropdown.
- Click Approve Request.
- Expected result: The dialog closes, a success toast appears, and the user's status updates to "Approved" in the table.
Workflow: Denying a Request with Feedback
- Goal: Reject a request while explaining why to the user.
- Prerequisites: Administrator permissions.
Steps:
- Click Review on the relevant request.
- Change the Action dropdown to Deny.
- In the Message to Requester field, type the reason for the denial (e.g., "Invalid sponsor email provided").
- Click Deny Request.
- Expected result: The request status changes to "Denied," and the message is saved in the Review Notes.
Who can review requests
Three groups of people are authorized to approve or deny a user request:
- Anyone with the "Manage user requests" permission - typically workspace admins. Its catalog description is "review and manage user requests: view, approve, and deny new user and reactivation requests."
- The sponsor named on the request - if the email a requester gave as their sponsor matches a real user in your workspace, that sponsor can act on the request directly, even without broader admin rights.
- Members of the configured reviewer group - your workspace can nominate a dedicated review team in Access Settings. Anyone in that group can pick up any pending request.
This "three-way" authorization makes it easy for organisations to split the approval workload across central admins, the person vouching for the new user, and a rotating review committee - without handing out full administrator permissions.
Limits and guardrails
- One decision per request: Once a request has been approved or denied, the review form is locked so the outcome cannot be silently changed. Reopening requires a new request from the user.
- Default account expiry: If you approve without setting an expiry date, the system applies the tenant default (90 days out of the box, configurable in Access Settings). This prevents guest accounts from living on indefinitely by accident.
- Default assigned role: Access Settings also lets you nominate a default role that is pre-selected in the approval form, which speeds up routine approvals and reduces the risk of forgetting to set a role.
- Audit trail: The reviewer, the timestamp, and the review notes are always recorded against the request.
What happens behind the scenes
- New user approvals: When you approve a new-user request, a full account is created with the name, email, role, and expiry you chose. The requester is emailed a password-reset link - setting the password also verifies the email address, so no extra verification step is needed. A branded approval email tells them who reviewed their request and welcomes them in.
- Reactivation approvals: For a returning user, the existing account is re-enabled with a refreshed expiry date, and an approval email is sent.
- Denials: The requester receives a denial email, and any message you typed in the "Message to Requester" field is included so they understand the reason.
Tips and Best Practices
- Sponsor Verification: If you see an orange alert icon next to a Sponsor Email, it means that email is not currently in the system. Double-check the spelling before approving.
- Default Expiry: If you leave the Account Expiry Date blank during approval, the system typically applies a default 90-day expiry period.
- Sorting: Click the Requested column header to sort by date, helping you find the oldest pending requests first.
Troubleshooting
Issue: Cannot find a specific request
- Symptoms: The table is empty or the expected user isn't appearing.
- Cause: Active filters are hiding the record.
- Fix: Click the reset button or manually set both the Type and Status filters back to their "Filter by..." placeholder values and clear the search field.
Issue: Approve button is disabled or fails
- Symptoms: Clicking the button does nothing or shows an error toast.
- Cause: A required field, such as User Role for new users, has not been selected.
- Fix: Ensure all fields marked with a red asterisk (*) are filled out before submitting.
- Prevention: Always select a role from the dropdown for "New User" types.