
Workflows
A workflow is the shape of the journey your assets follow - from the moment someone starts a draft to the day an asset is published, archived, or expired. Your administrator designs that journey once, and Freedam keeps every asset on the path.
Workflows are how your team agrees on questions like:
- Does every campaign photo need sign-off before it can be shared?
- Who approves product imagery - marketing, legal, or both?
- What happens to an asset the day its model-release expires?
This page explains how workflows work for the people who use them day-to-day: owners submitting for review, reviewers approving, and administrators tuning the shape of the flow.
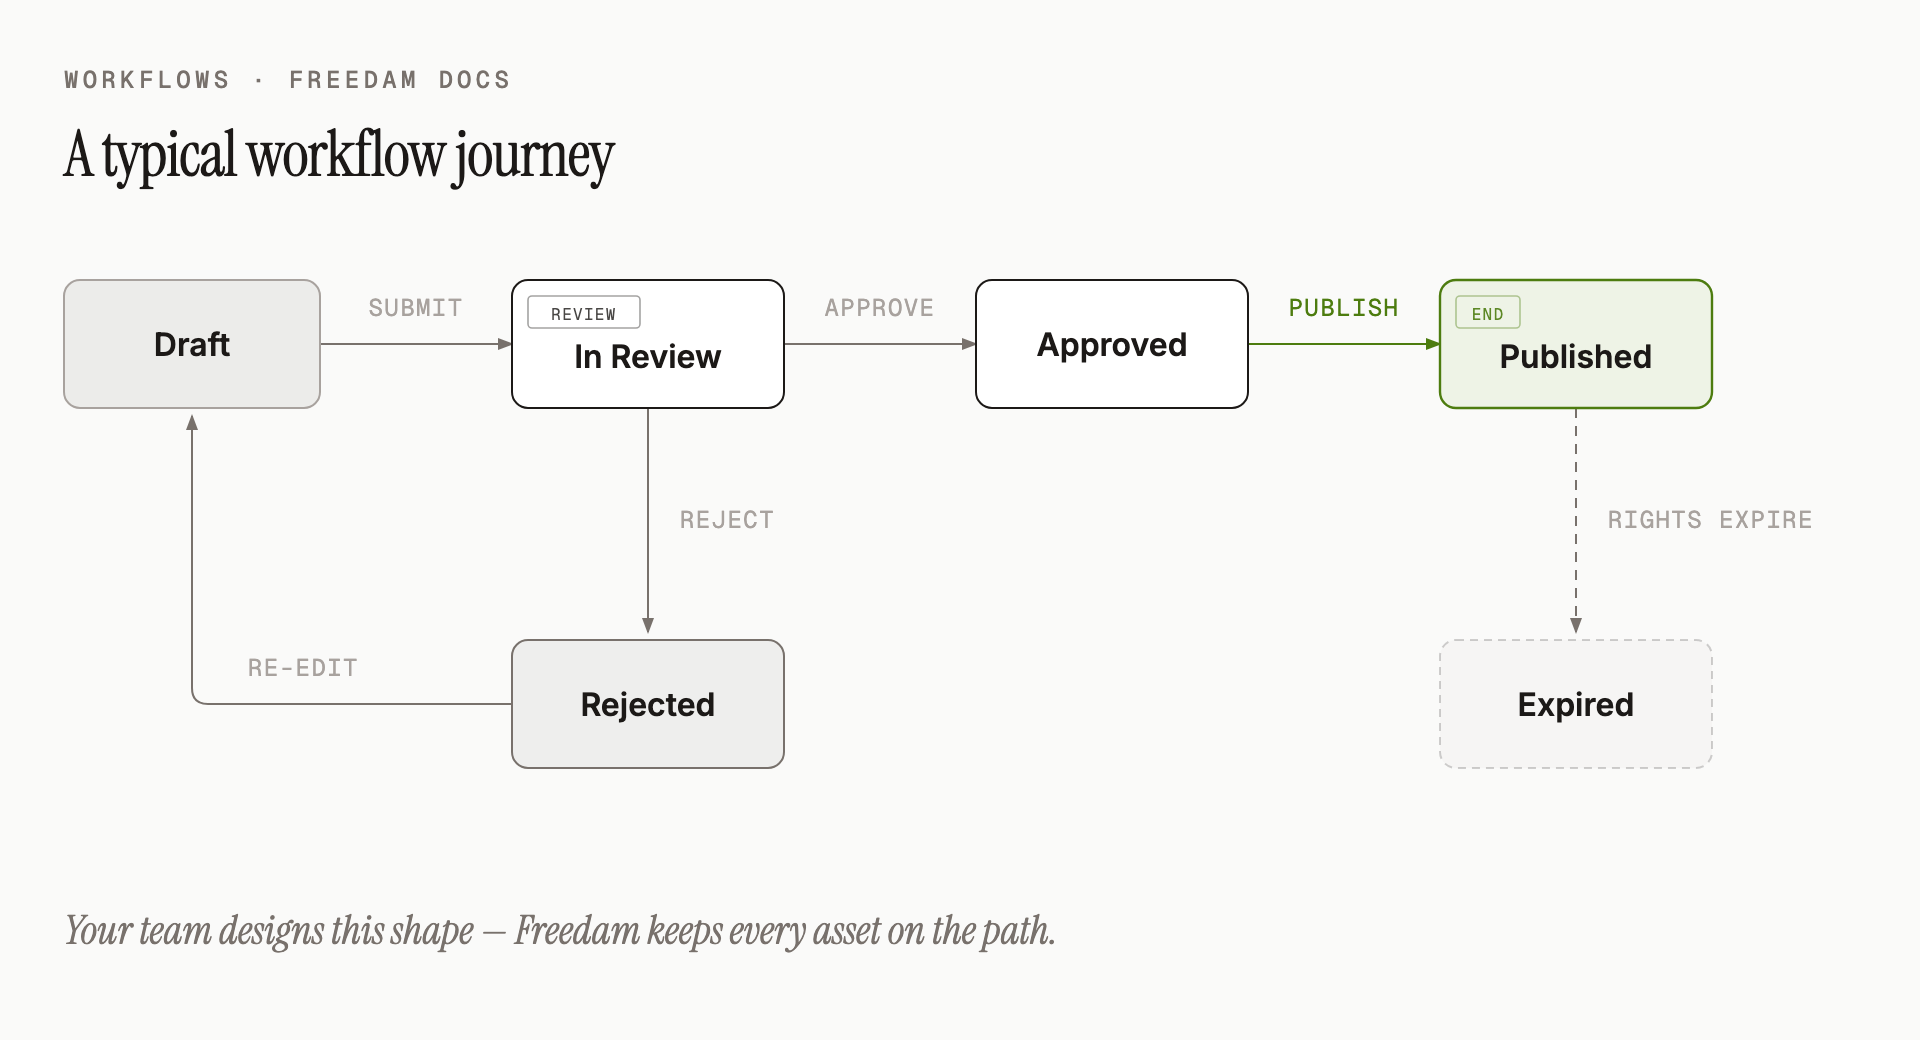
Page Overview
- Purpose: Keep assets moving through a clear, auditable approval and lifecycle path - no stray files shared before they're ready, no expired content quietly staying live.
- When to use it: Every time an asset needs sign-off from someone other than its creator, or needs to expire automatically after a period.
- What you can do here:
- Submit your own assets for review.
- Approve or reject assets assigned to your reviewer group.
- Work through a Review Mode in the Gallery that shows only what needs your attention.
- Follow the complete history of every move any asset has made.
The Three Kinds of Status
Every workflow is a small map made of statuses (the boxes) and transitions (the arrows between them). Each status is one of three kinds.
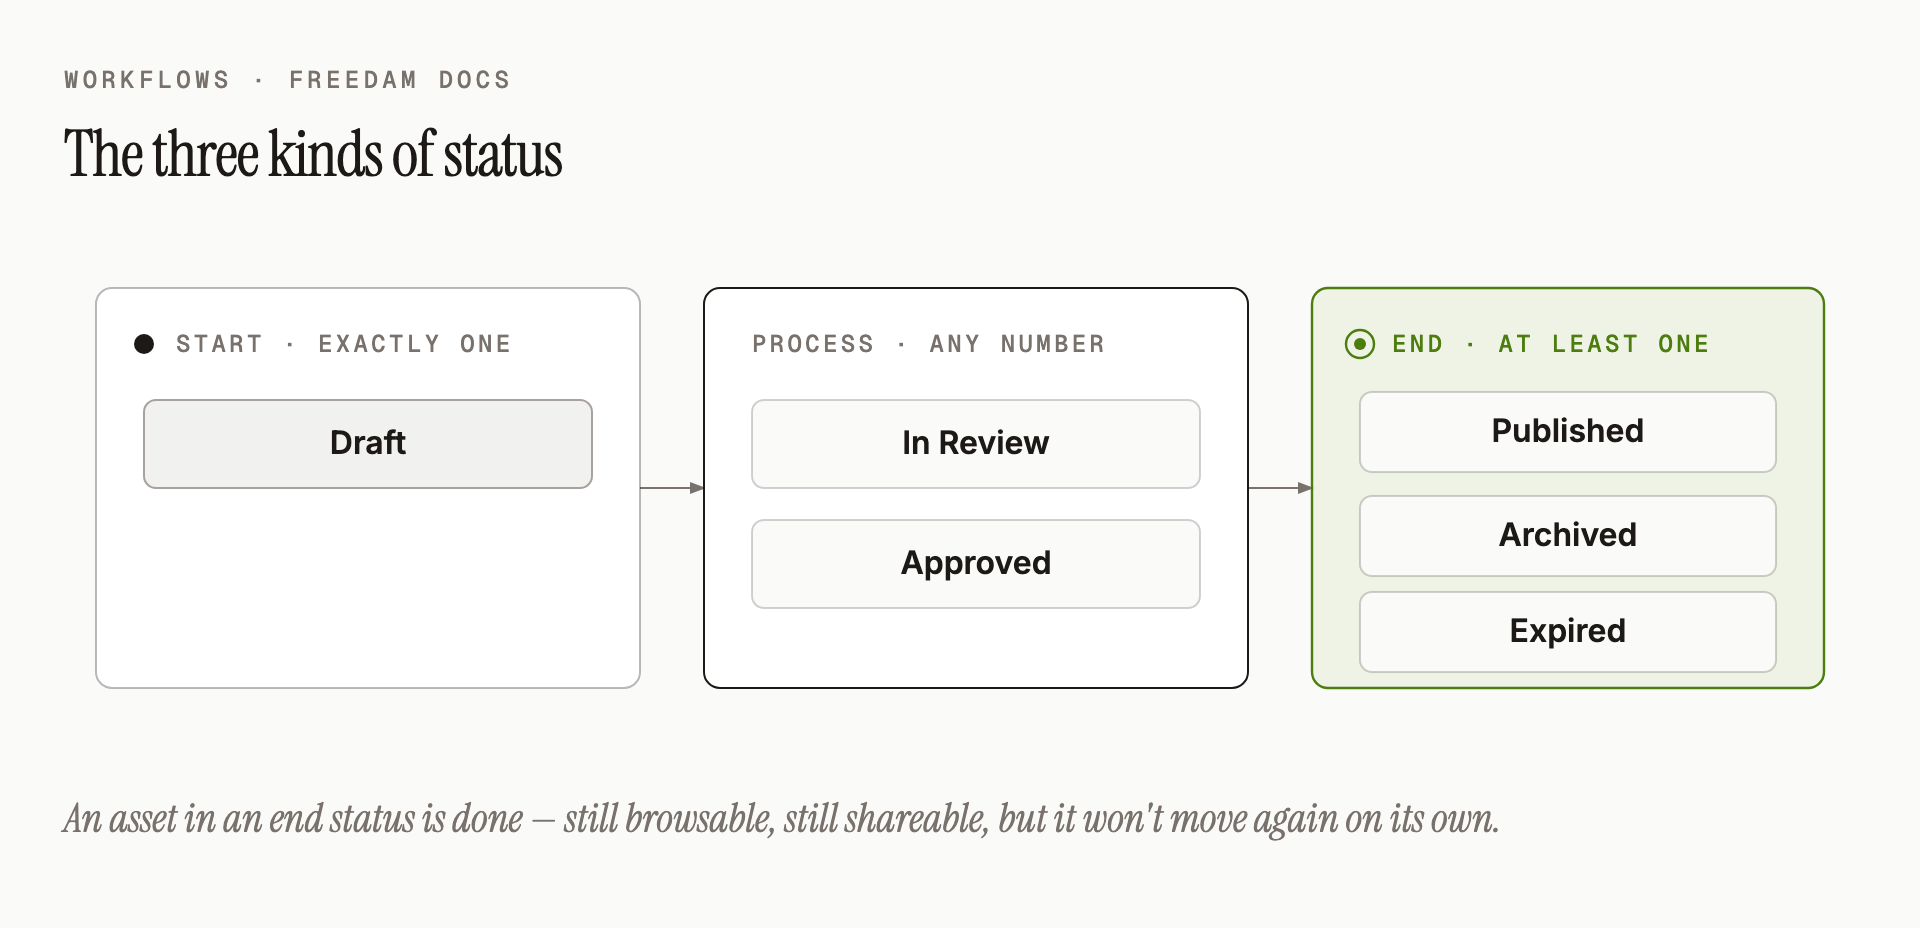
- Start - where every asset begins. A workflow has exactly one start status, usually Draft.
- Process - any number of intermediate steps. This is where approvals happen, where assets sit while they're live, where time-limited content sits before it expires.
- End - where the journey ends. A workflow has at least one end status. Typical examples: Published, Archived, Expired.
An asset in an end status is "done" - it can still be browsed and shared, but it won't move forward again on its own.
What an Asset's Status Tells You
The status of an asset at any moment answers three questions your team often asks:
- Is it ready to share externally? (Usually Approved or Published, not Draft.)
- Does someone need to act on it? (Usually In Review - but only if you're in the assigned reviewer group.)
- Is it still licensed for use? (Usually not, once it's reached Expired.)
Review Steps
A review step is a status where an asset is paused, waiting for a person or a team to approve or reject it before it can move forward. This is where your team's quality-control happens.
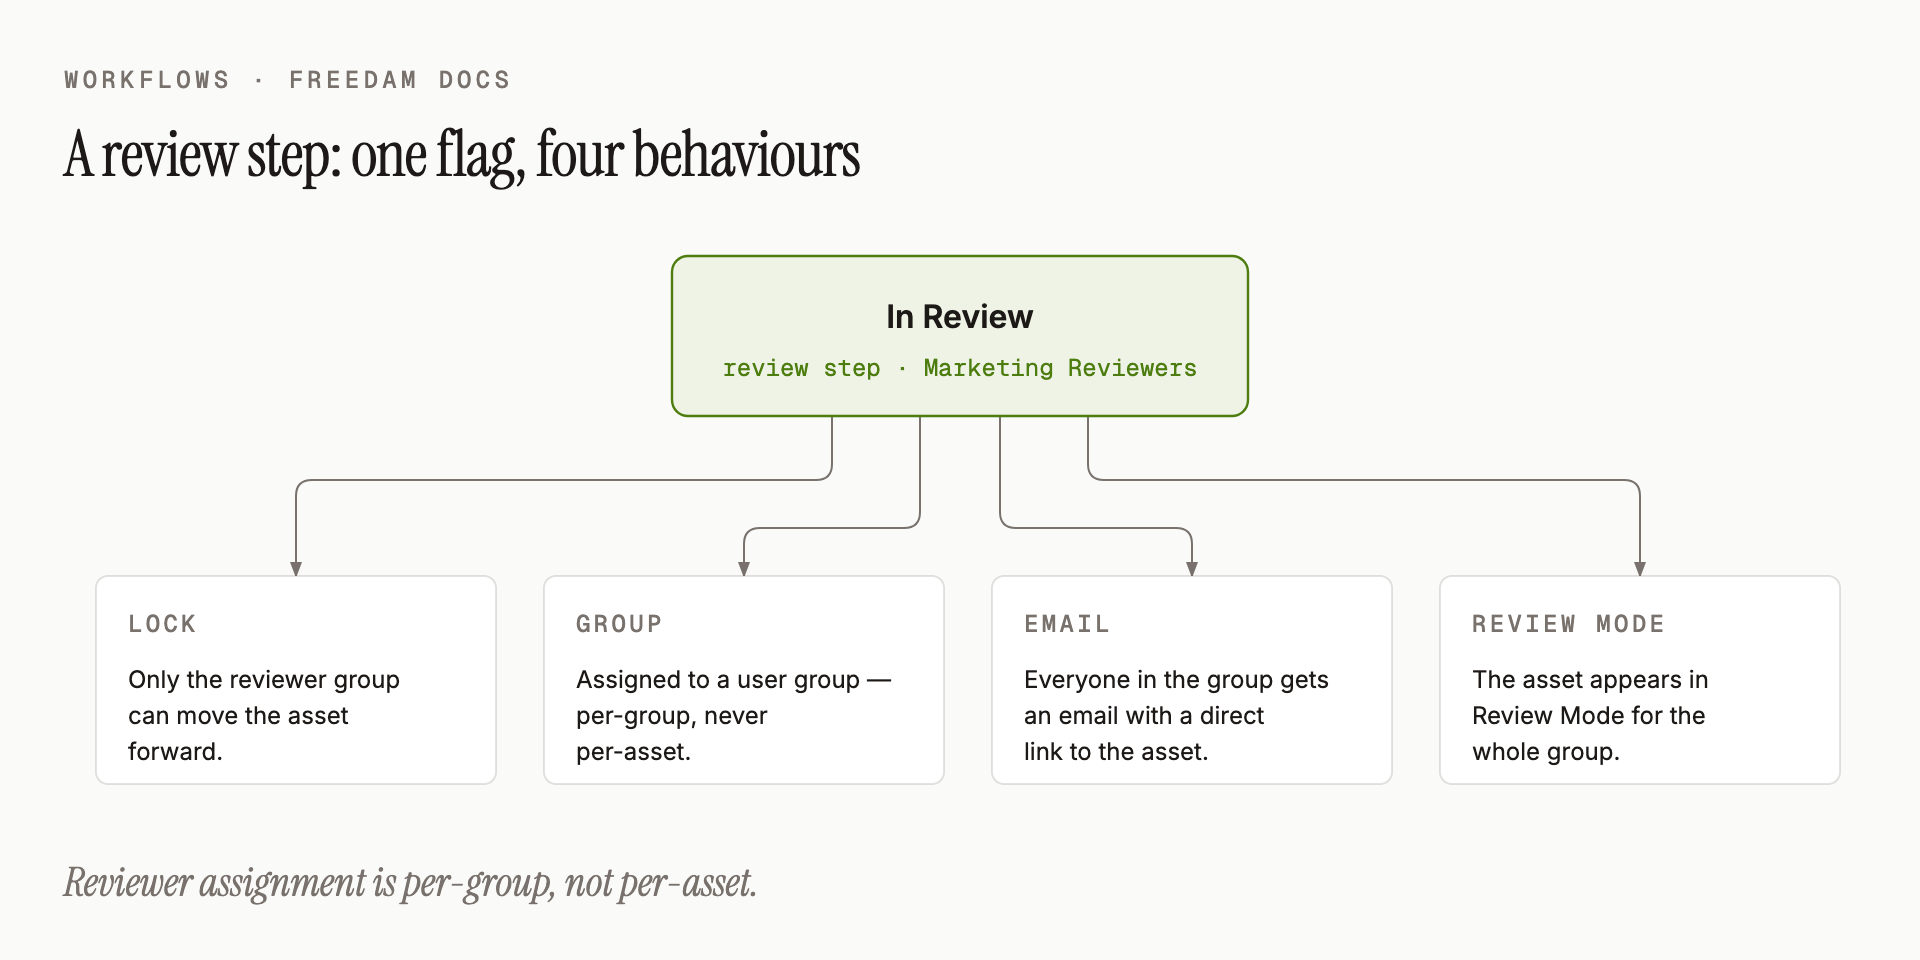
Under the hood, a review step is a normal status with one flag turned on - plus a reviewer group attached. That flag changes four behaviours at once:
- Lock. Only members of the assigned reviewer group can move an asset out of a review step. Anyone else sees the asset but cannot approve it.
- Group assignment. Every review step is assigned to a user group (for example Marketing Reviewers, Legal Reviewers). Reviewer assignment is per-group, not per-asset - there is no "assign Sarah specifically to this asset".
- Email notification. When an asset lands in a review step, every person in the assigned group gets an email with a direct link to it.
- Review Mode visibility. Assets in review steps appear in the Gallery's Review Mode for anyone in the assigned group (see later on this page).
Multiple Review Gates
Your workflow can chain more than one review step in sequence. A common shape:
Draft → Content Review (Marketing) → Legal Review (Legal) → Final Approval → Published
Each gate is independent: Marketing approves, the asset moves to Legal, Legal approves, and so on. There is no built-in "two of three reviewers must agree" logic in a single step - if you need multiple sign-offs, model them as sequential review steps, each with its own group.
The Life of a Review
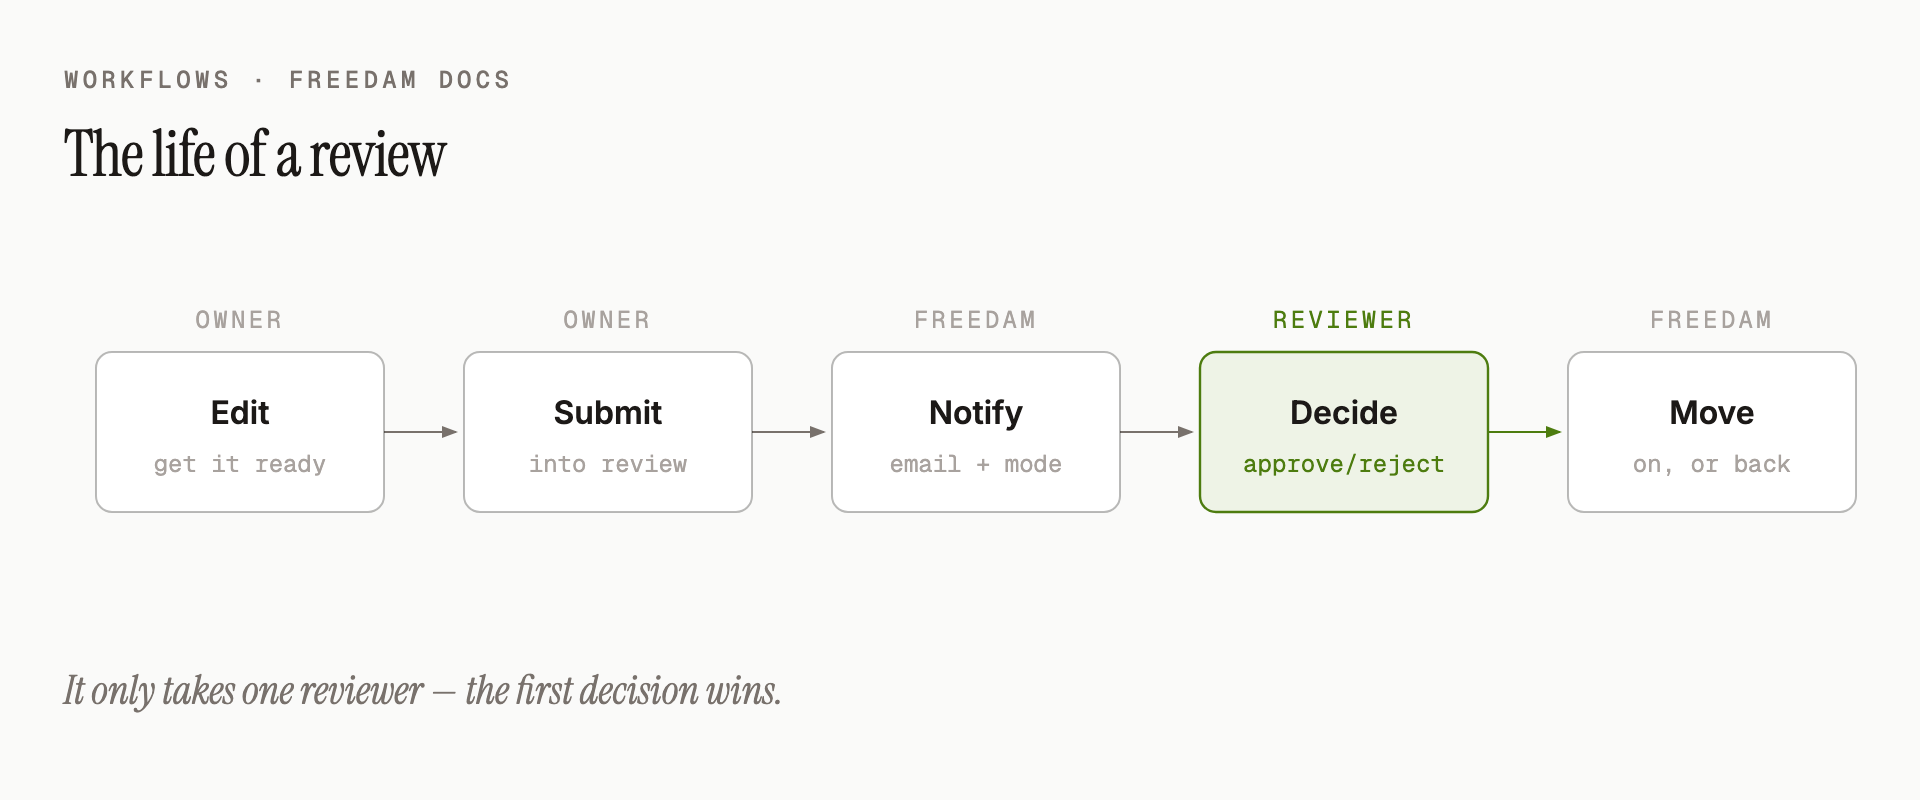
From the moment an owner submits to the moment a reviewer clicks Approve:
- Owner edits the asset. Metadata, file, rights, anything that needs to be ready.
- Owner clicks Submit for review. The asset moves to the review step.
- Reviewer group is notified. Everyone in the group gets an email, and the asset appears in their Review Mode in the Gallery.
- Any reviewer approves or rejects. It only takes one - the first decision wins.
- The asset moves. Approve sends it forward (usually to Approved); Reject typically sends it back to Draft so the owner can edit and resubmit.
What Reviewers See
As a reviewer, you can:
- Click the direct link in the email to jump straight to the asset.
- Or turn on Review Mode in the Gallery to see all assets waiting on your groups at once.
- Click Approve or Reject directly from the asset card, without opening the full asset detail view.
- Optionally leave a reason when rejecting - your reason is kept in the asset's history so the owner knows what to change.
Review Mode in the Gallery
Review Mode is a Gallery filter designed for the people who approve things. It shows only the assets currently waiting on one of your reviewer groups - nothing else.
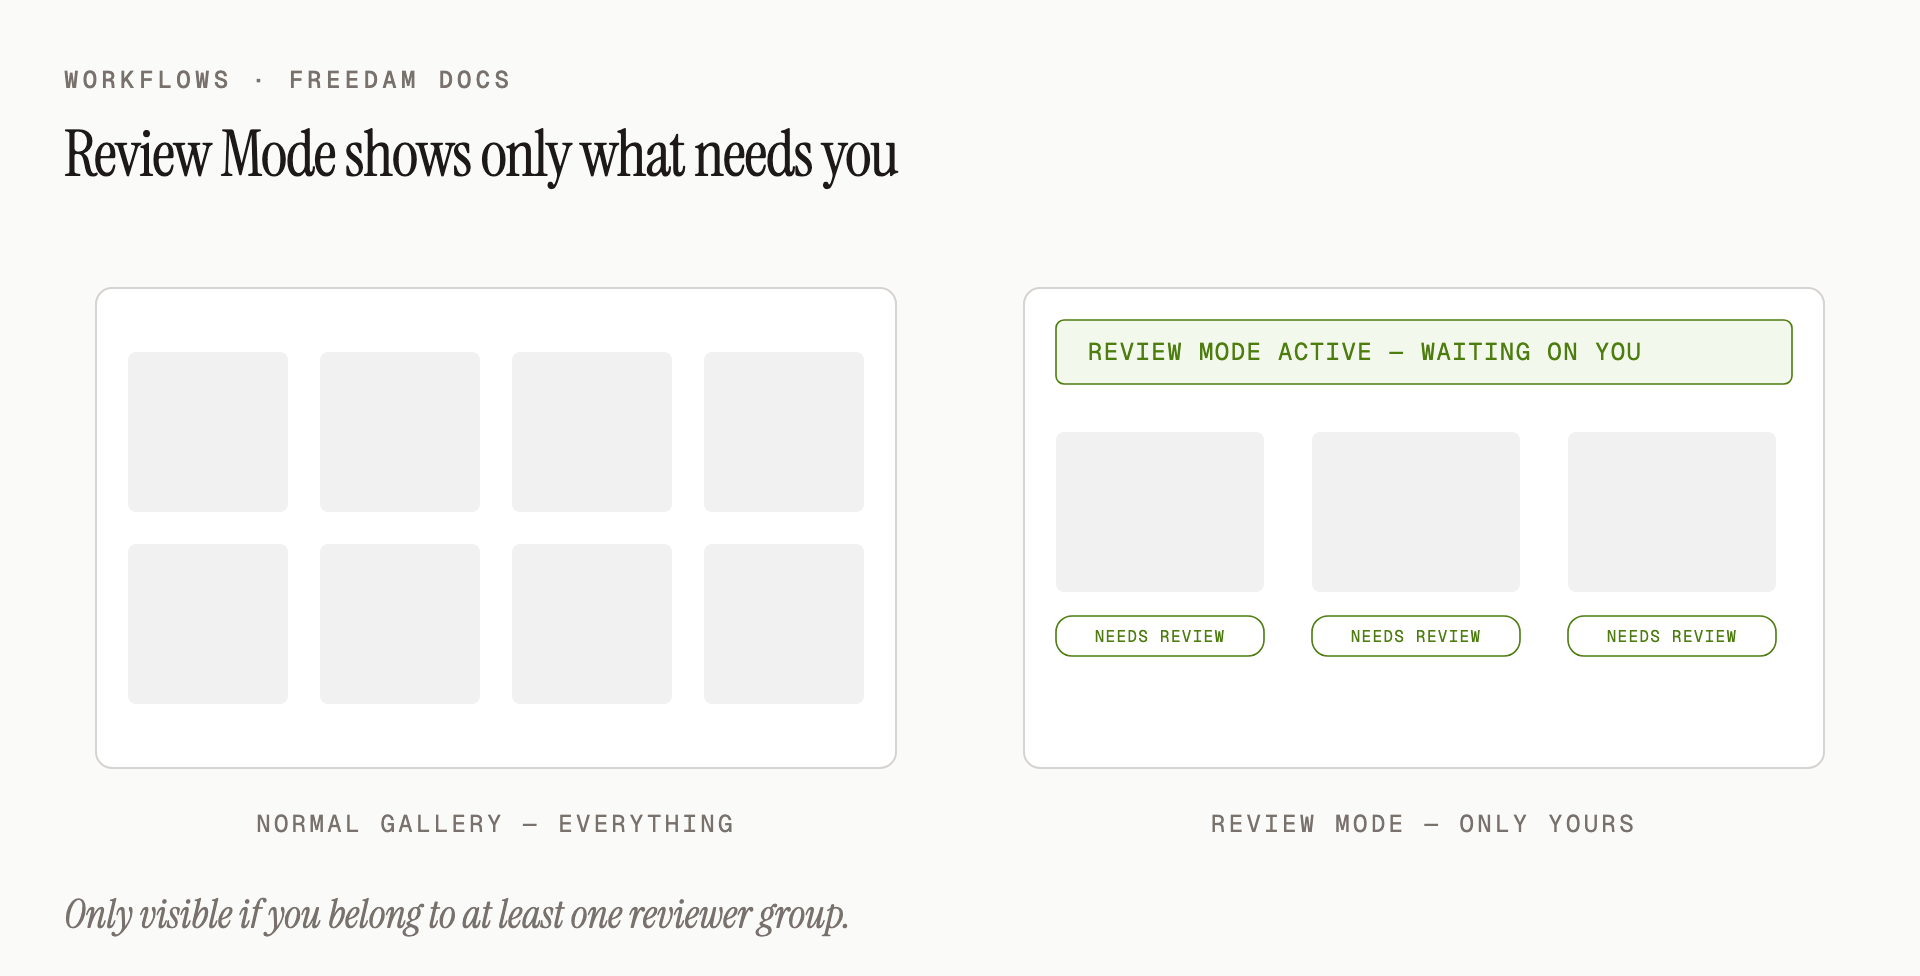
How to Turn It On
Review Mode is available only to users who belong to at least one reviewer group. If that's you:
- Open the Gallery.
- Click the View menu (or use the Review Mode toggle in the top bar).
- Pick Enter Review Mode.
A yellow banner appears across the top of the Gallery - "Review mode active - showing assets waiting for your review" - and the grid re-filters to match.
What Shows Up
Review Mode shows every asset whose current status is a review step assigned to one of your groups. If you're in two reviewer groups (say Marketing and Brand), you see assets from both in one list.
Review Mode does not show:
- Assets in Draft (no reviewer is expected yet).
- Assets you've already approved or rejected (they've moved on).
- Assets in review steps assigned to groups you're not in.
Combining with Filters
Review Mode respects every other filter in the Gallery. A few useful combinations:
- Review Mode + Collection - only assets in the "Spring Campaign" collection waiting for your review.
- Review Mode + Oldest first - tackle the assets that have been waiting longest.
- Review Mode + File type - approve a batch of videos, then a batch of photos.
Exiting Review Mode
Click Exit Review Mode on the yellow banner at any time. The Gallery returns to normal.
Transitions - How Assets Move
A transition is an arrow between two statuses (for example Draft → In Review). Every arrow in your workflow carries some configuration:
- Who can trigger it? Sometimes anyone, sometimes only reviewers, sometimes only administrators, sometimes only the system itself.
- Does it need confirmation? Certain transitions pop up a confirmation dialog before they fire (useful for destructive moves like sending something to Archived).
- Does it require a reason? Rejection transitions typically ask for a short reason that goes into the asset's history.
Manual vs Automatic Transitions
Transitions come in two flavours:
- Manual - a person clicks a button (Submit for review, Approve, Reject, Archive). You see these in the asset's status picker and on its action bar.
- Automatic - the system runs them without anyone clicking. These are used for things like expiry.
Automatic Transitions in Practice
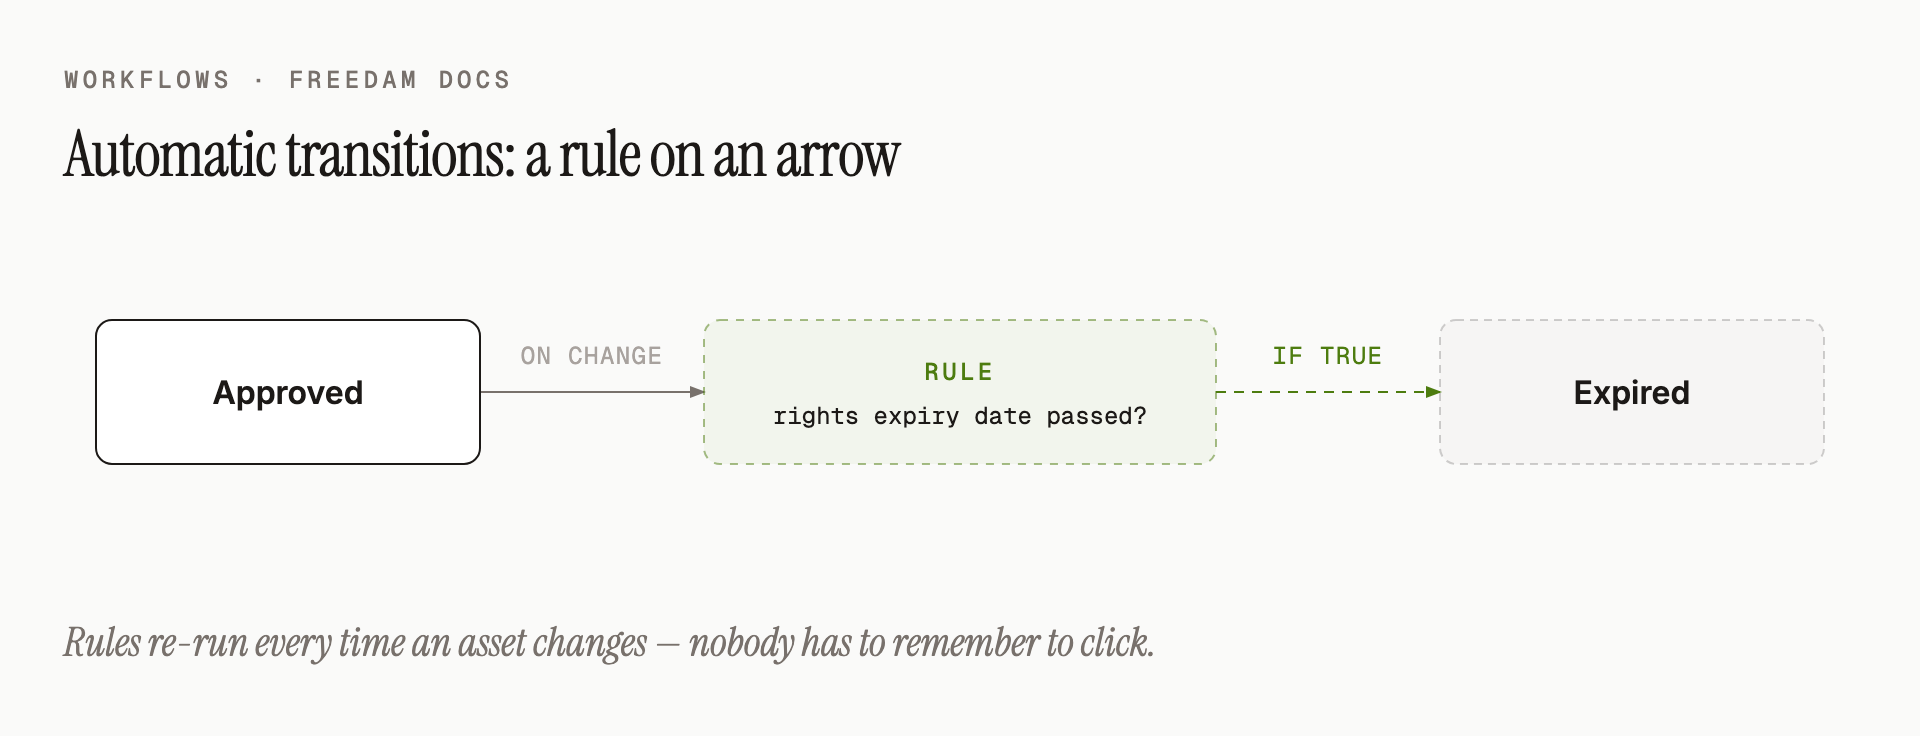
An automatic transition is an arrow between two statuses with a rule attached. The rule is a question - "has the rights policy expired yet?", "does this asset have more than two approval tags?" - and every time an asset changes, Freedam evaluates the rules that apply to its current status.
If a rule matches, the transition fires and the asset moves. No reminder is sent, no one has to remember to click anything. The rule simply runs in the background.
Common automatic transitions:
- Approved → Expired, when the rights policy on the asset has passed its expiry date.
- Draft → In Review, when a metadata field becomes non-empty (some teams use this to submit automatically once a form is complete).
Who Can Do What
Not everyone can move an asset wherever they want. The exact rules depend on how your administrator has configured permissions, but the defaults look like this:
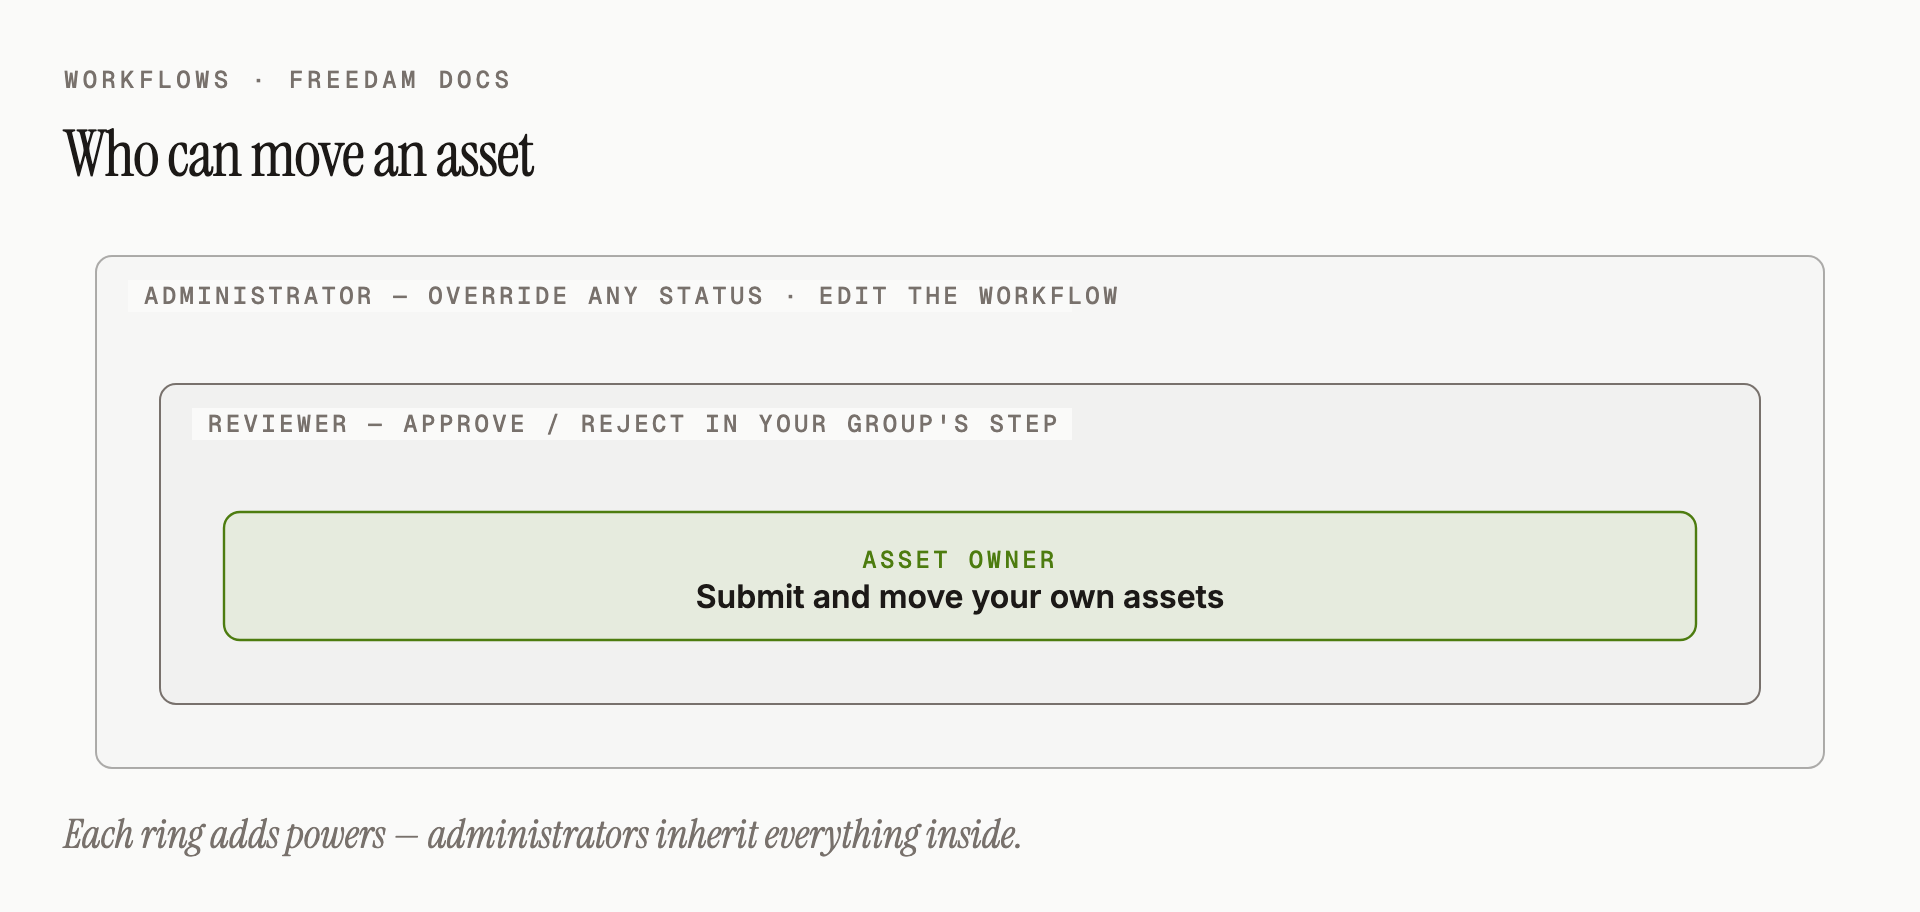
- Asset owner - can submit their own assets for review, and can move an asset along any transition that doesn't require special permission.
- Reviewer (in the assigned group) - can additionally approve or reject assets in their review step.
- Administrator - can force any asset to any status, including system-only statuses like Expired, and can edit the workflow itself.
Bulk Status Changes: Some Move, Some Skip
You can change the status of many assets at once from the Gallery's bulk actions bar. Two things to know:
- Freedam checks each asset individually. If you select 50 assets and click Approve, each asset is checked on its own. Only the ones whose current status allows that move will actually advance.
- Skips are silent. There's no error dialog listing what didn't move. Assets that couldn't advance are just left alone.
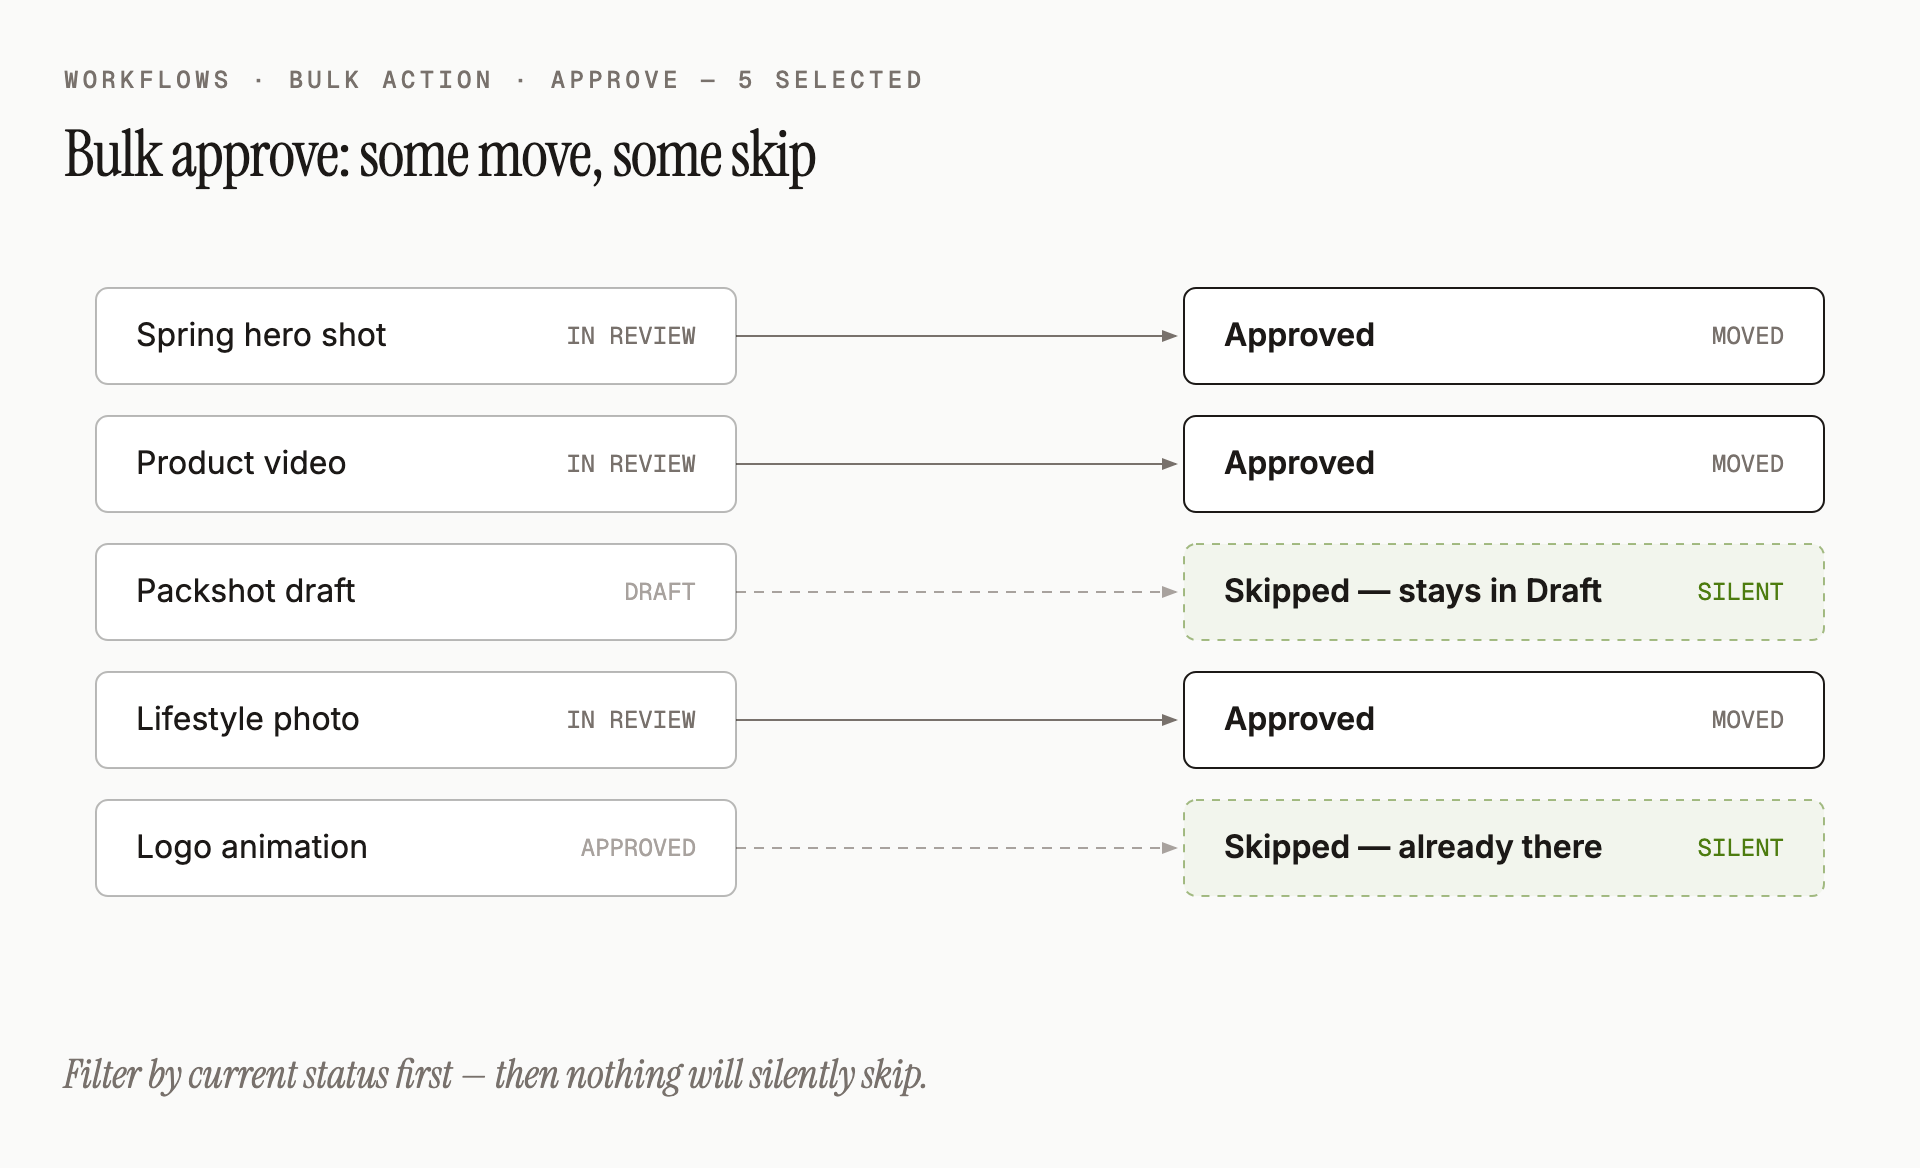
The safest way to use a bulk status change is to filter the Gallery by current status first. If you filter to In Review, then pick the assets, then click Approve, every selected asset will move. Nothing will silently skip.
Expiry
Some assets have a lifespan. A model photo is licensed until a specific date. A product shot is only valid for one season. A limited-time campaign is published, then archived.
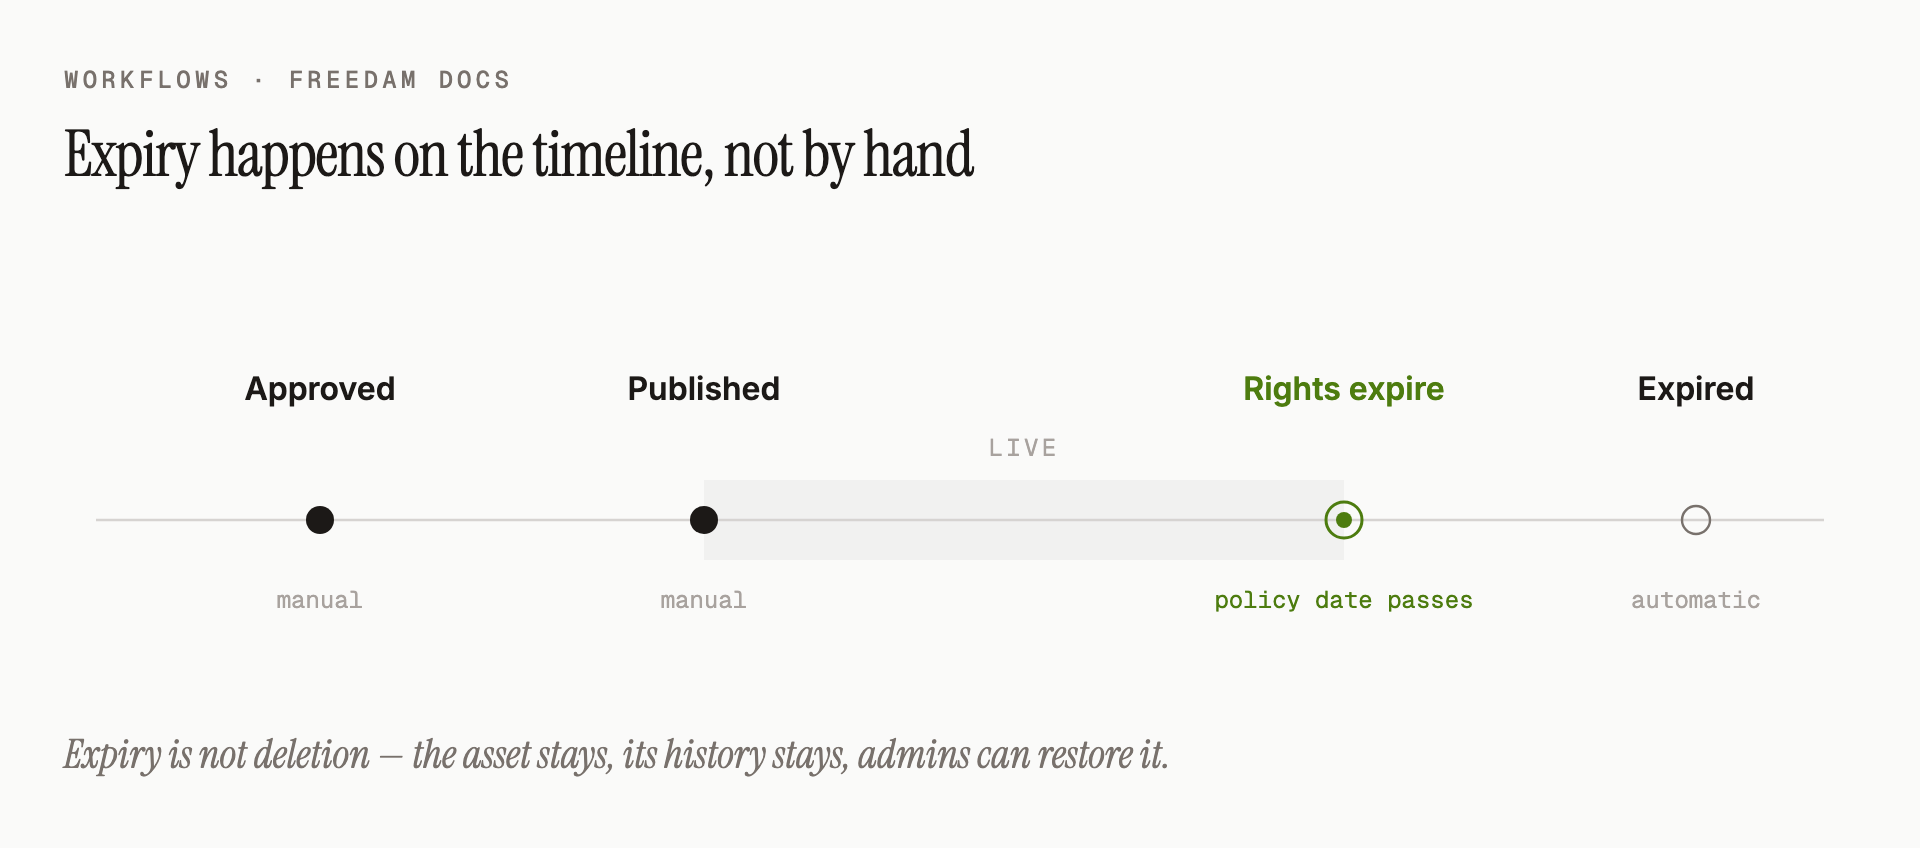
Freedam handles this through expiry transitions - automatic moves into an Expired (or similarly-named) status when a condition is met.
How Expiry Works
- Your administrator attaches an expiry rule to a transition that points into an Expired end status.
- The rule typically checks the rights policy on the asset. For example: "If the rights policy's expiry date is in the past, move this asset to Expired."
- When an asset changes (any update), Freedam re-evaluates the rule. If the condition now matches, the asset moves automatically.
What Expiry Does
When an asset enters Expired:
- Its status badge changes in the Gallery (often a red or amber colour).
- Depending on your organisation's access rules, it may stop being downloadable or shareable.
- It remains in the library - expiry is not deletion. You can still see its history, still restore it manually if needed, and administrators can override the status if a licence is renewed.
A Tip for Campaigns
If the contents of a share must stay the same even after rights change (for example, for a campaign retrospective), download the assets as a ZIP and share that file instead. A live Freedam share always reflects the current rights - it won't keep showing assets whose licence has expired.
History - Every Move is Remembered
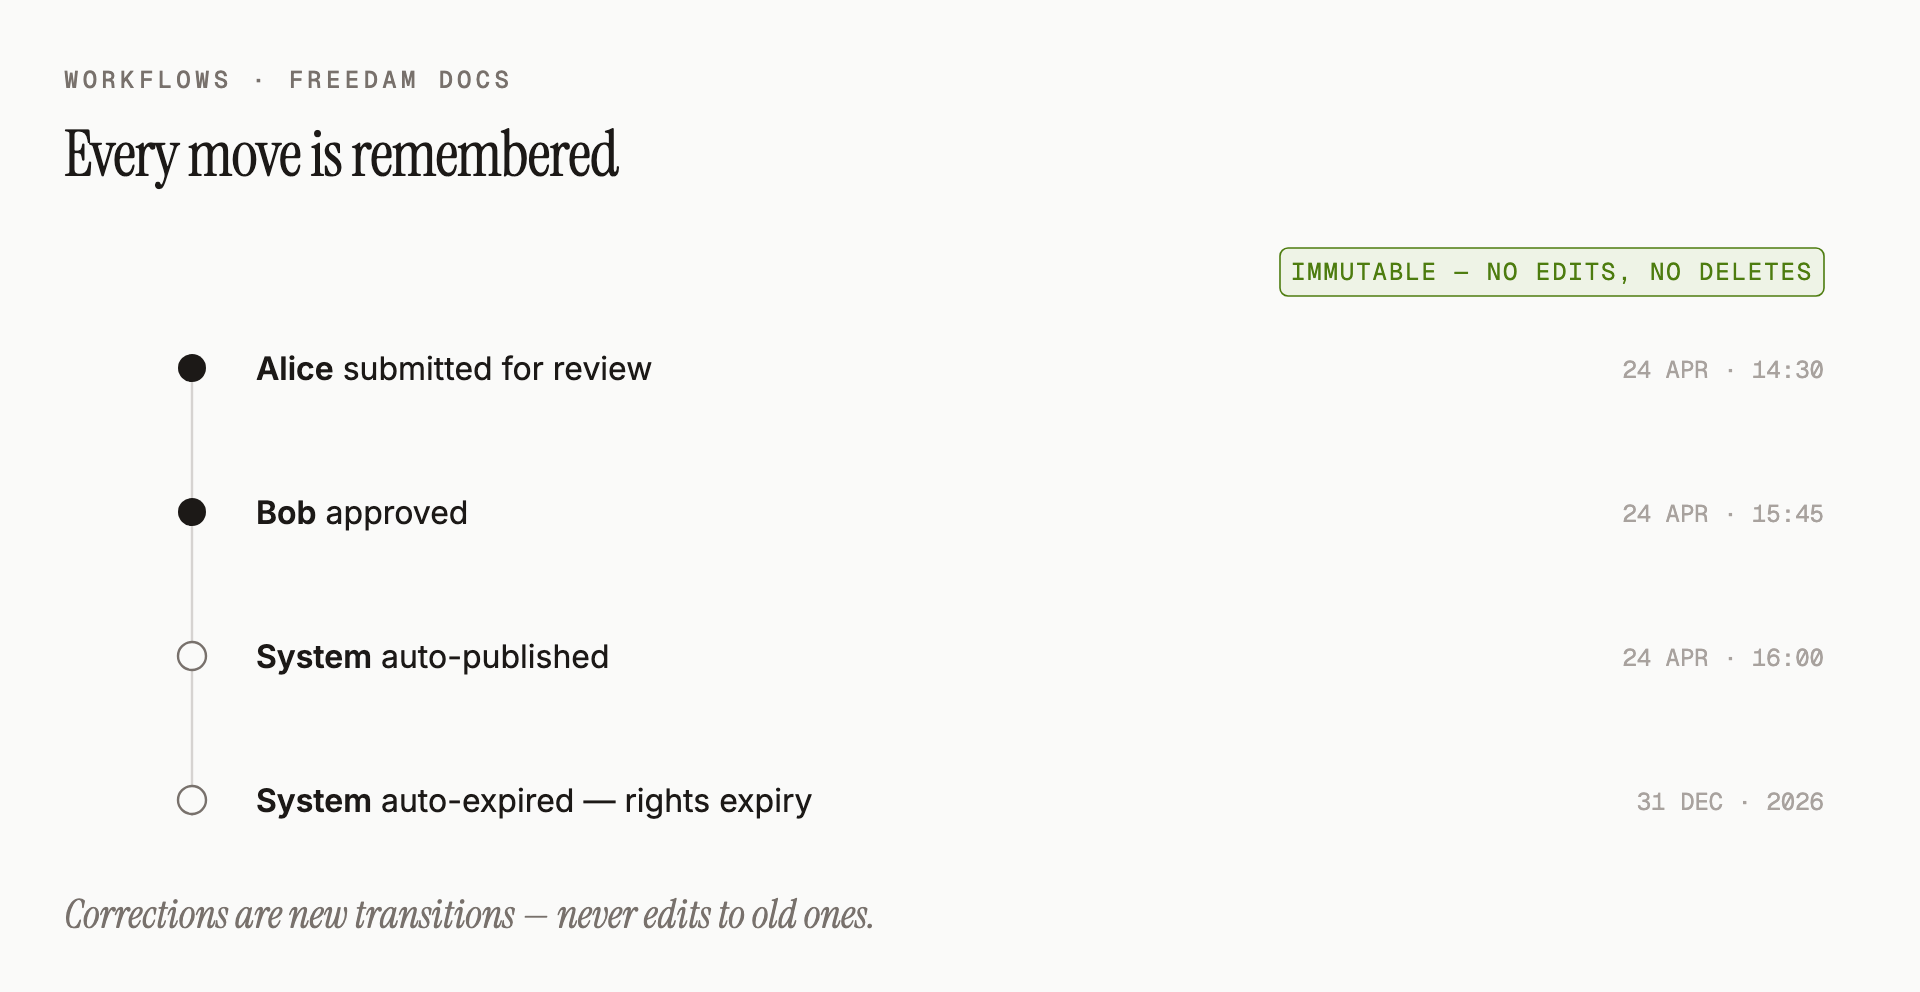
Every time an asset moves - every submission, every approval, every automatic expiry - Freedam keeps a line in the asset's history.
The history is:
- Complete. Every transition, manual or automatic, is recorded - who did it, when, and why.
- Immutable. Nobody - not even an administrator - can edit or delete history entries. Corrections take the form of new transitions, not edits to old ones.
- Always available. Open any asset and scroll to the history timeline. Auditors and managers can reconstruct exactly what happened and when.
Reasons and Comments
When a reviewer rejects an asset, they're typically asked to provide a short reason. That reason becomes part of the history, visible to the owner and anyone with permission to see the asset's timeline.
If a transition was automatic, the history notes which rule fired - so it's clear that the system, not a person, made the move.
Permissions at a Glance
As briefly summarised earlier, Freedam has three kinds of permissions around workflows:
- Submit and move own assets - the baseline, usually granted to all contributors.
- Approve / Reject in a review step - granted by being a member of the assigned reviewer group.
- Override - a special administrator permission that allows forcing an asset into any status, including system-only statuses (like Expired, which normally only the system can reach) and including transitions you are not the reviewer for.
If you're ever unable to perform a transition you expected to, the most common reasons are:
- You're not in the reviewer group assigned to that step.
- The transition is system-only (automatic) and no rule has matched yet.
- The transition requires a confirmation or a reason that you haven't provided.
- Your administrator has disabled that transition on the current workflow.
Admin: Designing and Editing a Workflow
If you're an administrator, you build and tune workflows from Admin → Workflows. See the Workflows admin page for the full reference. A few principles to keep in mind when designing:
- Start simple. A Draft → In Review → Approved → Published chain covers most needs.
- One start, at least one end. Every workflow must have exactly one start status and at least one end status, and every status must be reachable from the start.
- Reviewer groups are reusable. You can assign the same group (e.g. Marketing Reviewers) to multiple review steps across multiple workflows.
- Don't delete reviewer groups that are in use. Assets currently in a review step assigned to a deleted group will have no reviewers and will get stuck until an administrator reassigns the step.
- Deactivate, don't delete. When a workflow becomes obsolete, set it to inactive. Existing assets keep working under it; new assets can no longer be assigned to it.
Troubleshooting
I can't find the Approve button on an asset
- Check that you're actually in the reviewer group assigned to that step (ask an administrator if you're unsure).
- Confirm the asset is currently in the review step that your group owns. An asset in Draft or Approved won't show an Approve button because there's nothing to approve there.
- Try opening the asset's detail page - some transitions are only visible in the full detail view, not on the Gallery card.
I approved an asset but it didn't move
- The transition may require a confirmation dialog. Look for a follow-up popover or banner asking you to confirm.
- If the transition requires a reason, leaving it blank prevents the move. Add a short reason and try again.
- If neither of those helps, an administrator may have deactivated that transition on the workflow. Check the Workflows admin page or ask an administrator.
An asset expired that I didn't expect to expire
- Look at the asset's Rights policy - an expiry date in the past is the usual trigger.
- Check the asset's history. A line like "System auto-expired after rights expiry" will tell you exactly what ran.
- If the rights date was wrong, an administrator can update it and move the asset back to Approved. The new status will stick as long as the rule no longer matches.
A reviewer left the company and our approvals stopped
- Reviewer assignment is per-group, not per-person, so there should always be other people in the group.
- If the departing reviewer was the only one in the group, ask an administrator to add new members - every asset currently in that review step will become actionable as soon as someone qualifying is added.
"Review Mode" doesn't appear in my Gallery
- Review Mode only appears for users in at least one reviewer group.
- If you should be in a reviewer group but aren't, ask an administrator to add you. It takes effect on your next page load.
Tips and Best Practices
- Design for rejection, not just approval. Make sure the path from a review step back to Draft is clearly labelled ("Send back for edits" is clearer than "Reject") so the owner knows what to do.
- Keep names short and human. In Review, Approved, Published work better on cards and in emails than PENDING_REVIEWER_APPROVAL or LEGAL_SIGNOFF_REQUIRED.
- Use Review Mode daily. Reviewers with hundreds of pending assets often benefit from sorting by Oldest first to tackle the most-waited ones first.
- Use bulk approve sparingly and intentionally. It's powerful, but easy to accidentally skip assets. Filter by current status first.
- Let expiry do the watching for you. If your library has any seasonal or licensed content, set up expiry rules and stop relying on humans to remember dates.
- Audit the audit log. For regulated content, export or screenshot an asset's history before a major release - you'll have proof that sign-off happened.