
Data Sources
Data Sources connect Freedam to an external system and keep it in sync over time. Unlike a one-shot spreadsheet import, a source remembers what it pulled last time and, on every refresh, only downloads what has changed - new files are ingested, updated files get a new version, and files that have disappeared upstream are soft-archived.
This feature is designed for operators who connect Freedam to an upstream DAM, product catalog, or file repository. It requires the admin.sources permission.
Note: Data Sources replace the older Import Wizard (
/imports/*). If you set up imports before this feature launched, ask a developer to help migrate your configuration to the new format.
Page Overview
- Purpose: Configure and monitor long-lived connections to external data systems.
- When to use it: When assets or catalog data live in an upstream system and need to be kept in sync with Freedam on a regular basis.
- Where to find it: Admin → Sources in the left navigation.
- What you can do here:
- Create and manage source connections (WebDAV, S3, Google Drive).
- Configure how files map to collections (folders, catalog, matching, sections, disposition).
- Trigger manual refreshes, sample test runs, or dry-runs.
- Review run history and the plan computed for each refresh.
- Apply or cancel a pending plan that is waiting for operator review.
- Review unmatched files (imported without a catalog match) and re-link, dismiss, or remove them.
- Enable or disable a source without deleting its configuration.
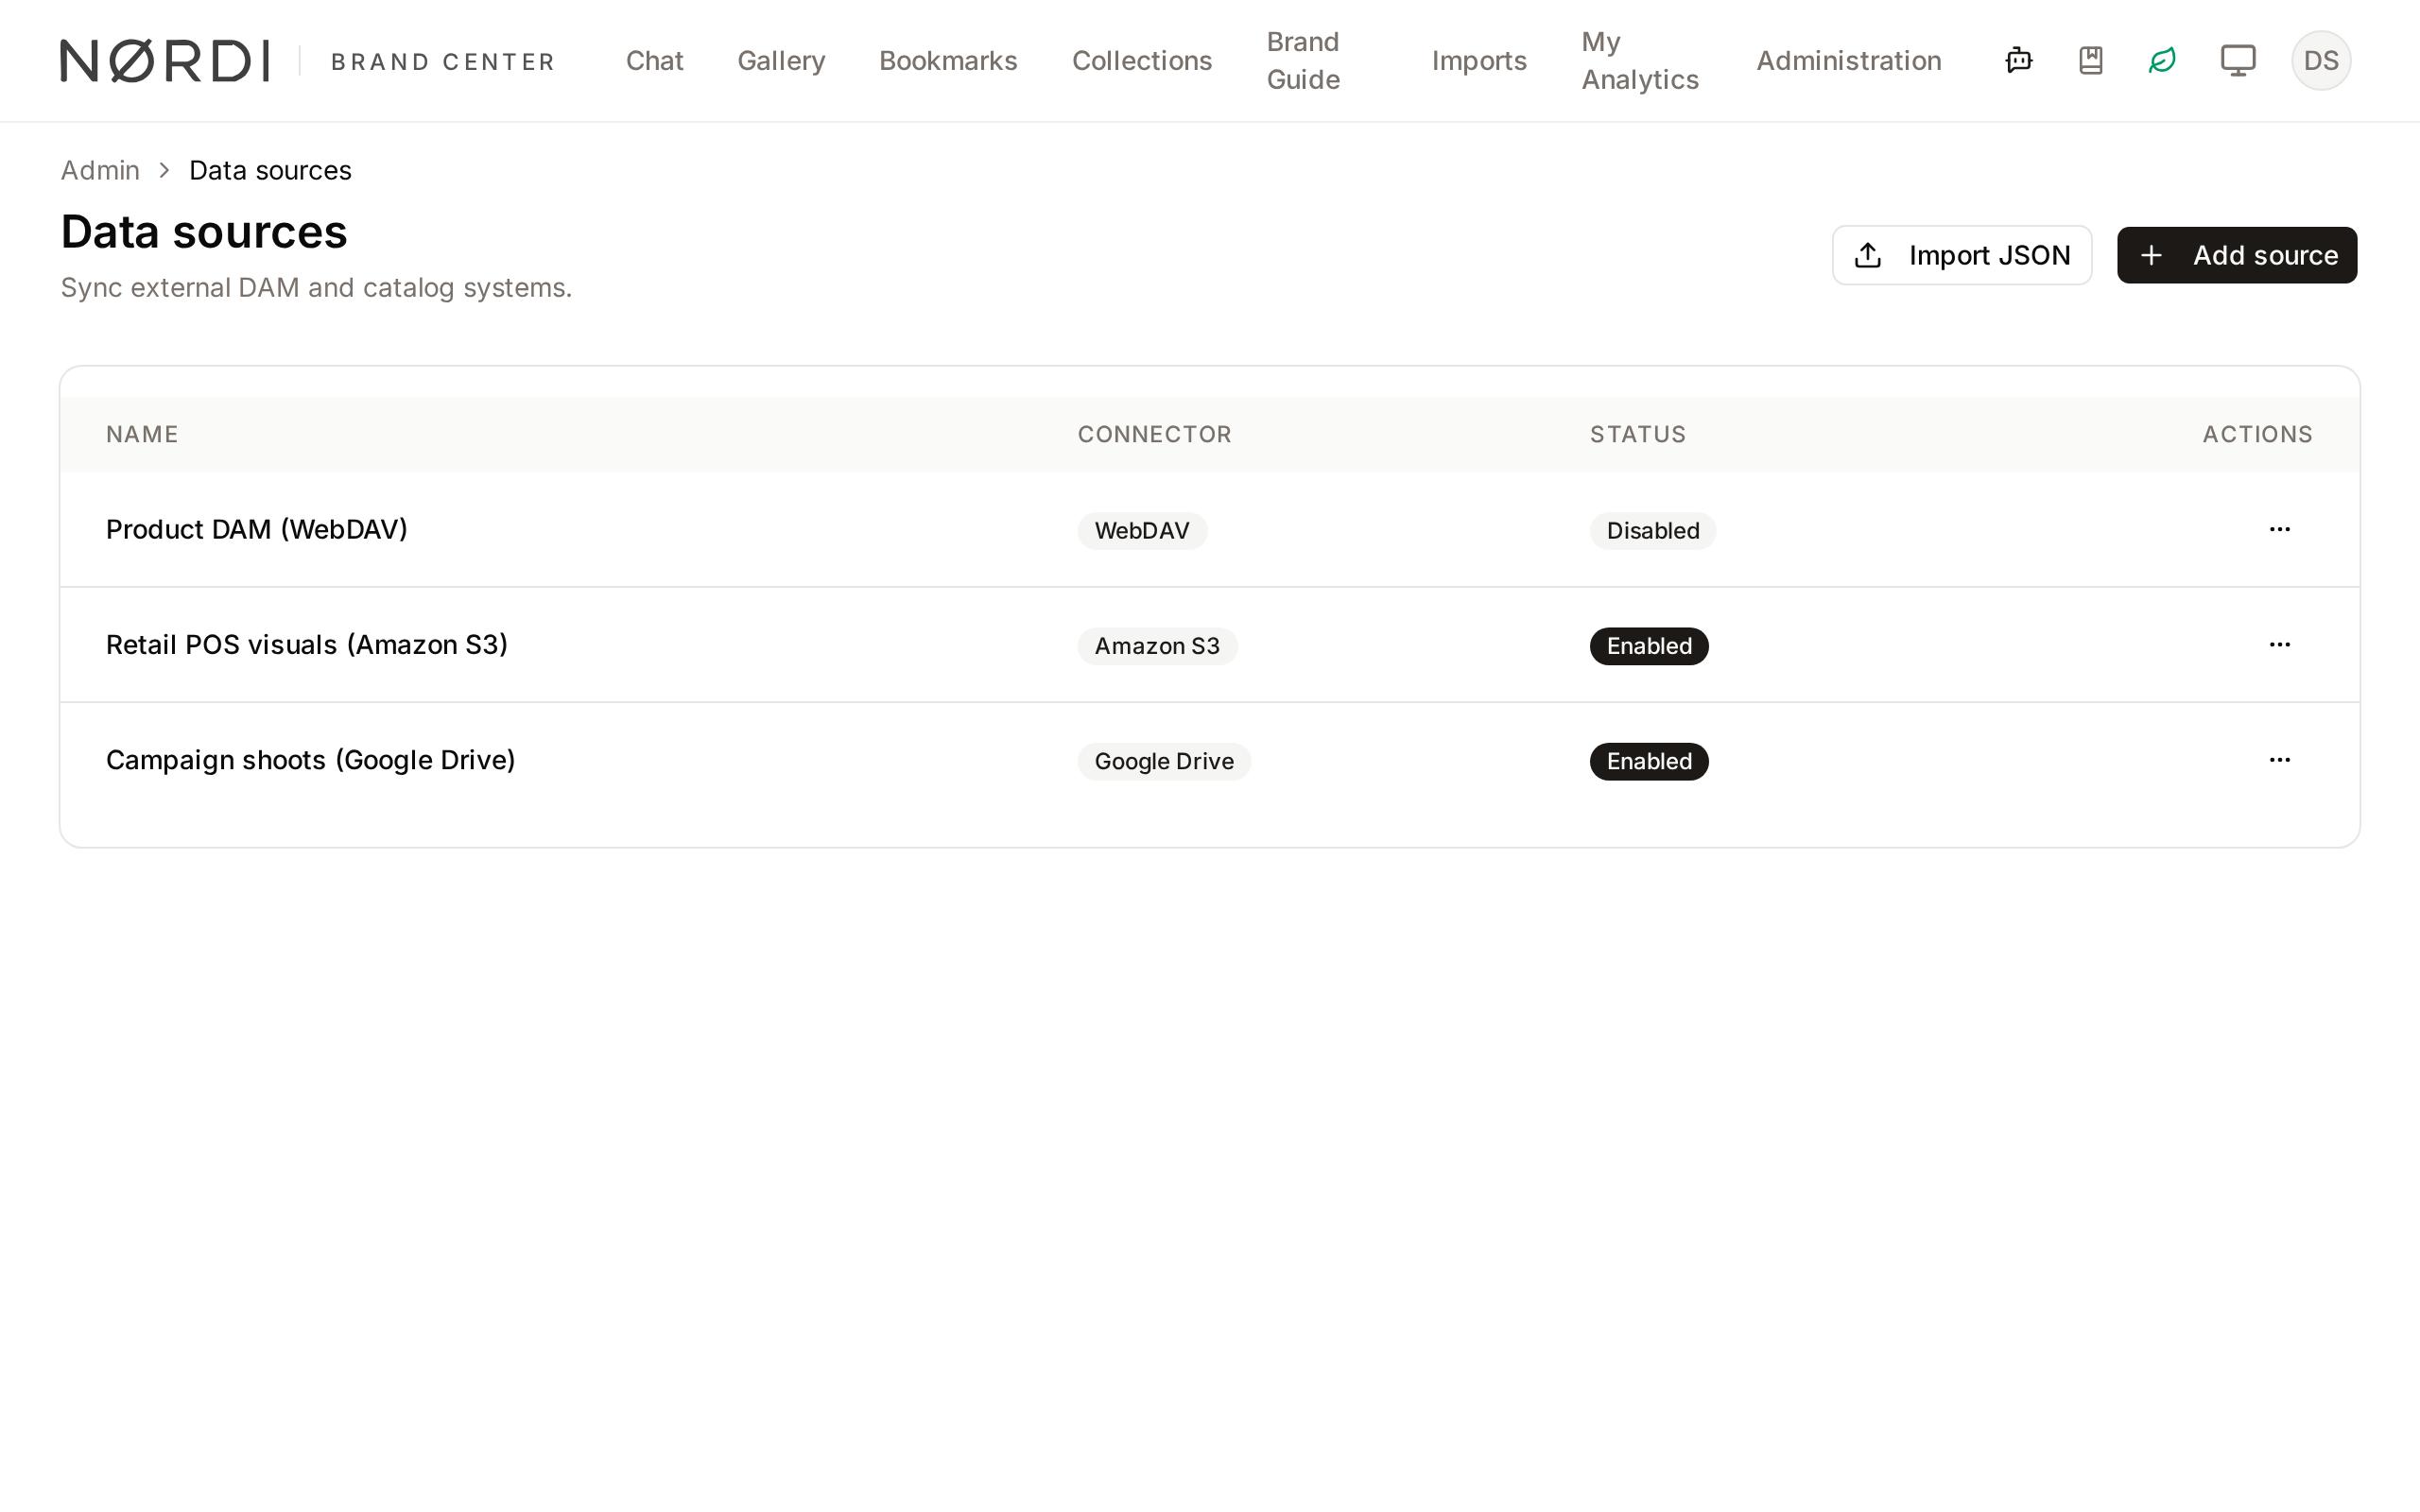
Connectors
Freedam ships three connectors. Choose based on how your upstream system exposes files.
| Connector | Best for | Authentication |
|---|---|---|
| WebDAV | Synology NAS, Perfion DAM exports, ownCloud, SharePoint (WebDAV endpoint), any Apache mod_dav server |
Username + password (Basic or Digest) |
| Amazon S3 | AWS S3 buckets, MinIO, Wasabi, or any S3-compatible object store | AWS access key + secret key |
| Google Drive | Shared drives or specific folders in Google Drive; Google Sheets as catalog source | OAuth access token |
All connectors are read-only. Freedam never writes back to the upstream system.
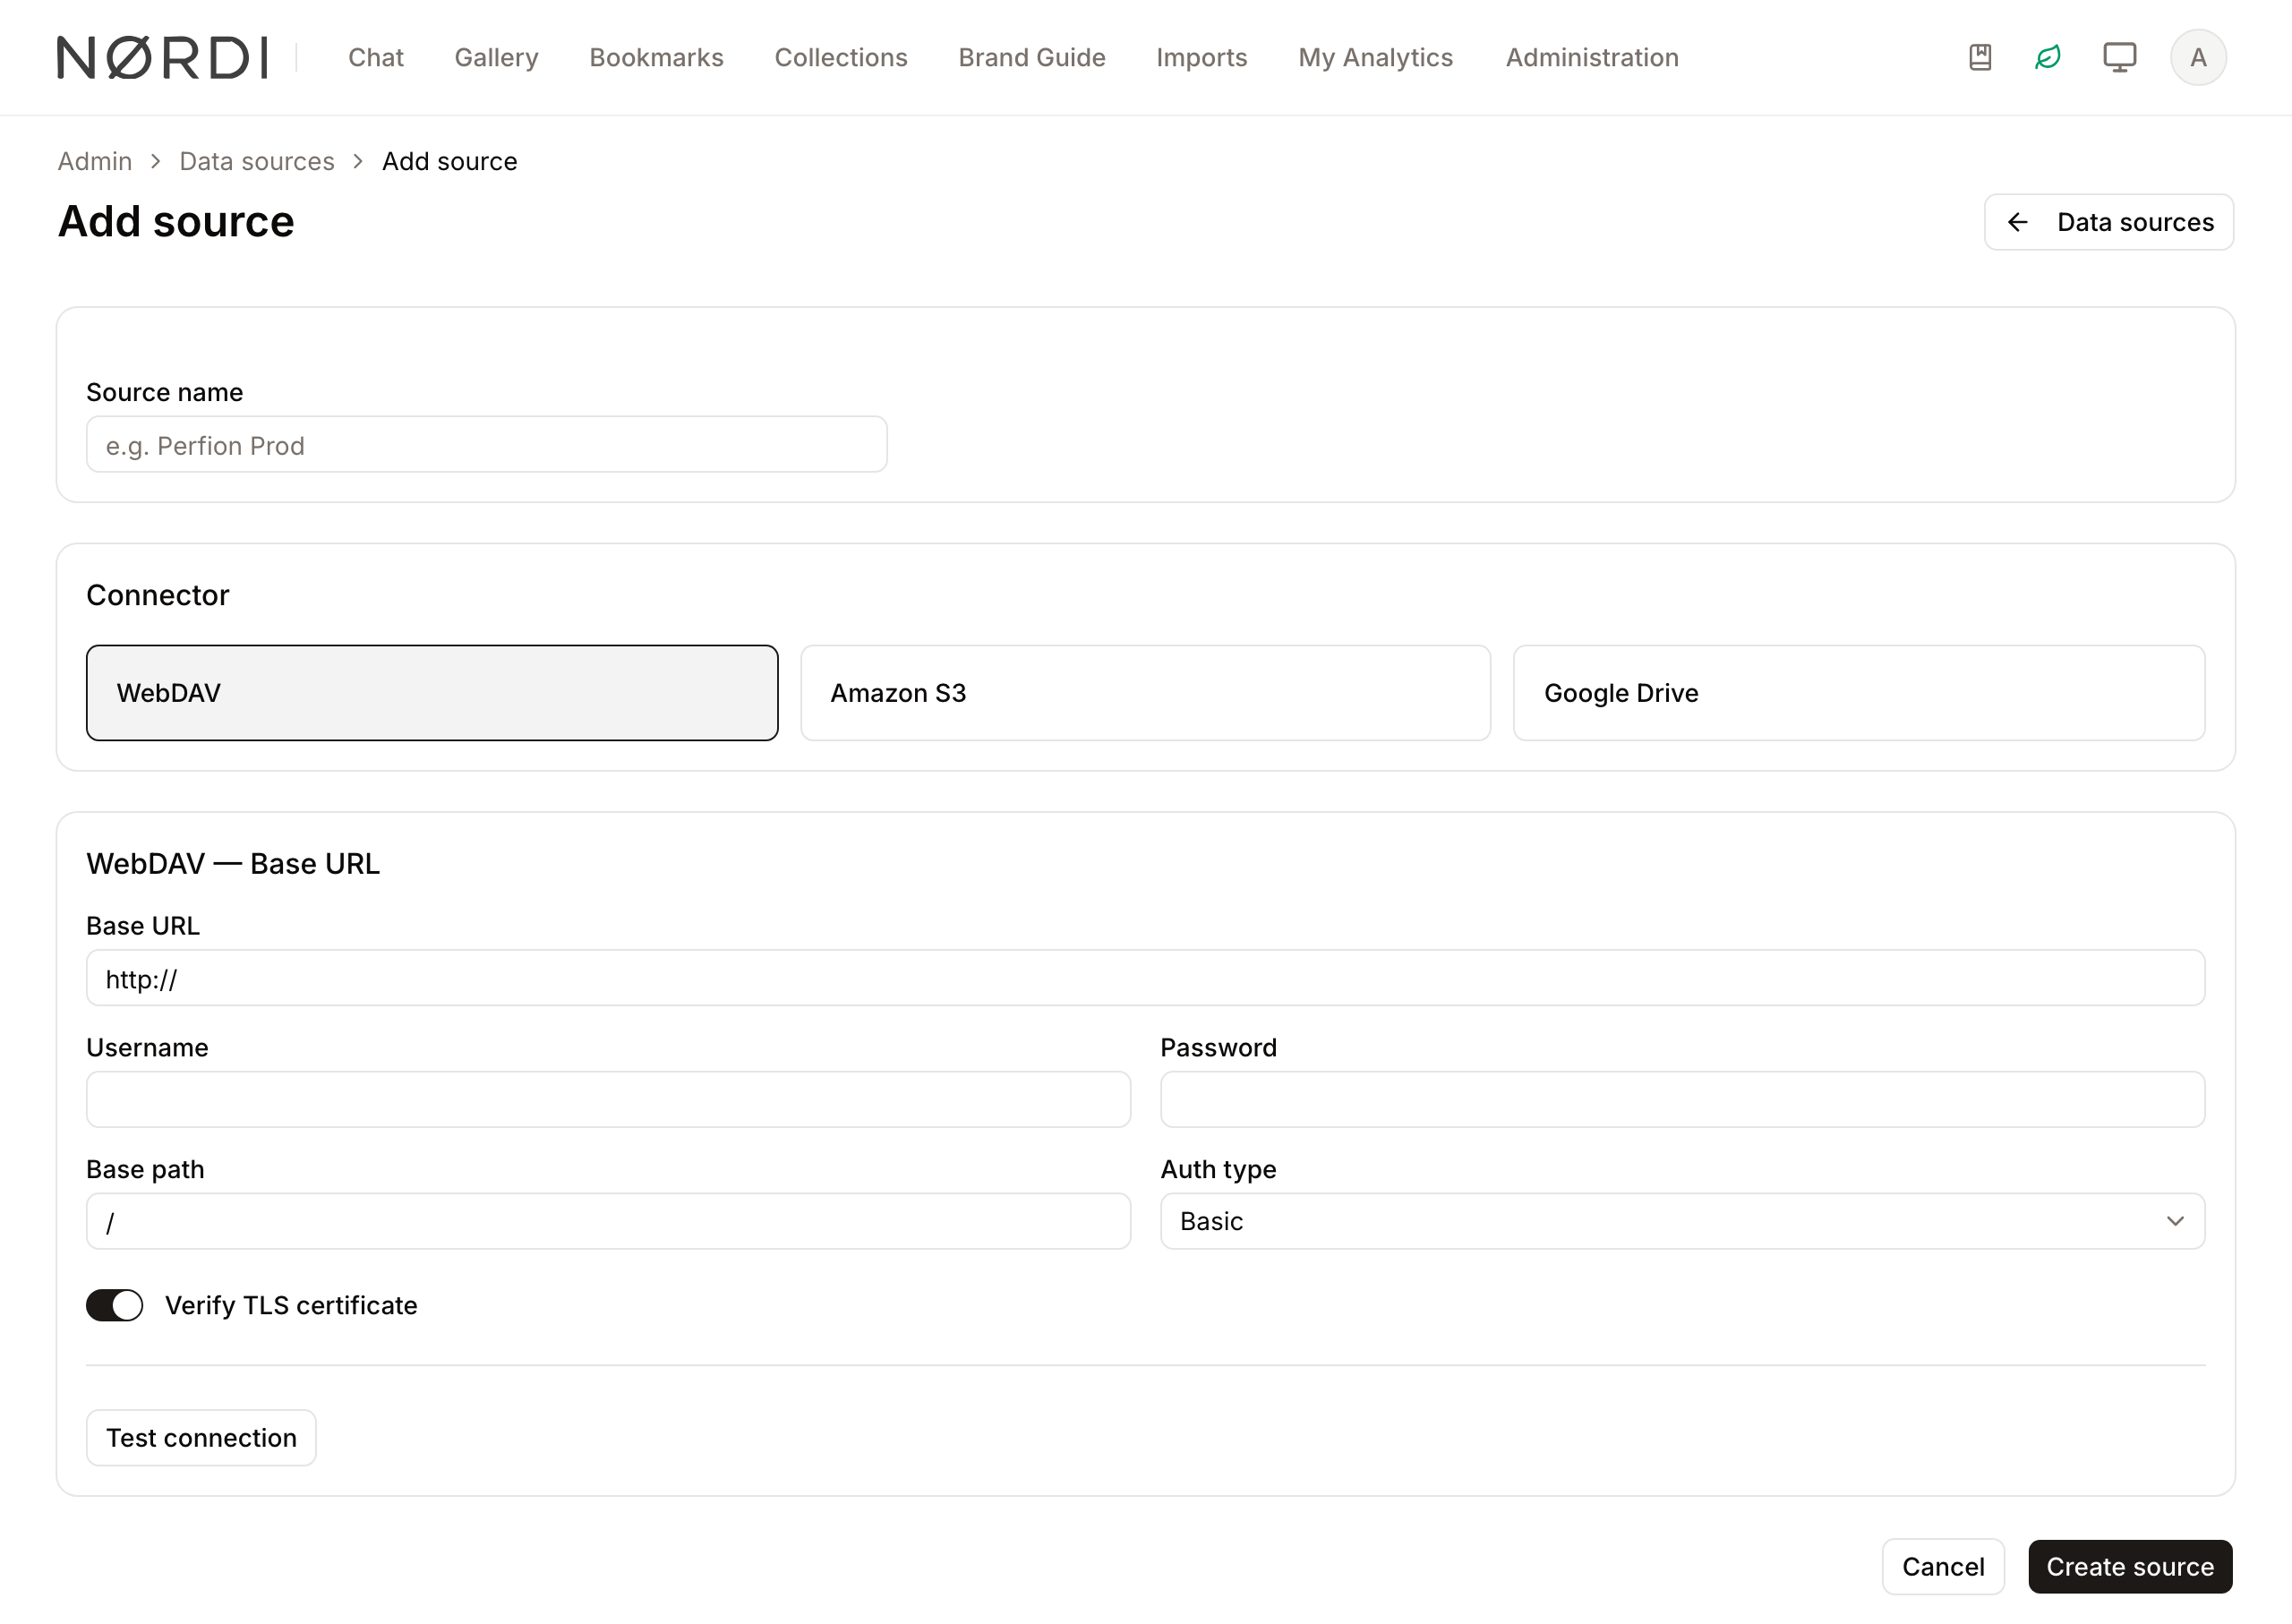
Connecting to WebDAV (Synology / Perfion Example)
This walkthrough uses a Synology NAS running Perfion DAM as the upstream source. The same steps apply to any WebDAV server.
Before you start
You will need:
- The server's base URL, including the port (e.g.
https://myserver.example.com:5006) - A username and password with read access to the files
- The base path on the server that contains your data (e.g.
/Dam)
Synology DSM ships WebDAV over HTTPS on port 5006 by default. Port 443 is often not configured for WebDAV. If your server uses a self-signed certificate, see the TLS note below.
Step 1 - Visit the create page
Go to Admin → Sources and click + Add source.
Step 2 - Name the source and pick the connector
Give the source a descriptive name. For the Perfion example:
Product catalog – production
Select WebDAV as the connector.
Step 3 - Fill in the connection form
| Field | Example value | Notes |
|---|---|---|
| Base URL | https://nas.example.com:5006 |
Include the port. Must be HTTPS in production. |
| Authentication | Basic | Digest is also supported. |
| Username | <your-webdav-username> |
|
| Password | <your-webdav-password> |
Stored encrypted; never logged. |
| Base path | /Dam |
The root folder under which Freedam will look. |
| Verify TLS | ✓ (checked) | Uncheck only if you fully trust the host and it uses a self-signed cert. |
Warning: Unchecking Verify TLS leaves the connection open to interception. Freedam displays a permanent warning banner on the source and a lock icon on every run started while this setting is off. Only use this option on a trusted internal network.
Step 4 - Test the connection
Click Test connection. Freedam sends an OPTIONS request to verify that the server speaks WebDAV, then a PROPFIND to check credentials. A successful probe returns something like:
✓ Connected · DAV 1,2 · Apache
Found 1 catalog file · 4 asset folders

Suggested layout:
  Catalog:  /Dam/Data/Datafields.csv  (5.1 MB · 27 columns)
  Assets:   /Dam/Images  (8 082 files)
            /Dam/Videos  (298 files)
            /Dam/Documents  (371 files)
If the probe fails, see the Troubleshooting section.
Step 5 - Accept or adjust the suggested layout
Click Use this layout to accept what Freedam detected, or Choose manually to configure the catalog file path and asset folder paths yourself.
For a typical Perfion / Synology shape, the auto-detected layout is usually correct.
Step 6 - Create the source
Click Create source. Freedam saves the configuration and opens the source detail page. No data is downloaded yet - the first refresh is triggered separately (see Manual vs scheduled refresh).
After creating the source, open Edit to configure how files map to collections. The Edit page is organised into steps:
- Connection - the connector credentials you just entered (secret fields are blanked; fill them in only to change a credential).
- Folders & catalog - the destination, the asset folders to scan, the optional catalog spreadsheet, and how files are matched and linked.
- Column mapping - map each catalog column to a field, hierarchy level, vocabulary, or metadata key.
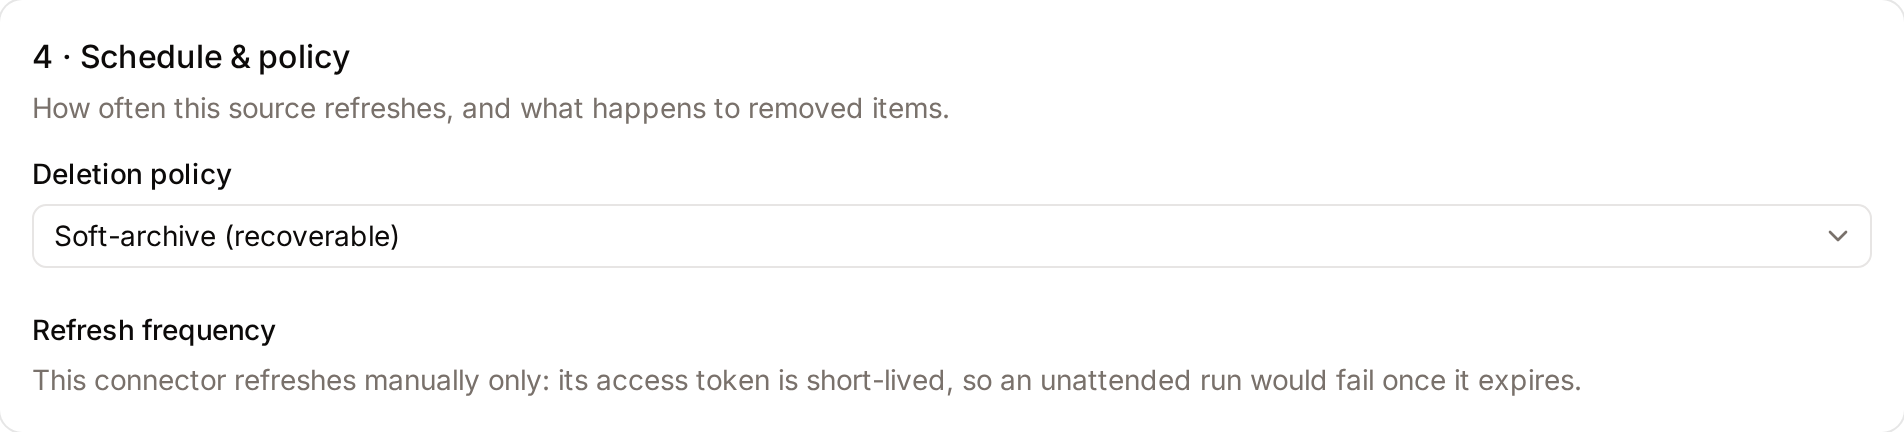
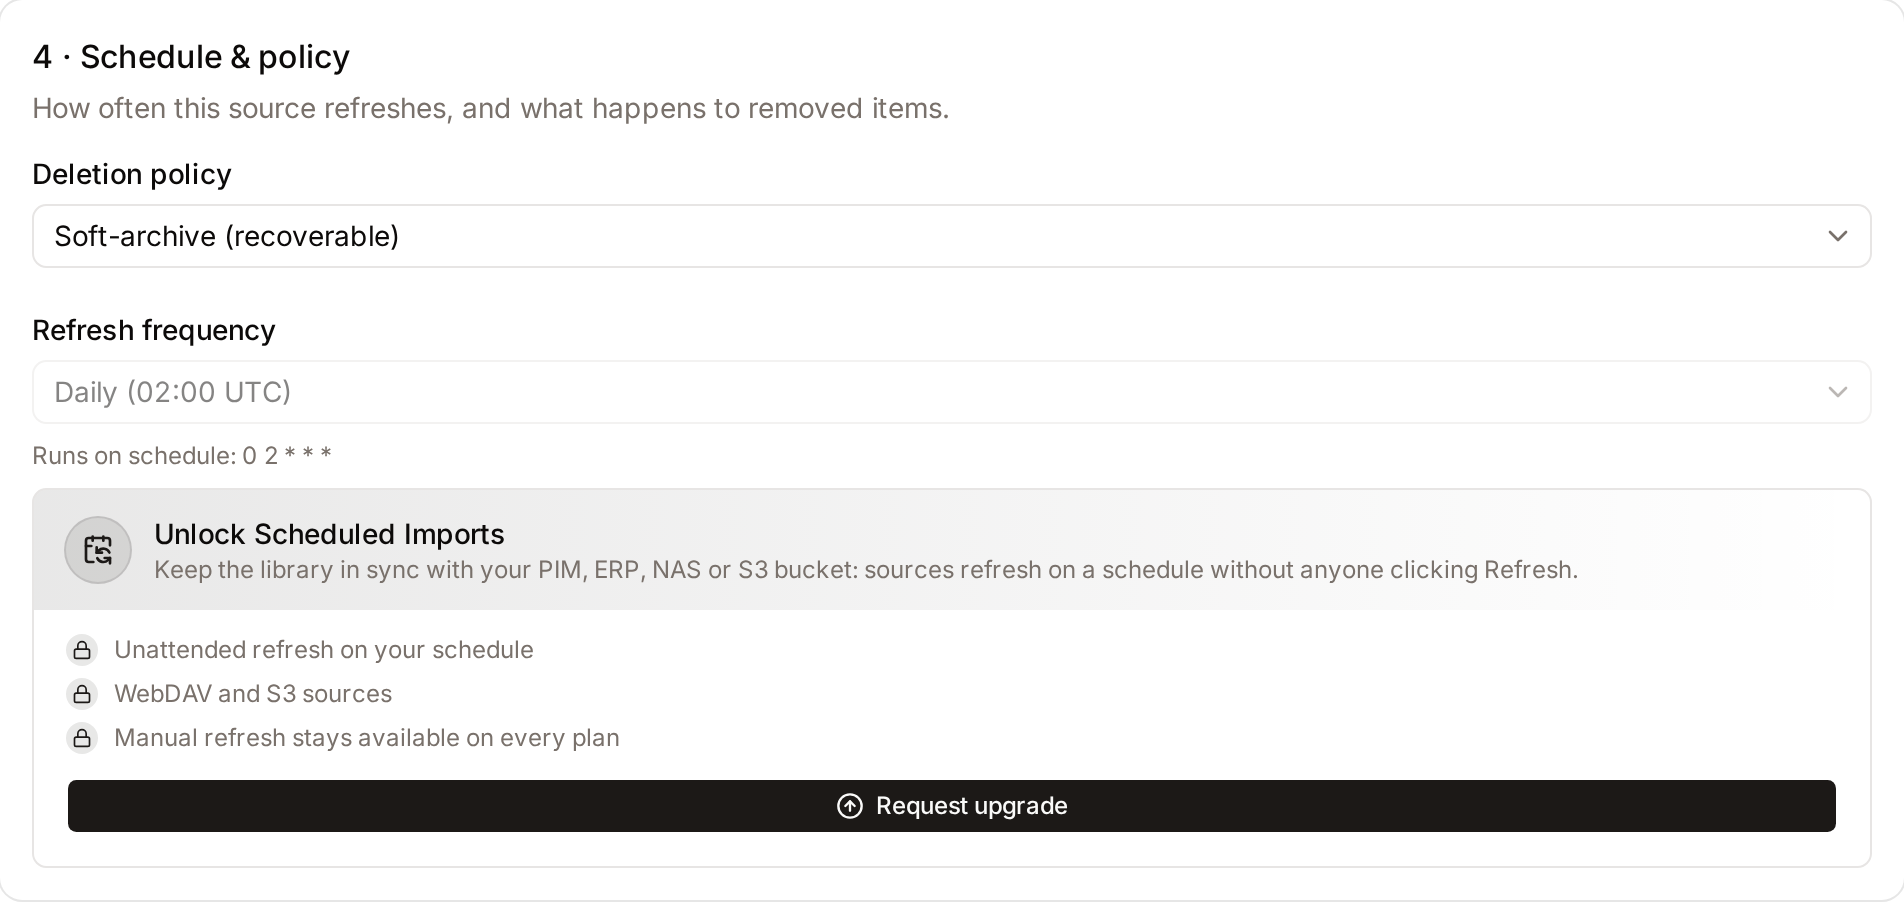
- Schedule & policy - how often the source refreshes (scheduled refresh requires the Business plan) and what happens to removed items.
The next section, Mapping Files to Collections, walks through the Folders & catalog step end to end.
Connecting to S3
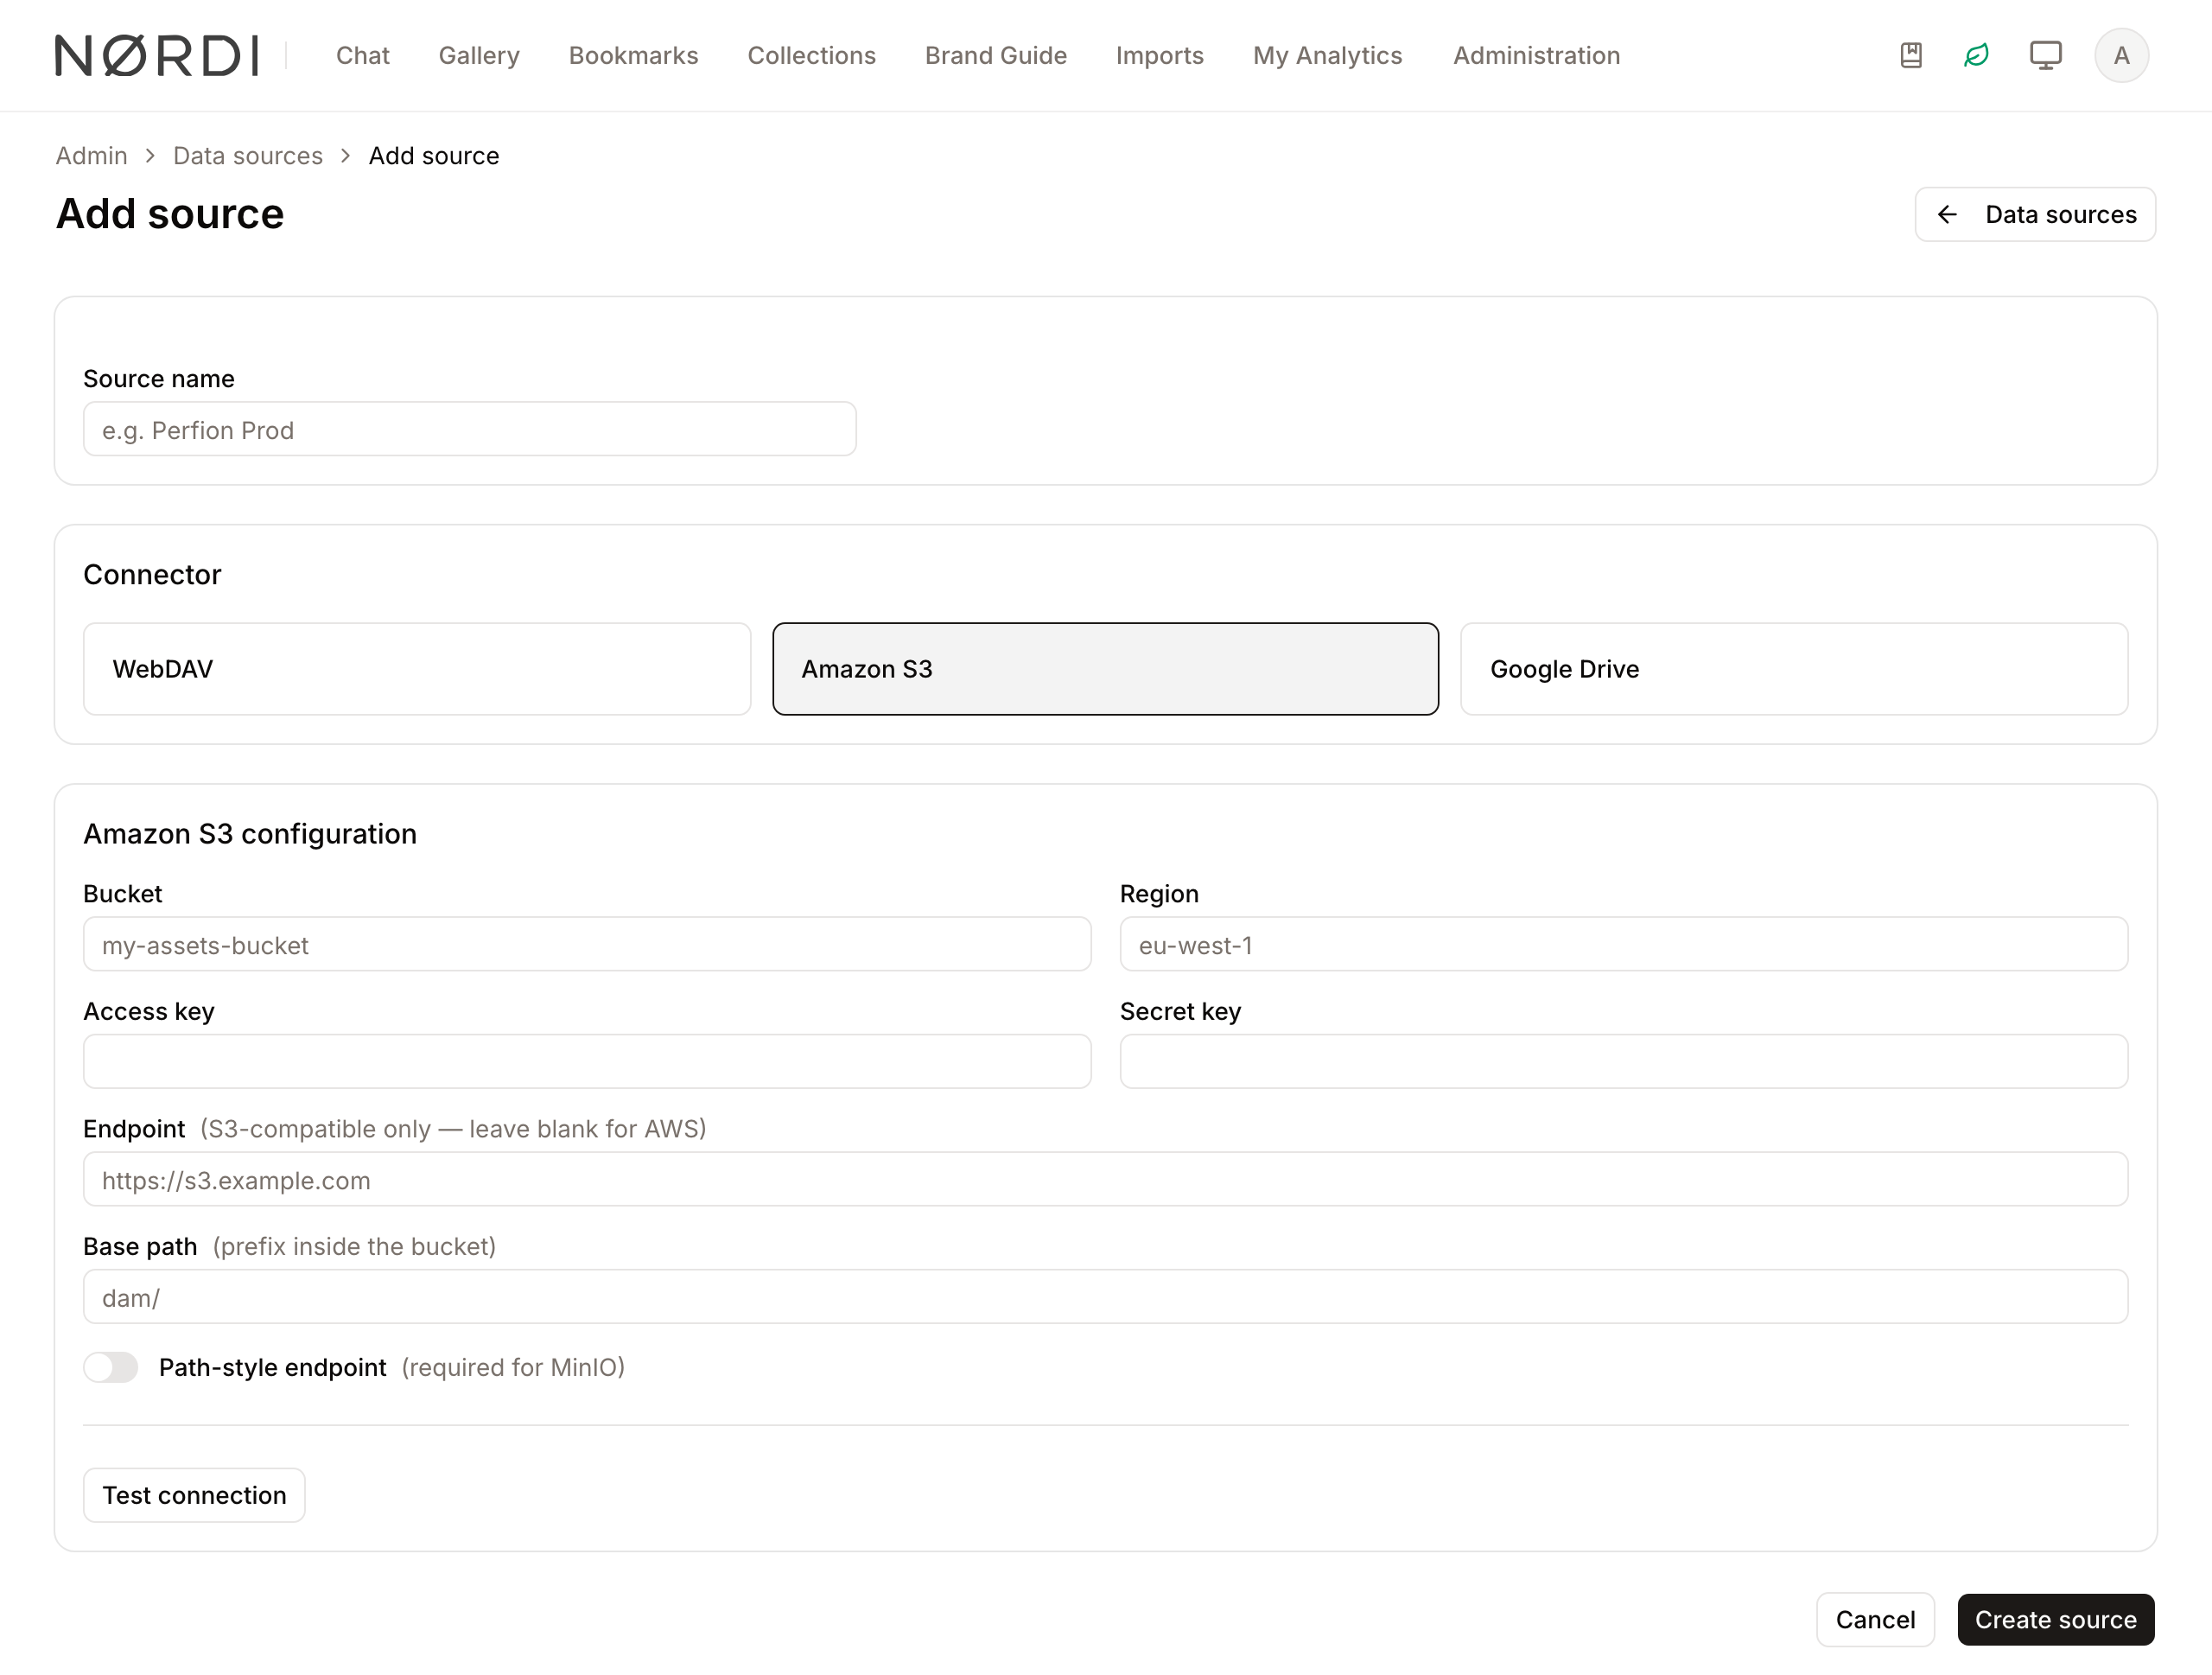
Before you start
You will need an IAM user (or role) with read-only access to the bucket. The minimum policy is:
{
    "Version": "2012-10-17",
    "Statement": [
        {
            "Effect": "Allow",
            "Action": ["s3:GetObject", "s3:ListBucket"],
            "Resource": [
                "arn:aws:s3:::your-bucket-name",
                "arn:aws:s3:::your-bucket-name/*"
            ]
        }
    ]
}
Replace your-bucket-name with the actual bucket name. Do not grant write permissions - Freedam never needs them.
Connection form
| Field | Notes |
|---|---|
| Bucket | Exact bucket name, e.g. acme-dam-assets |
| Region | AWS region, e.g. eu-west-1 |
| Access key | IAM access key ID |
| Secret key | IAM secret key - stored encrypted, never logged |
| Base path | Optional. Restrict ingestion to a specific prefix, e.g. products/2026/. Leave blank to pull the entire bucket. |
| Endpoint | Leave blank for AWS. For S3-compatible servers, enter the full endpoint URL (e.g. https://s3.wasabisys.com for Wasabi or https://minio.yourcompany.com:9000 for MinIO). |
Click Test connection to verify bucket access before saving.
Connecting to Google Drive
Note: The full OAuth flow (where Freedam requests access to your Google account directly) is planned for a future release. For now, you provide a short-lived OAuth access token that you generate manually from the Google Cloud Console.
Getting an access token
- Open the OAuth 2.0 Playground in your browser.
- In Step 1, enter the scope
https://www.googleapis.com/auth/drive.readonlyand click Authorize APIs. - Sign in with the Google account that has access to the target Drive or folder.
- In Step 2, click Exchange authorization code for tokens.
- Copy the Access token value.
Paste it into the Access token field in the Freedam connection form.
Warning: Google access tokens expire after about 1 hour, and the playground gives you no refresh token, so Freedam cannot renew it for you. For that reason Google Drive sources are manual only, on every plan: the Schedule field is not shown for them, and you trigger each refresh with Refresh now. Once the token has expired, a refresh fails with
auth_failed, shown on the run page and as the source's last-run status. Nothing is sent to you and the source is not switched off: paste a fresh token into the connection form, save, and refresh again.
Connection form
| Field | Notes |
|---|---|
| Access token | The OAuth access token you generated above |
| Folder ID | The Google Drive folder ID from the folder's URL: https://drive.google.com/drive/folders/<folder-id> |
| Catalog file ID | Optional. The ID of a Google Sheets file to use as the catalog. |
Mapping Files to Collections
Everything in this section lives on the source Edit page, under the Folders & catalog step. This is where you tell Freedam which folders to scan, which (if any) catalog spreadsheet to read, and how each file should be matched to a record and placed into a collection.
You can configure a source three ways, from simplest to richest:
- Folders only (no catalog). Files are imported and dropped into the folder's collection. Matching is filename-only.
- Folders + catalog. A spreadsheet (or Google Sheet) supplies one row per record; matched files inherit that row's metadata and hierarchy placement.
- Folders + catalog + per-key grouping, sections, disposition, and vocabularies. The full mapping - one collection per record, files sorted into sections, derived files skipped, and filename tokens captured as metadata.
Destination
Under Destination you set where imported assets and collections are created:
- Asset class - the asset class applied to every imported file (unless a folder overrides it).
- Collection type - the collection type used for collections created by this source. A collection type must be set before a catalog can create collections.
- Root collection - the collection that imported collections are nested under. Picking an existing collection here also derives the collection type from it.
These are source-level defaults; individual asset folders can override the asset class and root collection (see Advanced options below).
Asset folders
Under Asset folders, add one entry for each folder Freedam should scan. Each folder has:
| Field | Notes |
|---|---|
| Label | A name for the folder, e.g. images. For your reference only. |
| Path | The folder path on the connector, e.g. /Dam/Images. |
| Include subfolders | When on, Freedam scans nested folders too. Off by default. |
Open Advanced options on a folder to reveal:
- Include patterns - glob patterns that restrict the import to matching files, e.g.
*.png, *.jpg. Leave blank to include everything not excluded. - Exclude patterns - glob patterns for files to skip. New folders start with the default excludes
Thumbs.dband*.dbso common junk files are ignored. Add patterns such as.DS_Storeor._*for macOS metadata files. - Asset class (override) - use a different asset class for files from this folder instead of the source default.
- Root collection (override) - nest this folder's collections under a different root than the source default.
The Advanced options summary shows at a glance whether a folder has custom includes, excludes, a class override, or a root override.
Catalog file
A catalog is an optional spreadsheet where each row describes one record (one product, one campaign, …). When present, matched files inherit the row's metadata and are placed in the hierarchy the catalog implies.
You can supply the catalog two ways:
- Connector path - point at a CSV/XLSX file that lives on the same connector as your assets, e.g.
/Dam/Data/catalog.csv. - Upload file - upload a CSV or XLSX directly into Freedam (use Replace to swap it later).
The catalog is optional. Leave it blank to import only the asset files; matching then falls back to filename-only.
Two columns drive matching and naming:
- Key column - uniquely identifies each row (e.g. a SKU or product code). Files are matched against this column.
- Name column - optional; names each collection created from a row (e.g. the product title). Falls back to the key when blank.
Matching files to catalog rows
Turn on Match files to catalog rows to link each asset file to a catalog row, so it lands in the right collection and inherits its data. Leave it off to drop files straight into the folder's collection.
When matching is on, configure:
- Match against catalog column - the catalog column the resolved key is compared to (usually the key column).
- Extract the key from the filename - choose how the key is read from the filename:
- Off - the whole filename without its extension is the key.
12345.jpgmatches the value12345. - On - use a pattern when the key is buried inside a longer filename, e.g. pull
12345out ofproduct_12345_front_v2.jpg.
- Off - the whole filename without its extension is the key.
Building the pattern. Rather than writing a regular expression by hand, you label the parts of a sample filename - Freedam's segment/parts builder splits a real filename into segments and you tag each one (the key, a role, a sequence number, and so on). From those labels Freedam generates a regular expression with a named capture group for the key. The generated pattern is shown read-only. To override it, click Edit manually and write the expression directly. A manually-edited pattern is validated as you type:
- It must be wrapped in slashes, e.g.
/(?P<key>\d+)/. - It must contain a named group such as
(?P<key>…)to capture the key. - It must be a valid regular expression.
Live preview. As you adjust the column and pattern, Freedam samples real files from your folders and shows, per file, the Resolved key, whether it Matched, and the resolved Target, Section, and Disposition - exactly where each file would land if you ran the import now. A summary line reports how many sample files matched and how many catalog rows have a matching file, so you can verify the mapping before running anything.
Group files into one collection per match key
Turn on Group files into one collection per match key to create one collection per distinct match key, instead of dumping matched files into a single shared collection.
- When a catalog row exists for that key, the collection is placed in your catalog hierarchy and filled with the row's metadata.
- When no catalog row exists yet, the collection sits flat at the root.
The important part: a flat per-key collection is automatically re-nested and enriched on a later run once a matching catalog row appears - the collection keeps its identity, so no duplicate is created and the files already attached stay put. This is what makes partial or late-arriving catalogs work: you can start importing files before the full catalog is delivered, and the hierarchy fills in by itself as catalog rows arrive.
Unmatched files (orphan routing)
An unmatched file is one whose key couldn't be extracted from its filename, or whose key has no matching catalog row. Choose what happens to these:
- Keep unmatched files at the root - they are imported into the source's root collection.
- Put them in a separate collection - pick an existing collection with the collection picker, and all unmatched files go there.
Routing unmatched files to a dedicated collection (rather than scattering them at the root) makes it easy to review them and refine the pattern. Note that with per-key grouping on, a file whose key was extracted but has no catalog row still gets its own per-key collection - orphan routing only catches files where no key could be resolved at all.
File disposition (skip)
Some sources ship derived or duplicate files alongside the originals - for example web-optimised renditions. Under File disposition you can mark these to be skipped so they are never downloaded or imported:
- Disposition token - pick the filename token (a named group from your pattern) that distinguishes the variants.
- For each value that token can take, choose Import or Skip.
Skipped files are recorded but never streamed or ingested, so they cost no storage and never become assets. (You need a named token in the filename pattern before this control is available.)
Sections
If the target collection type defines asset sections, you can sort each file into the right section automatically. Sections are slots within a collection - for example Main image, Gallery, Documents, Videos - defined on the collection type (in Admin → Collection Types), so they apply to every collection of that type.
Under Sections, pick the Section token (a filename token) and map each of its values to a section. Set a Default section for files whose token value isn't mapped. A file whose section can't be resolved lands in the collection's Ungrouped area.
Note: This control only appears when the target collection type has sections configured. If it doesn't, the control tells you so - add sections to the collection type first.
Vocabularies and metadata from filename tokens
Beyond the key, a filename pattern can capture extra tokens (role, document type, shot number, …). Under Filename metadata, map each captured token to a target:
- Vocabulary - capture the value as a controlled-vocabulary facet. Freedam auto-provisions the vocabulary and its terms if they don't exist yet, so a token like
rolecan populate animage_typefacet without any manual setup. - Asset metadata - write the value into an asset metadata field.
- Skip - ignore the token.
Two special roles help with image sets:
- Primary image - pick the token that marks the hero shot. A file is treated as primary when this token is absent from its filename (e.g.
SKU.pngis the hero,SKU_PSP_1.pngis a variant). The primary becomes the collection cover. - Image order - pick a numeric token that orders images within each record (primary first).
This complements catalog column mapping: catalog columns feed collection-level metadata and the hierarchy, while filename tokens feed per-file metadata and facets.
Targets recap
When the mapping is complete, every imported file resolves to:
- a target collection - a catalog-nested collection, a flat per-key collection, the folder's collection, or the orphan collection;
- a section within that collection (if sections are configured);
- a disposition - Import or Skip;
- an asset class (source default or folder override);
- whatever metadata and facets its catalog row and filename tokens supply.
The live preview shows all of this before you run, so you can confirm the mapping is right.
Manual vs Scheduled Refresh
Next steps checklist
Until a source has everything a run needs and has run at least once, the top of its detail page shows a Finish setting up this source checklist. Each unfinished step links straight to the matching step on the Edit page:
- Choose what to import - select folders on the connector or upload a catalogue file (Folders & catalog).
- Map the catalogue columns - only shown when a catalogue is configured; tell Freedam which column holds the file reference and which ones become metadata (Column mapping).
- Run it once - use Test run… for a dry run first, then Refresh now.
While steps are missing, Refresh now is disabled and explains why on hover, so a run cannot be queued that would import nothing. Once the source is ready the card turns into a short Ready to run note until the first run completes, then disappears.

Triggering a refresh manually
From the source detail page, click Refresh now to queue a full run immediately. The run detail page shows live progress. The button stays disabled until the next-steps checklist above it is complete.
Test run (sample import or dry run)
Before committing a new or reconfigured source to a full import, click Test run… to open the test-run dialog. It offers two ways to validate the setup safely:
- Import only the first N files - Freedam imports a small sample (the first N matched files) so you can confirm assets land in the right collections, sections, and with the right metadata before running the full library.
- Preview only (dry run - import nothing) - Freedam builds the full manifest and computes the plan, but writes nothing. In dry-run mode the N-files limit is ignored: the complete plan is shown, but no files are downloaded or imported.
A test run is the recommended last check after configuring the mapping: import five files, review where they landed, adjust the pattern or section/disposition maps if needed, then run for real.
Setting a schedule
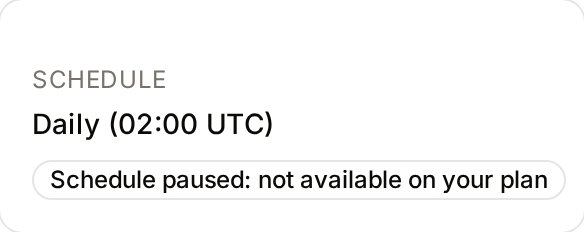
Note: Scheduled refresh is included in the Business plan (and Tailored plans). On the Free and Team plans the Schedule field on the Edit page is locked and shows an upgrade notice. A schedule saved earlier, for example during the 30-day trial, which unlocks every feature, is kept but paused: the scheduler skips the workspace, the source page shows a Schedule paused: not available on your plan badge, and the schedule resumes automatically after an upgrade. Refresh now and test runs work on every plan.
Google Drive sources have no Schedule field at all, on any plan, because their hand-pasted access token expires within about an hour (see Connecting to Google Drive). Refresh them manually.
Open Edit on the source. Set Schedule to a standard cron expression:
# Every day at 02:00
0 2 * * *

# Every hour
0 * * * *

# Every weekday at 06:00
0 6 * * 1-5
Leave Schedule blank for manual-only sources.
The per-tenant scheduler checks every minute for sources whose cron expression is due. It dispatches at most one active run per source at a time - if a previous run is still executing when the next tick fires, the tick is skipped.
Deletion Policies
When files or catalog rows disappear from the upstream system, Freedam applies the source's deletion policy. Two policies are available, set under the Schedule & policy step on the Edit page.
Soft-archive (recoverable) - default
Assets and collections created by this source are soft-archived: they are hidden from the gallery but their data is preserved. If the item reappears upstream in a later run, it is automatically restored.
Use this policy when upstream systems occasionally remove items temporarily or reorganize folders.
Additive (never remove)
Nothing is done about missing items. Freedam only ever adds or updates. Previously ingested files stay in the gallery regardless of what changes upstream.
Use this policy for append-only archives where the upstream system can remove files for reasons unrelated to whether Freedam should keep them (e.g. storage rotation).
The Source Run Page
Each time a refresh runs, Freedam creates a Run record. Open it from the Run history table on the source detail page. The run page header also has an Unmatched button that jumps to this source's unmatched files.
What happened (outcome)
Every run page leads with a plain-language summary of what the run did, so you don't have to decode raw numbers:
- A completed run reads like "Imported 2,501 new files. 18,661 files were already up to date and skipped. Nothing was changed or removed."
- A preview (dry run) says it only shows what a real run would do - nothing was imported.
- A failed run explains why in plain words. For example, if you trigger a refresh while another run for the same source is still going, the second run stops automatically and says so - no files are touched.
Summary chips
Below the outcome, the plan (computed before any data is written) is shown as labelled, colour-coded chips. Each chip is hidden when its count is zero, and hovering it explains the term:
| Chip | Meaning |
|---|---|
| new | Files not seen before - imported as new assets. |
| updated | Files that already existed and changed at the source - the existing asset gets a new version (not a duplicate). |
| unchanged | Already in Freedam and identical at the source - skipped, not re-downloaded. This is the normal, healthy state for a re-sync. |
| no longer in source / archived | Files missing from the source. Under the additive policy they are kept (shown as "no longer in source"); under the soft-archive policy they are archived (recoverable). |
| restored | Previously archived files that have returned to the source. |
| unmatched | Files with no matching catalog product - imported without catalog metadata. Click the chip (or the Unmatched button) to review them. |
The run also reports the total downloaded size (or to download for a preview) - this covers only new and changed files; unchanged files cost no bandwidth. A timeline footer shows who triggered the run, when it started and finished, the duration, and the run number.
Awaiting review
When a run reaches the Awaiting review state, no data has been written yet. The plan is fully computed and waiting for your confirmation.
Review the outcome summary and the chips (especially any no longer in source / archived counts). If everything looks correct, click Apply this run in the page header. If something is wrong, click Cancel.
Note: For subsequent runs where removals are within the configured threshold, plans are auto-applied without requiring a manual review step.
Execution progress
After you click Apply (or when a run auto-applies), the page switches to a live progress card that updates every two seconds. Once the run completes, the final counters are shown.
Reviewing Unmatched Files
An unmatched file is one that imported without a matching catalog product - so it has no catalog metadata and no product collection. This is normal when assets arrive before the catalog row that describes them exists. The Unmatched view is where you reconcile them.
Getting there: click the Unmatched button on the source detail page or on any run page, or click the unmatched chip in a run's summary.
Layout
The page is a split view:
- Left - unmatched files grouped by their extracted key (SKU). Each row shows the key and how many files it covers. Search by SKU, sort, and page through the groups.
- Right - a thumbnail preview of the files in the selected group. Thumbnails are capped at a sensible size and load lazily, so even large groups stay quick to browse. Click a thumbnail to select it (for bulk actions).
Actions
- Re-link - re-checks already-imported files against the current catalog and attaches any that now match. Use this after you have added the missing SKUs to the catalog: import the catalog rows, then re-link, and the orphans become properly catalogued assets without re-downloading anything.
- Acknowledge (dismiss) - hides a SKU group or file from the unmatched list for items you have reviewed and intentionally accept (for example, brand assets that legitimately have no catalog SKU). Nothing is deleted; turn on Show dismissed to bring dismissed items back.
- Delete - moves the selected files to Trash (recoverable). Use this only for files that should not be in Freedam at all. If a file's SKU just needs adding to the catalog, add it and use Re-link instead - don't delete.
- Export missing SKUs - downloads a CSV of the SKUs that have unmatched files, so you can hand it to whoever maintains the catalog.
You can select individual images for a bulk delete, or select whole SKU groups to act on them together.
Recommended workflow
- Open the Unmatched view and Export missing SKUs.
- Add those SKUs to the source's catalog - update the catalog file it reads (or upload a new catalog) - so the new rows are ingested on the next refresh.
- Come back and click Re-link - files whose SKU now exists in the catalog attach automatically.
- Acknowledge the remainder that genuinely have no catalog entry, so the list reflects only items still needing attention.
Refresh Cadence and Safety Stops
Manifest sanity check
Before applying any deletions, Freedam compares the current manifest size to the previous run's manifest size. If the total item count has dropped by more than 50%, the run is paused at Awaiting review regardless of the source's review setting. This prevents a transient server error (an empty or partial directory listing) from archiving or deleting most of your library.
Review the plan carefully before clicking Apply in this case.
Concurrency lock
Only one run can execute per source at a time. The scheduler simply skips a tick while a run is still going. A manual refresh started while another run is in progress is stopped automatically rather than queued - its run page shows "Another sync for this source was already running, so this run was stopped automatically. No files were touched." Wait for the in-progress run to finish, then refresh again.
Asset Versioning
When Freedam detects that an upstream file has genuinely changed, it creates a new version of the existing asset rather than creating a new asset or overwriting silently.
"Genuinely changed" matters: a refresh compares the stored fingerprint (ETag / modification time / content hash) and, as a final guard, the actual file contents. A byte-identical re-import is skipped - no new version, no re-processing - so repeated refreshes of an unchanged library don't pile up redundant versions. A new version is created only when the bytes differ.
What this means in practice:
- The asset ID stays the same. All links, collection memberships, shares, and rights records are unaffected.
- The version history shows the previous file alongside the new one.
- Any user who had a share link to the asset will see the updated file automatically.
- The change is recorded in the run's item log with the action
updated.
This behaviour is identical to manually clicking "Replace file" on an asset's detail page - it uses the same versioning pipeline.
Copying a Source to Another Environment
You can export a source's configuration as a JSON file and import it into another Freedam workspace, for example to prepare a source on a test workspace and then move it to production. You need the Manage data sources permission.
Export a source
On the source's page, open Configuration and choose Export JSON. Freedam downloads a file named after the source.
The file contains the source's name, connector and connection settings, catalog settings, asset folders, matching and mapping rules, deletion policy, schedule, and targets such as the asset class, workflow status and collections. Targets are saved by their code or name so they can be matched in another workspace.
- Secrets are not exported. Passwords, secret keys and tokens are replaced by placeholders.
- The catalog file is not included. Upload it again on the destination workspace.
- The file records who exported it and from which workspace. Treat it as an internal document.
Import a source
- Open Import JSON: on the Data Sources list to create or match a source, or from a source's Configuration menu to update that source.
- Choose an Import mode:
- Auto - update if matched, otherwise create: updates the source that was imported before from the same file, or that has the same connector and name. Otherwise creates a new one.
- Create a new source.
- Update an existing source: choose the Destination source.
- Click Choose JSON file. Nothing is saved yet: Freedam shows a Preview.
- Review the preview:
- The badge says whether the import will Create or Update a source.
- Errors must be fixed before applying, for example a missing asset class or an invalid schedule.
- Under Connector secrets, enter each secret value, or keep the existing one when updating.
- Under Collections, collections found on this workspace are marked as matched. For the others, enter a Destination collection ID, or leave it empty to import without it.
- Dependencies lists every asset class, workflow status and collection type as Resolved, Missing or Ambiguous.
- Click Re-check after fixing anything outside the page, then Apply import.
A preview is valid for 30 minutes. A source created by an import is always disabled: check it, upload its catalog file if it has one, and enable it when ready. An updated source keeps its current enabled or disabled state.
Don't change the import mode after previewing; choose the file again instead, so the preview matches what is applied.
Recovery
Recovering from auth_failed
A run that cannot log in stops with auth_failed. The error is shown on the run page and as the source's last-run status; Freedam does not notify anyone and does not disable the source. To fix it:
- Open Admin → Sources and find the source whose last run shows
auth_failed. - Click the source name to open its detail page.
- Click Edit and update the credentials (username, password, or access token).
- Click Save.
- Click Refresh now to verify the connection works. On a scheduled source, the next due tick will run normally from then on.
Restoring archived items
Items archived by the Soft-archive (recoverable) deletion policy are not deleted - they are hidden. If the items reappear upstream (e.g. the file was temporarily moved or renamed), the next refresh will automatically restore them.
Archived items can only be restored this way today. Freedam has no screen to un-archive a source-archived asset or collection by hand, individually or in bulk. To bring an item back:
- Put the file or catalog row back in the upstream system, at the same path or with the same match key.
- Open the source and click Refresh now, or wait for the next scheduled run.
- Check the run's items: the restored entries are listed as restored, and the assets and collections are visible again with their metadata intact.
If the item cannot return upstream, upload the file again as a new asset. The archived copy and its metadata stay hidden.
Investigating a failed run
- Open the source and find the failed run in the run history table.
- Click the run to open its detail page. The outcome banner at the top states why the run failed in plain language (for example, a concurrency stop, or a processing error).
- For per-item problems, check the Execution log - it lists up to 100 per-item errors with their error codes.
- Common error codes are explained in Troubleshooting below.
Troubleshooting
"not_webdav" on probe
- Symptoms: The test connection fails with a
not_webdaverror immediately. - Cause: The server at that URL does not return a
DAV:header in itsOPTIONSresponse. This usually means the port is wrong, the URL path doesn't point to the WebDAV root, or the server isn't actually serving WebDAV. - Fix: Double-check the base URL and port. For Synology, the default WebDAV HTTPS port is 5006, not 443.
"auth_failed" on probe or run
- Symptoms: The probe or a run fails immediately with
auth_failed. - Cause: The username or password is wrong, or the account doesn't have permission to read the specified path. On a Google Drive source, the pasted access token has most likely expired (they last about an hour).
- Fix: Verify credentials with a WebDAV client (e.g. Finder on macOS or Cyberduck) using the same URL, username, and password. Then update the source credentials and retry. For Google Drive, generate a new token, paste it in, and click Refresh now.
"not_found" on probe
- Symptoms: The probe returns
not_found. - Cause: The base path you specified doesn't exist on the server (e.g. you typed
/DAMbut the folder is/Dam- paths are case-sensitive on most WebDAV servers). - Fix: Check the exact folder name on the server. On Synology you can browse the folder structure via the DSM web interface.
"network" or TLS error on probe
- Symptoms: The probe times out or fails with a TLS certificate error.
- Cause: The server is unreachable (firewall, DNS, wrong hostname) or its TLS certificate is self-signed and Verify TLS is checked.
- Fix for TLS: If you trust the server, uncheck Verify TLS. Read the warning banner and confirm this is appropriate for your setup.
- Fix for network: Ensure the Freedam application server can reach the upstream host on the specified port. If Freedam runs in Docker, you may need to allow outbound traffic to the upstream host.
Orphan files in the plan
- Symptoms: The run plan reports more orphan files than you expect.
- Cause: The filename pattern isn't extracting a key (or the key doesn't match a catalog row) for those files.
- What to do: Review the sample orphan filenames in the plan, and use the live preview on the Edit page to see resolved keys per file. If the filenames follow a different naming convention than expected, adjust the pattern under Matching files to catalog rows. Remember that orphans are not lost: they are routed to the source root or to your configured orphan collection, and with per-key grouping on, keyed-but-uncatalogued files still get their own per-key collection that fills in automatically when the catalog catches up.
Manifest sanity check pauses the run
- Symptoms: A scheduled run reaches Awaiting review with a note that the manifest is more than 50% smaller than last time.
- Cause: The upstream server returned a partial or empty listing - often a transient issue (server restart, network glitch, or directory temporarily unavailable).
- Fix: Check whether the upstream server is healthy. If it is, run a Dry-run to verify the current manifest looks correct, then Apply if it does. If the upstream data was intentionally reduced by more than 50%, you may need to apply the run manually after verifying the removals are expected.
Run stuck in "building_manifest" or "diffing"
- Symptoms: A run stays in
building_manifestordiffingstatus for an unusually long time. - Cause: The manifest is very large (tens of thousands of files) and building it takes time, or the upstream server is responding slowly.
- What to do: Wait. For a source with 8 000+ files over a slow WebDAV connection, manifest builds can take several minutes. If the run is still stuck after 30 minutes, check the application logs for errors and contact your system administrator.