
Workflow Designer
Workflows allow you to define the lifecycle of your digital assets. By creating a series of statuses and transitions, you can control how assets move from initial creation to final publication, ensuring that necessary reviews and approvals take place.
This feature is primarily for administrators who need to standardize content operations across different asset classes. You can build simple linear paths or complex branching processes with automated rules and AI-driven decisions.
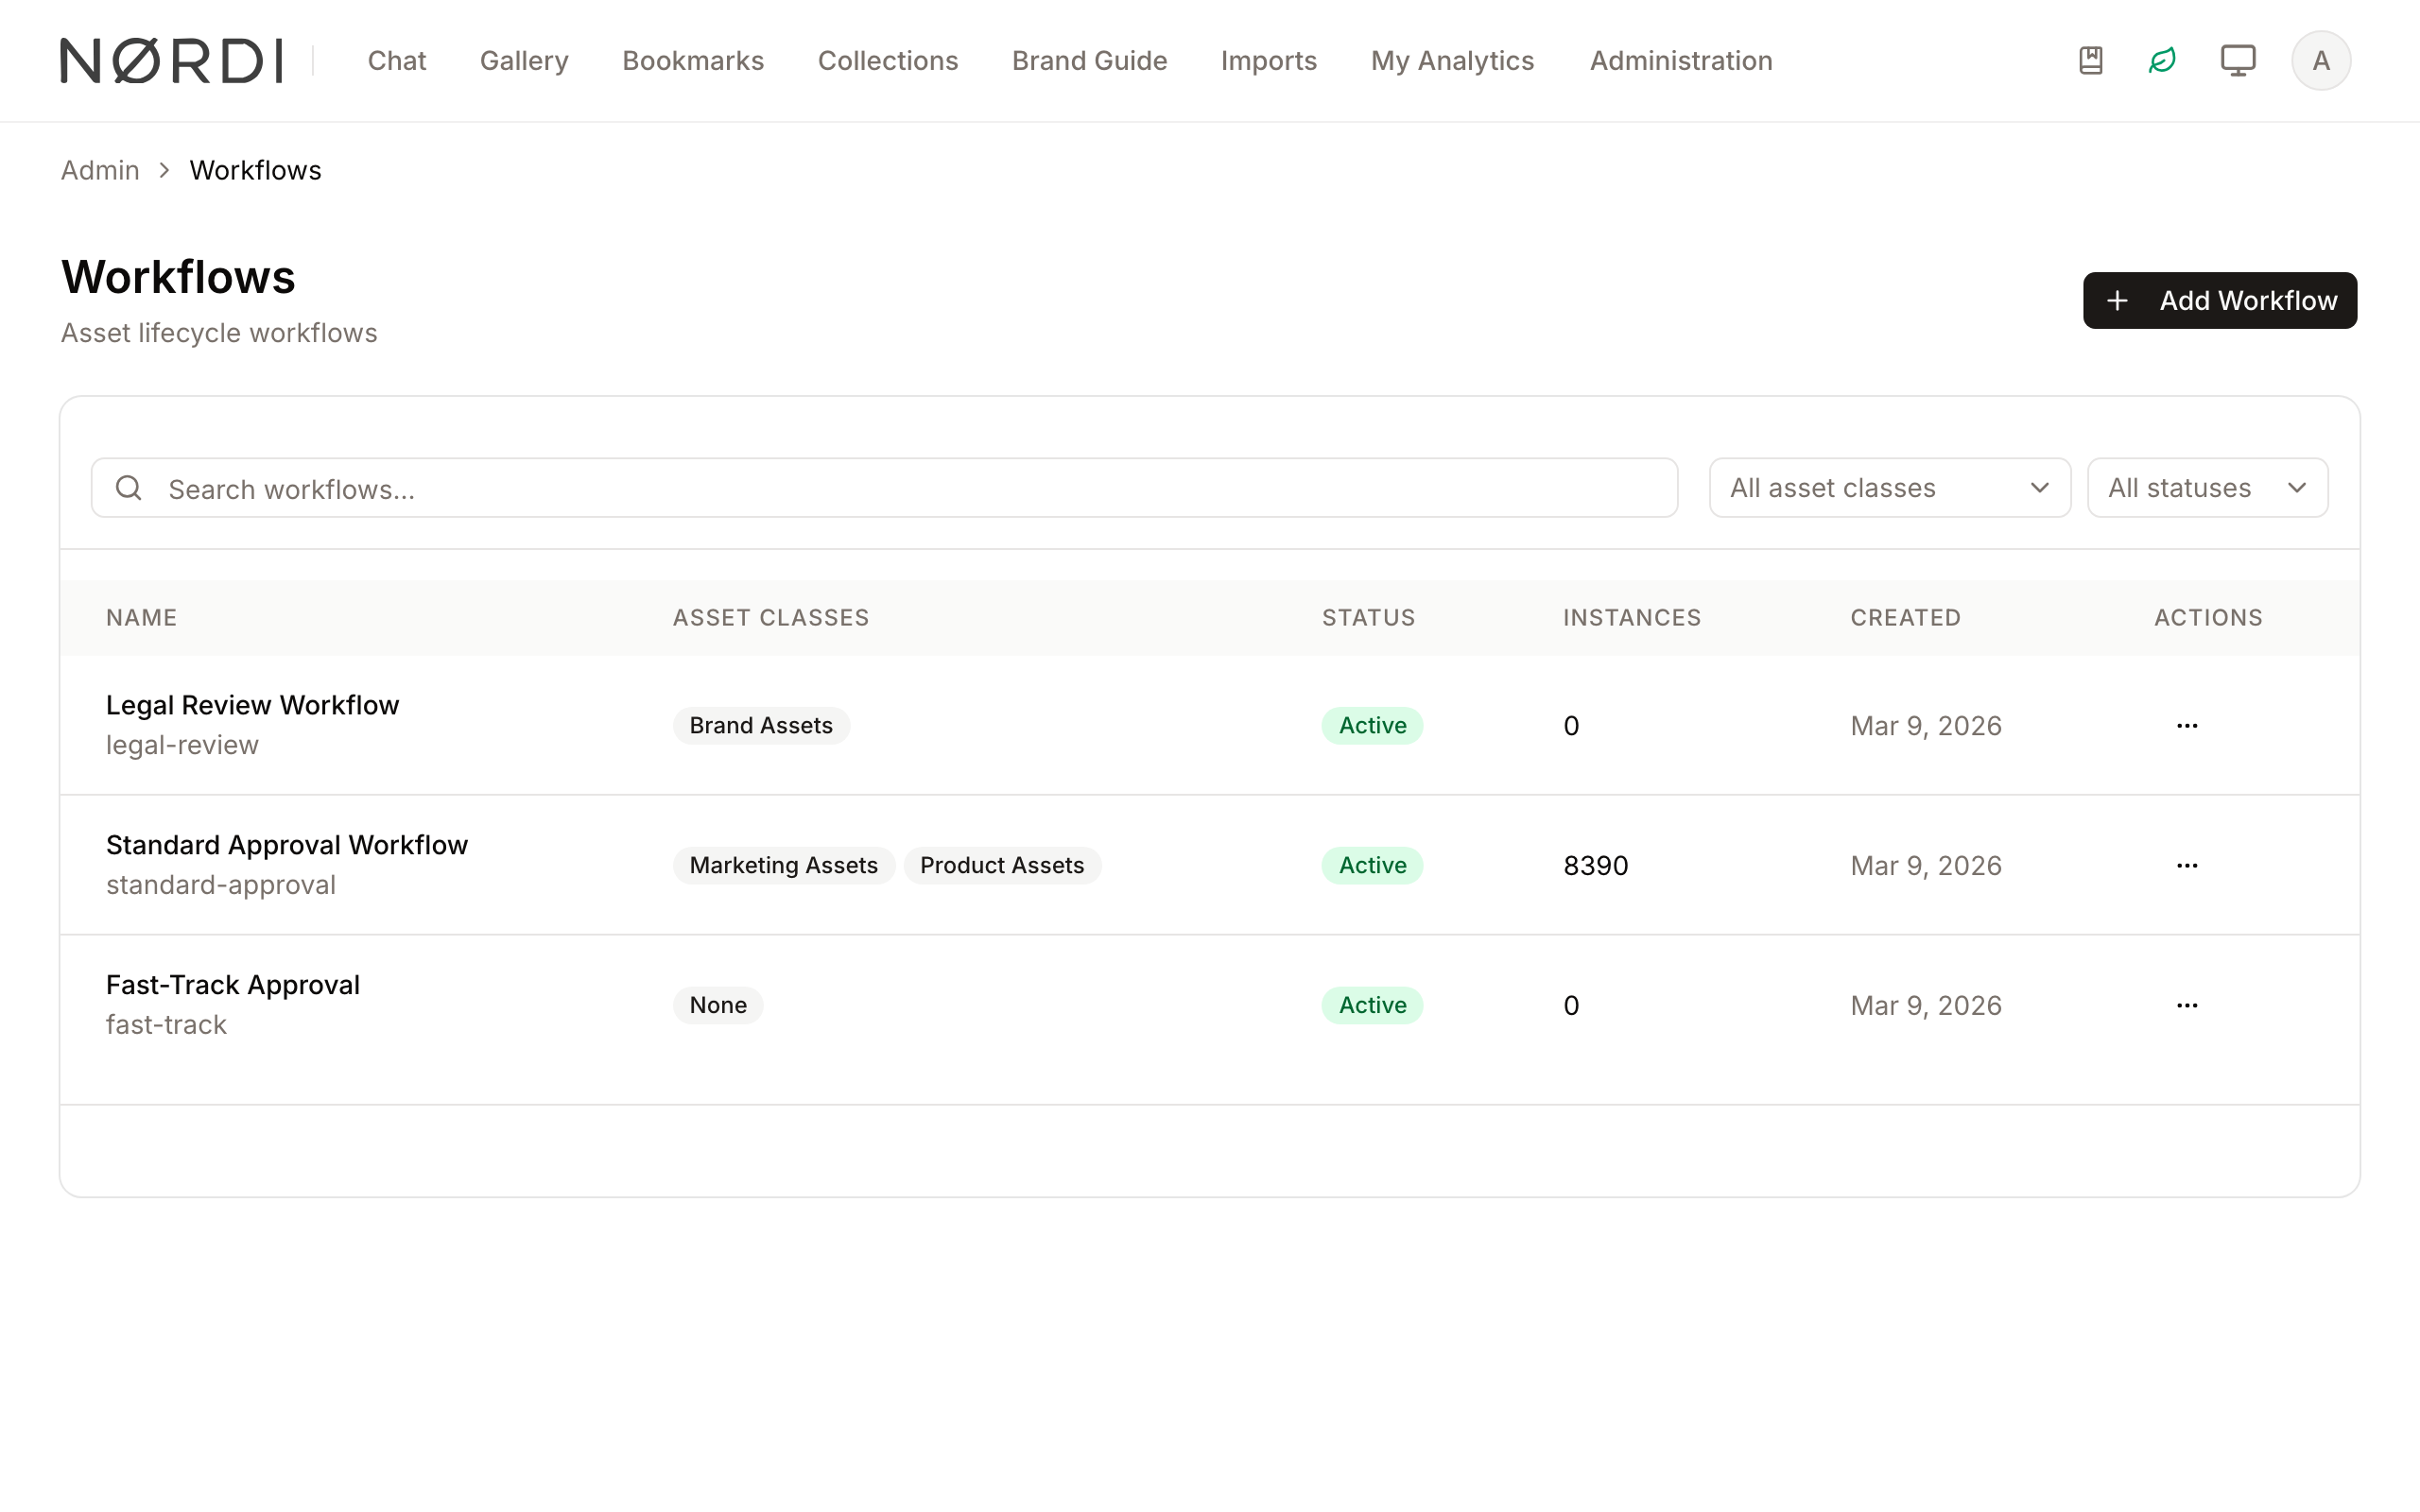
Page Overview
- Purpose: To centralize the design, management, and monitoring of asset lifecycles.
- When to use it: Use this page when you need to create a new approval process, update existing status names, or configure automation rules for asset movement.
- What you can do here:
- Create new workflows using pre-built templates.
- Visually map out statuses and transitions in a drag-and-drop designer.
- Assign workflows to specific Asset Classes.
- Configure automatic transitions based on asset metadata.
- Duplicate existing workflows to quickly iterate on designs.
- Monitor how many asset instances are currently active in each workflow.
Who can use it
Designing and editing workflows requires the "Create and edit workflow definitions" permission. Viewing past transitions is covered by the "View workflow transition history" permission, and forcing a status change on an individual asset is covered by the "Force workflow status transitions" permission.
Page Layout
- Top bar: Contains the page title, a description of the feature, and the Add Workflow button to start a new process.
- Main area: Displays a searchable table of all existing workflows, showing their associated asset classes, active status, and the number of assets currently using them.
- Search and Filters: Located above the table, allowing you to find workflows by name, filter by specific Asset Classes, or filter by Active/Inactive status.
- Workflow Designer (Edit Mode): A visual canvas where you can drag statuses (nodes) and draw connections (transitions) between them.
Main Features
Workflow Designer
- What it's for: A visual interface for building the logic of your workflow.
- Typical use: Dragging a "Draft" status to a "Review" status to create a path for users to follow.
- Result: A graphical map that dictates exactly which steps an asset can take.
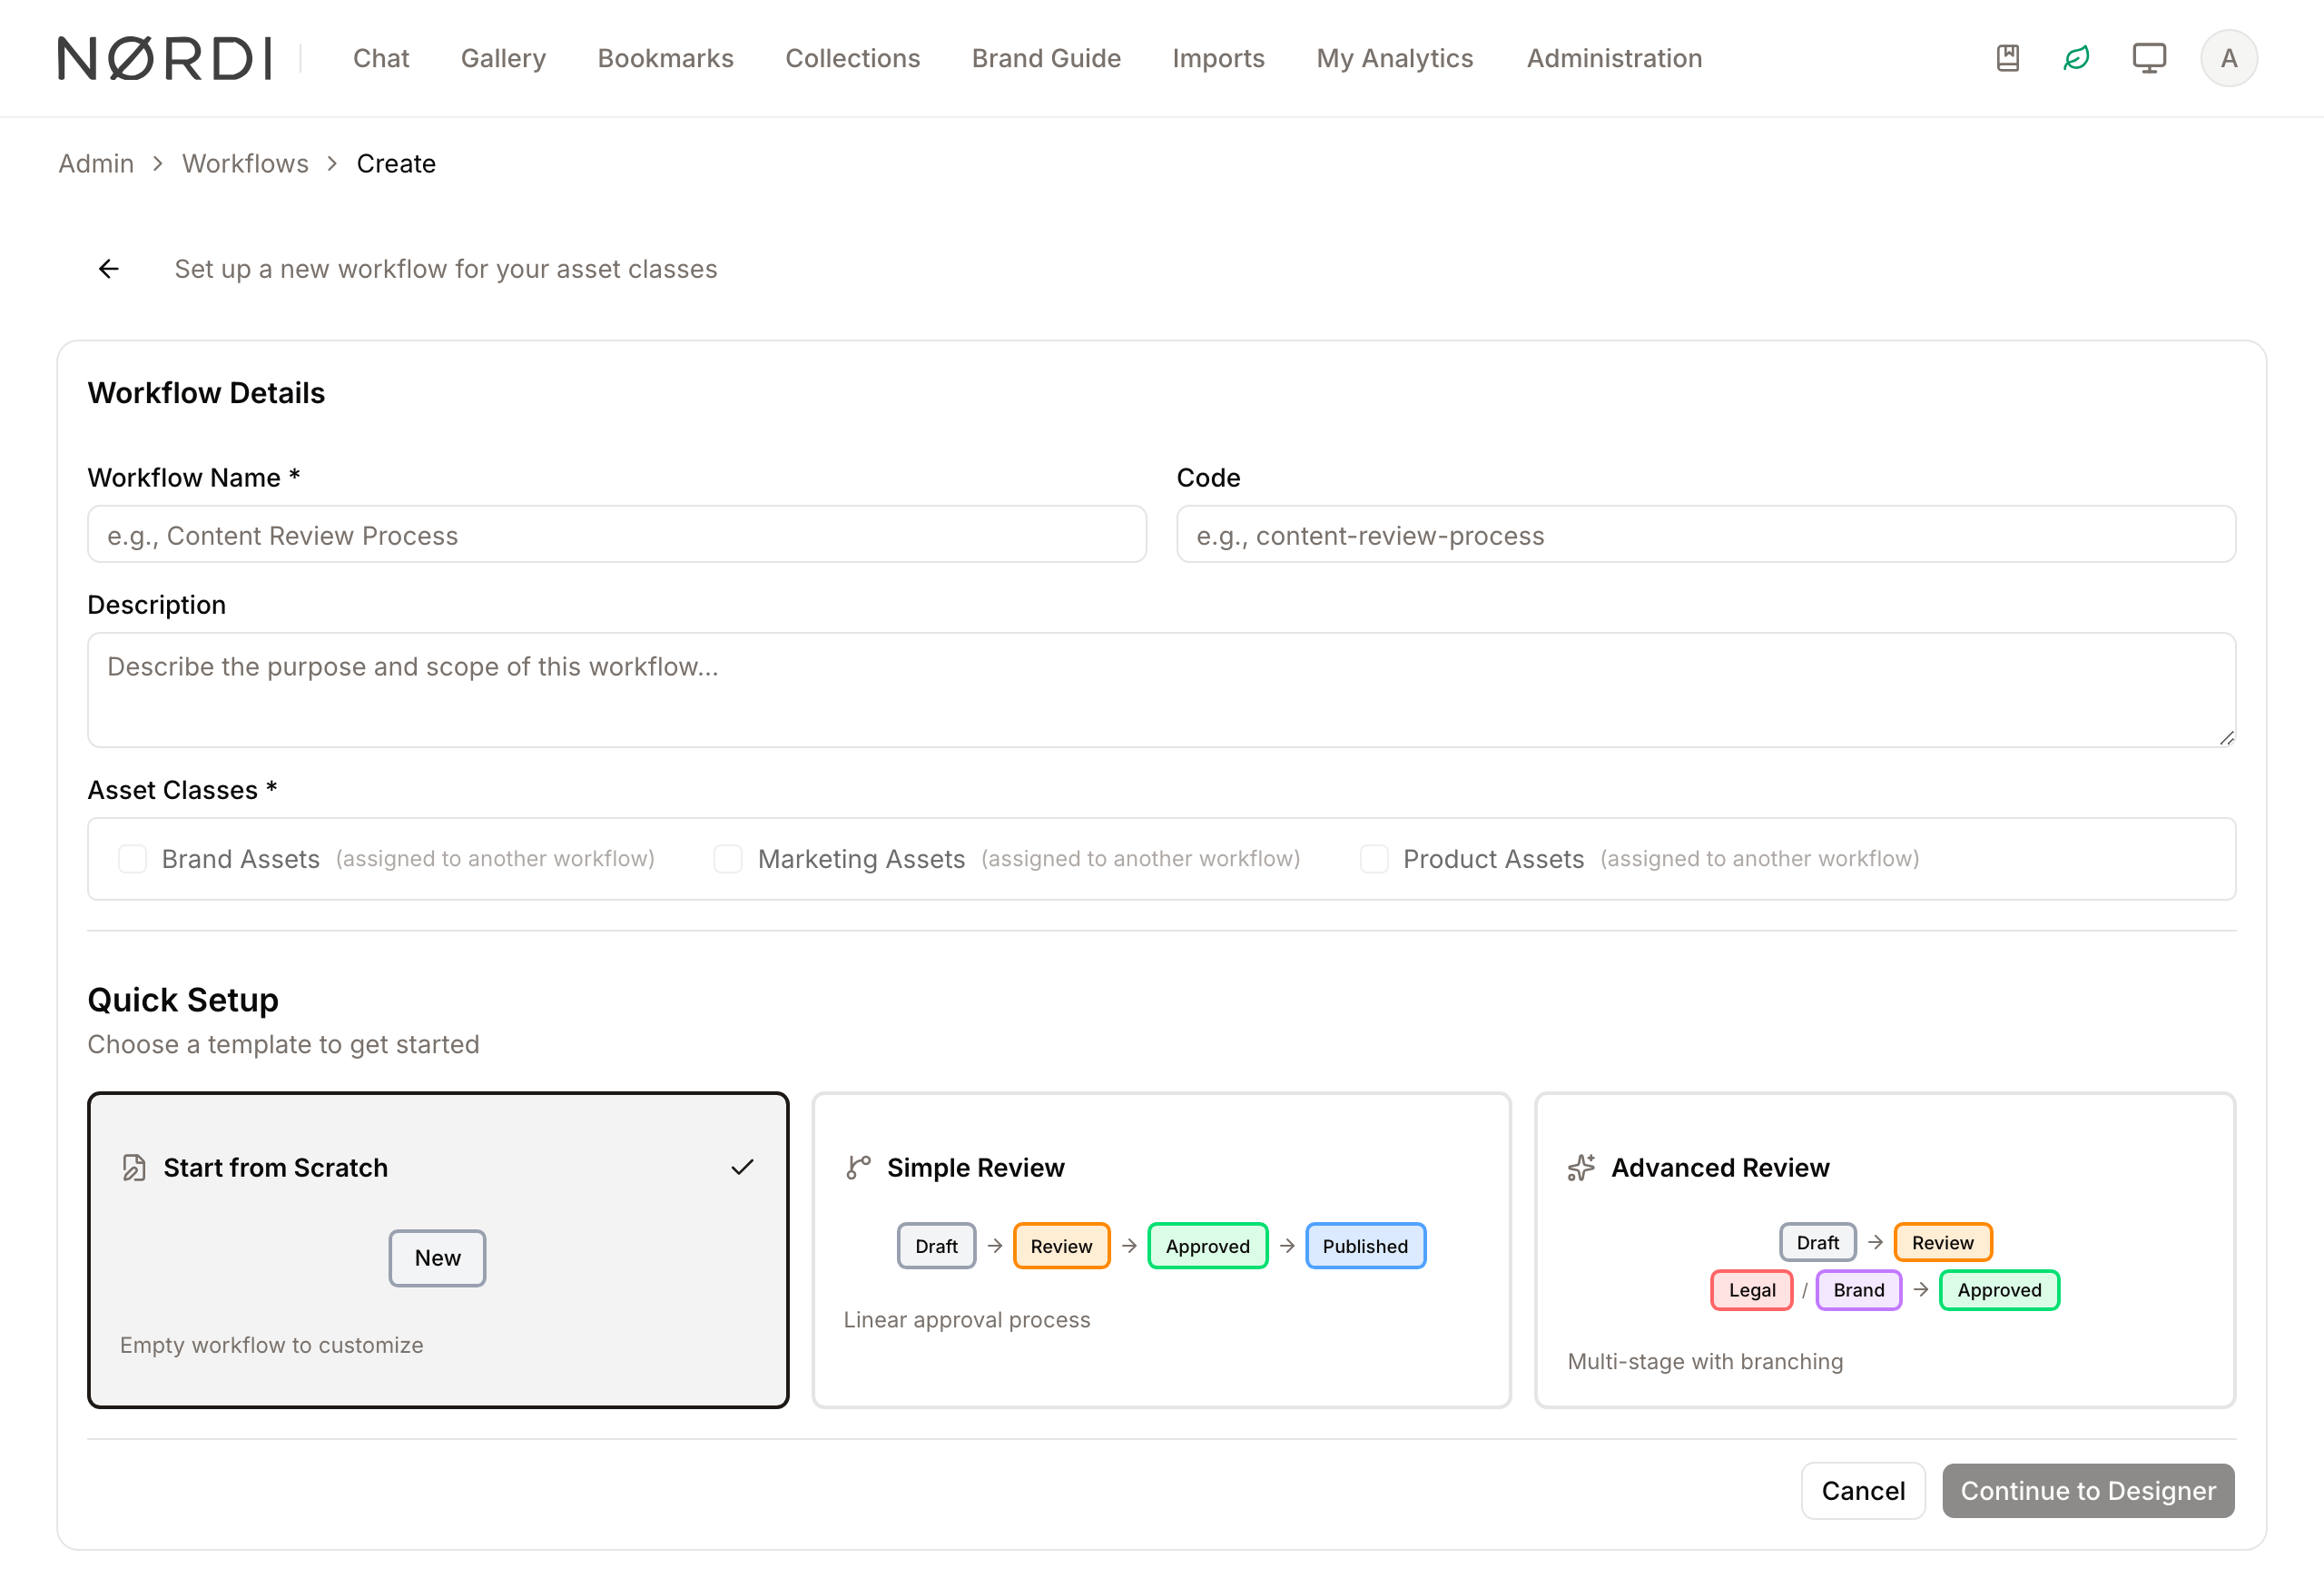
Quick Setup Templates
- What it's for: Speeding up the creation of common workflows.
- Typical use: Selecting "Simple Review" to instantly generate Draft, Review, Approved, and Published statuses.
- Result: A pre-populated workflow that you can immediately customize or use.
Transition Rules
- What it's for: Automating the movement of assets without manual user intervention.
- Typical use: Automatically moving an asset to "Legal Review" if a specific metadata field is marked as "High Risk."
- Result: Assets move through the lifecycle faster based on data-driven logic. Whenever an asset is updated, Freedam re-checks the rules attached to any automatic transition from its current status. If a rule matches, the asset moves to the target status; the new status is then re-evaluated so a chain of rule-based moves can happen in one go without human intervention.
Review Statuses and Reviewer Groups
- What it's for: Flagging specific statuses as "review steps" and tying them to a group of reviewers.
- Typical use: Marking a "Legal Review" status as a review step and selecting the Legal team as the reviewer group.
- Result: When an asset first enters a review status, Freedam emails every member of the assigned reviewer group with a link straight to the asset. Reviewers also see these assets automatically in their Review queue. When multiple assets enter the same review status in a short window (for example, after a bulk import), Freedam consolidates the notifications into a single email per reviewer summarising all pending assets, so inboxes stay readable.
Asset Class Assignment
- What it's for: Linking a workflow to specific types of content.
- Typical use: Assigning a "Video Production Workflow" specifically to the "Video" asset class.
- Result: Any new video uploaded will automatically follow the assigned workflow steps.
Detailed Feature Documentation
Workflow Designer Canvas
- Purpose: To provide a workspace for arranging the steps of a lifecycle.
- Where to find it: Click Add Workflow or edit an existing workflow; it appears under the Workflow Designer section.
- What you'll see: A grid-patterned area containing status boxes and arrowed lines representing transitions.
How to use it:
- Click Add Status to place a new step on the canvas.
- Click Add Transition to define a path between two existing statuses.
- Drag any status box to reposition it for better visibility.
- Double-click a status or a transition line to open its specific settings.
- Use the Zoom In/Out or Center Canvas buttons in the floating toolbar to navigate large workflows.
Transition Rule Editor
- Purpose: To define the logic that triggers an automatic movement between statuses.
- Where to find it: Inside the Edit Transition dialog, set Trigger Type to "Automatic" and click Configure Rule Conditions.
- What you'll see: A modal with tabs for "Basic Info" and "Rule Conditions."
How to use it:
- In the Rule Conditions tab, click to add a new condition.
- Select an asset property (e.g., "File Size" or "Author").
- Choose an operator (e.g., "is greater than" or "equals").
- Enter the value that must be met to trigger the transition.
- Set the Priority (0-100) if multiple rules might apply.
- Click Save Rule.
Quick Setup
- Purpose: To provide a starting point for new workflows.
- Where to find it: On the Create Workflow page, before entering the designer.
- What you'll see: Three options: "Start from Scratch," "Simple Review," and "Advanced Review."
How to use it:
- Enter a Workflow Name.
- Select one of the three template cards.
- Click Continue to Designer.
- The canvas will load with the pre-defined statuses and transitions from that template.
Complete Workflows
Workflow: Creating a New Approval Process
- Goal: Set up a standard review path for a new type of asset.
- Prerequisites: You must have at least one Asset Class created that is not already assigned to a workflow.
Steps:
- Click Add Workflow in the Workflows index.
- Type a name in the Workflow Name field (e.g., "Legal Document Review").
- Select the relevant Asset Classes from the checkbox list.
- Choose the Simple Review template in the Quick Setup section.
- Click Continue to Designer.
- Double-click the "Review" status on the canvas.
- Check the Review status box and select a Reviewer group from the dropdown.
- Click Save Status.
- Click Save Workflow at the top of the designer.
- Expected result: The workflow is saved, and assets in the selected class will now follow the Draft -> Review -> Approved path.
- If it doesn't work: Check the Validation Errors box at the top of the designer; it will list missing connections or required fields.
Workflow: Automating a Status Change
- Goal: Move an asset to a "Large File" status automatically if it exceeds a certain size.
- Prerequisites: An existing workflow with a "Large File" status already created.
Steps:
- Open an existing workflow and click Add Transition.
- Set From Status to "New" and To Status to "Large File."
- Set Trigger Type to Automatic (rule-based).
- Click Configure Rule Conditions.
- Under Rule Conditions, add a condition where "File Size" is "greater than" "500MB".
- Click Save Rule, then click Save Transition.
- Click Save Workflow.
- Expected result: A purple dashed line appears on the canvas indicating an automatic transition.
What happens behind the scenes
- Workflow definitions are validated every time you save, both by the button in the designer and silently on create and update. If anything is wrong - a transition with no target, a status code that is not unique, a missing start status - Freedam blocks the save and shows the errors inline so you can fix them.
- Automatic transitions run in the background a few moments after an asset changes. Freedam re-evaluates the new status and keeps moving the asset forward as long as matching rules apply. To protect against cycles (for example, two rules that keep sending an asset back and forth), Freedam prevents infinite loops by limiting chained automatic transitions to 10 steps before stopping and logging a warning. If you see assets that stall after many moves, a loop in the rules is usually the cause.
- Reviewer notifications only fire when an asset moves from a non-review status into a review status. Moving between two review statuses, or leaving a review status, does not re-send the email.
- A workflow that already has active asset instances cannot be deleted. Freedam will block the delete and ask you to clear out or reassign those assets first. Deactivating the workflow via the Active toggle is a safe alternative - existing assets keep their history, but new ones will not enter it.
- An asset class can only be governed by one workflow at a time. If you assign a different workflow to an asset class, the previous assignment is cleared automatically.
Good to know
- Duplicating a workflow copies every status, transition, and rule, so you can iterate on a new variant without touching the live one.
- Deactivating a workflow is different from deleting it: inactive workflows no longer accept new assets, but historical transitions remain viewable.
- Review statuses can also be used as automation targets - a rule can send an asset straight into "Legal Review" without any manual click.
Tips and Best Practices
- Use Codes: Always provide a clear Code for your statuses (e.g.,
under-review). If you leave it blank, the system generates one, but manual codes are easier to reference in API calls. - Validation First: Before saving, click the Validate button in the designer toolbar. It checks for "dead ends" (statuses with no way out) or orphaned statuses.
- System-Only Statuses: Use the System-only status checkbox for steps that should only be triggered by automation or AI, preventing users from manually skipping to those steps.
- Spacebar Navigation: While in the designer, hold the Spacebar to click and drag the entire canvas (panning) without accidentally moving individual status boxes.
Troubleshooting
Issue: Cannot assign an Asset Class to a new workflow
- Symptoms: The checkbox for an Asset Class is greyed out or shows "(assigned to another workflow)".
- Cause: An Asset Class can only be governed by one workflow at a time.
- Fix: Go to the workflow currently using that Asset Class and uncheck it, or delete the old workflow.
- Prevention: Plan your asset organization so that similar content types sharing a lifecycle are grouped into the same Asset Class.
Issue: "Validation Errors" appearing in the designer
- Symptoms: A red box appears listing errors, and the Save Workflow button is disabled.
- Cause: The workflow logic is incomplete (e.g., a transition has no "To" status, or there is no "Start" type status).
- Fix:
- Read the specific error in the red box.
- Ensure at least one status is set to Type: Start Status.
- Ensure all transitions have both a From and To status selected.
- Prevention: Use a template to ensure basic structural requirements are met.
Issue: Automatic transition is not firing
- Symptoms: An asset meets the criteria but stays in the previous status.
- Cause: The transition rule might have a lower priority than another conflicting rule, or the workflow is marked as Inactive.
- Fix:
- Check that the Active toggle is enabled in the Workflow Details.
- Open the Transition Rule and increase the Priority value.
- Verify the asset metadata exactly matches the rule conditions.