
Uploads
The Uploads feature serves as the central hub for bringing new content into Freedam. It allows you to track the lifecycle of your assets from the moment they are selected for upload through virus scanning, metadata extraction, and final gallery ingestion.
This area is designed for contributors and administrators who need to manage high-volume asset imports. You can monitor real-time processing progress, review historical upload batches, and handle complex scenarios like duplicate file detection or failed processing attempts.
How uploads work in plain English
- Chunked, resumable uploads. Large files are split into small chunks and sent in sequence, so a flaky connection only costs you the current chunk - not the whole file. If the browser is refreshed mid-upload, previously-received chunks on the server are still there when you try again.
- Consent first. If your organization has an active upload-consent notice, Freedam asks you to accept it before the first chunk leaves your computer. Uploads simply won't start until you have.
- Fair-use rate limit. Each user can send up to 500 upload requests per minute. For reference, a 1 GB file cut into 10 MB chunks fits comfortably inside this window. If you hit the limit, Freedam tells you how many seconds to wait before retrying.
- Smart batch grouping. If you upload more files within 30 minutes of your last batch, they join that same batch automatically. Tick New batch in the upload panel to force a fresh one. Failed or cancelled batches are never reused.
- Two supported sources. You can drag files from your computer, or connect Google Drive and pick files directly from there - the Google Drive import feeds into the same ingestion pipeline.
What happens behind the scenes after upload
Once a file has finished uploading, it goes through a pipeline before it's browseable in the gallery:
- Virus scan. A dedicated scanner inspects the file. Anything flagged is permanently blocked and cannot be moved to the gallery.
- Metadata extraction. Freedam reads dimensions, capture date, EXIF, IPTC and other embedded information.
- Preview generation. Multiple preview sizes are rendered and the standard thumbnail renditions are created automatically.
- Document conversion. Office files (Word, PowerPoint, etc.) are converted to PDF so they can be previewed in the browser.
- AI analysis. Freedam generates AI tags and captions to make the asset discoverable.
- Face detection. Faces are detected and matched against known people in your library.
- Focus-point detection. The most visually important point is detected so smart crops stay centred on the subject.
Different stages run on different background workers, so you'll typically see thumbnails appear before tags, and tags appear before face matches. The processing progress bar on the batch page reflects the whole pipeline.
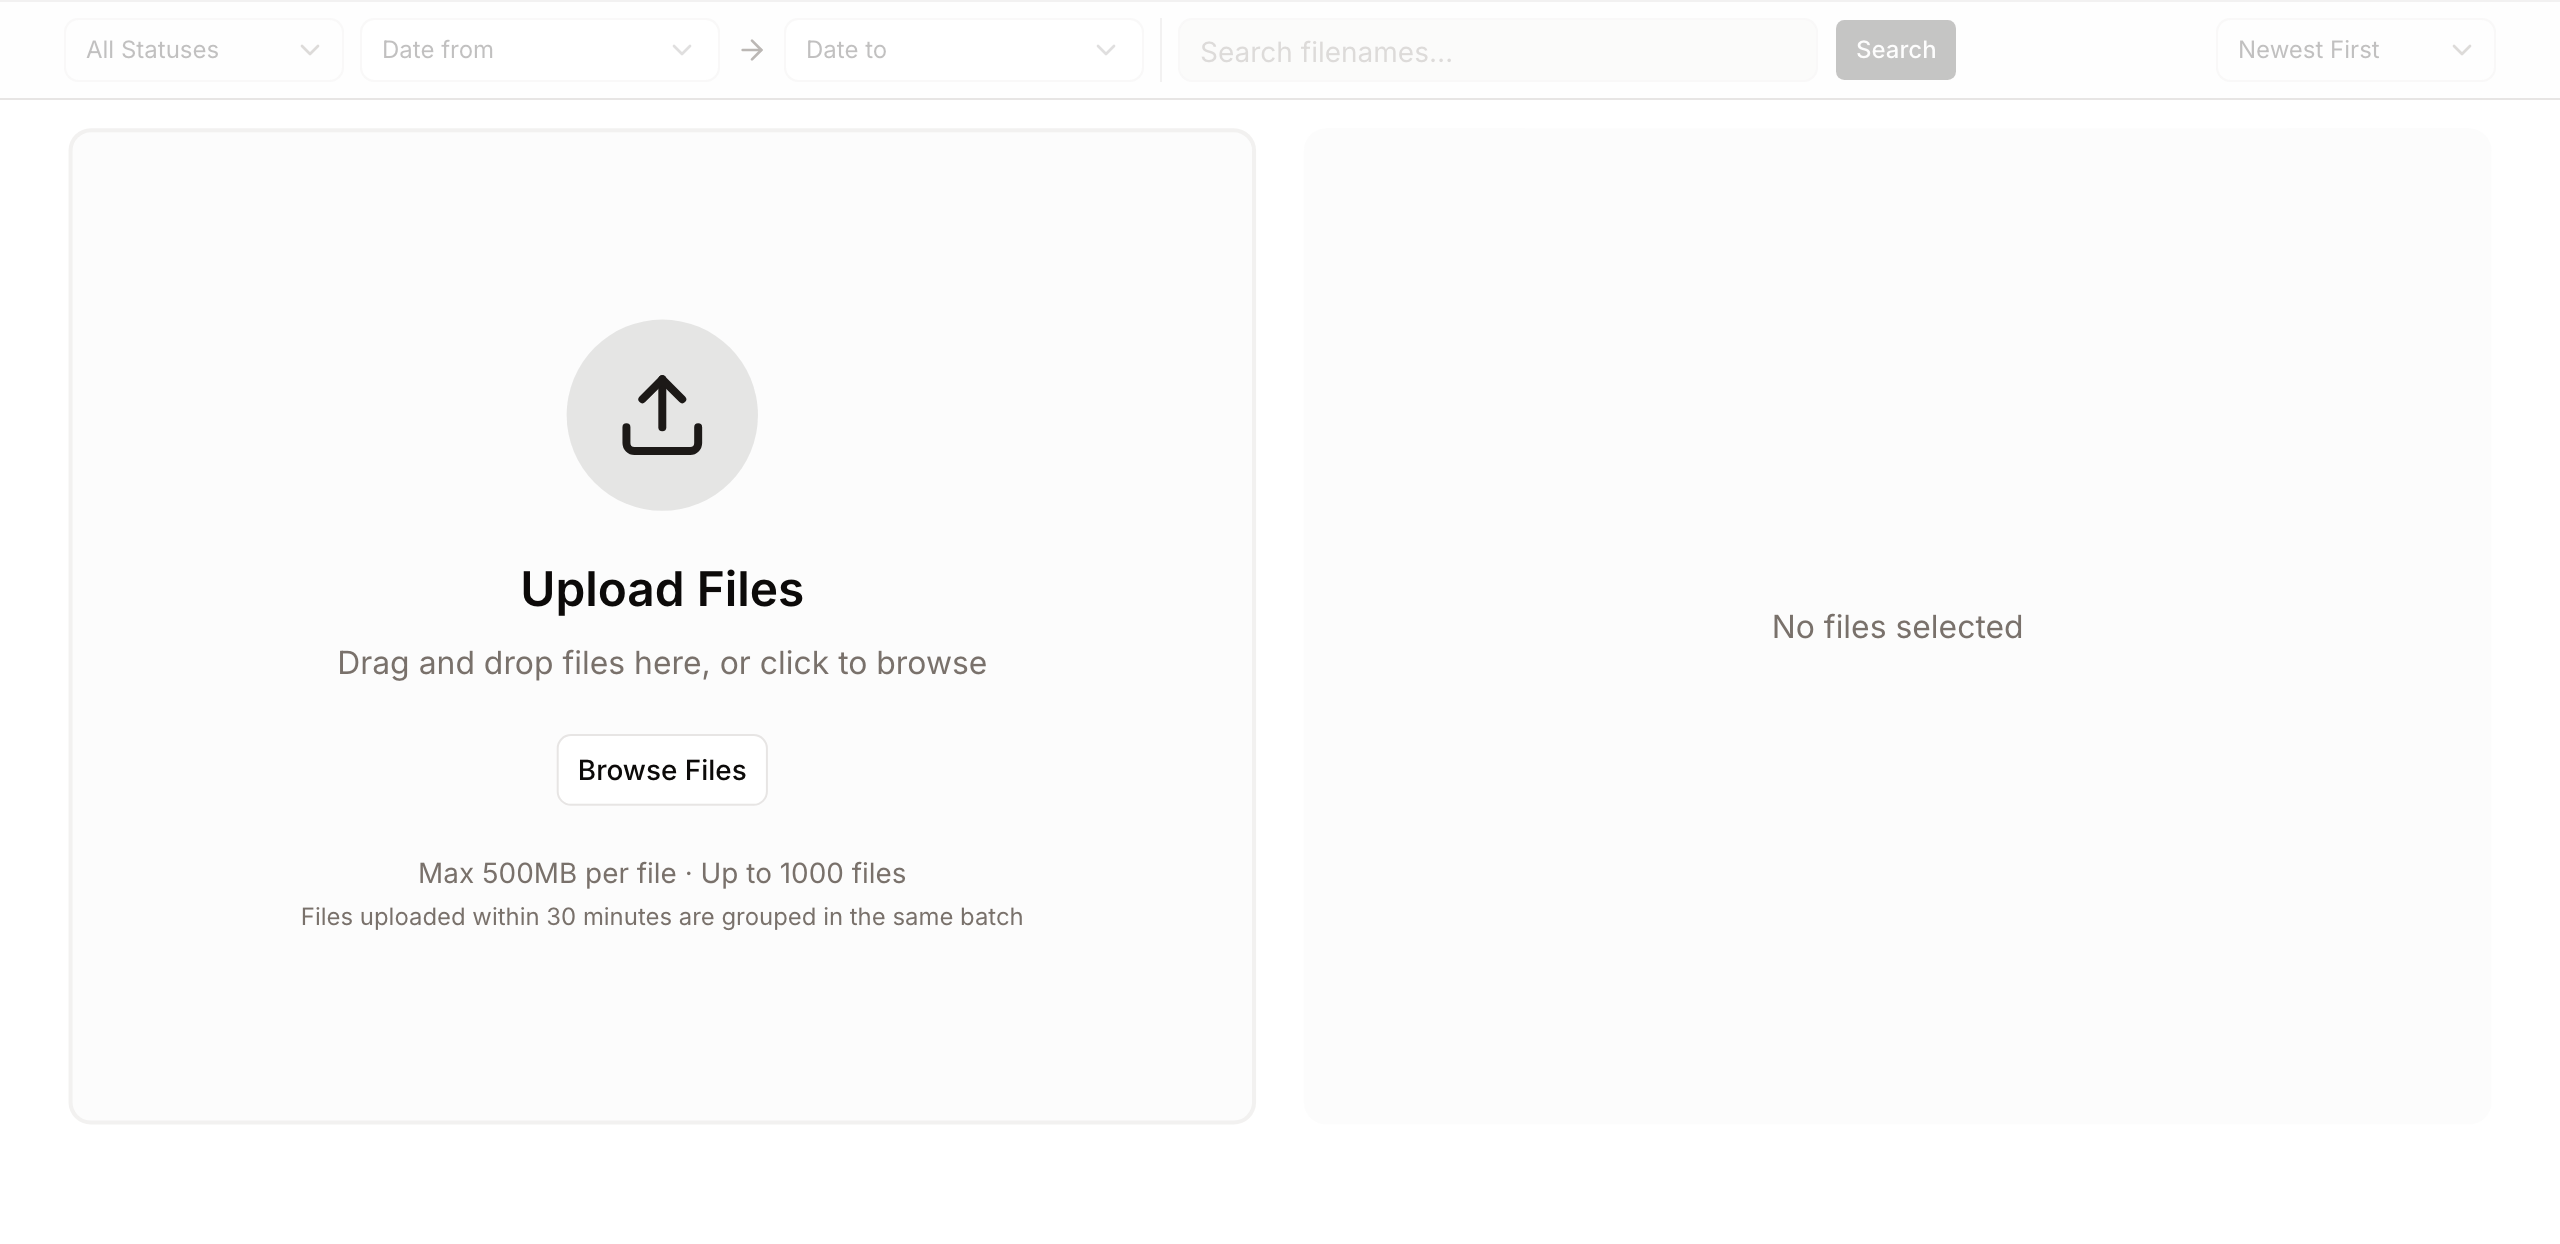
Page Overview
- Purpose: To provide a searchable, filtered history of all file ingestion activities and a dedicated zone for adding new assets.
- When to use it: Use this page when you need to upload new files, check if a previous upload has finished processing, or resolve "flagged" files that may already exist in the system.
- What you can do here:
- Drag and drop files to start new ingestion batches.
- Monitor real-time progress bars for active file processing.
- Rename upload batches for better organization.
- Filter upload history by date, status (Completed, Failed, Processing), or filename.
- Resolve duplicate file conflicts using side-by-side visual comparisons.
Page Layout
- Top bar: Contains the "Upload History" title, a summary of total batches, and the primary Upload Files button which toggles the ingestion zone.
- Filter Bar: Located below the header, providing dropdowns for All Statuses, date range pickers (Date from / Date to), a search field for filenames, and sorting options.
- Main area: Displays a grid of "Batch Tiles" showing a mosaic preview of uploaded assets, their current status, and file counts. When the upload zone is active, this area transforms into a drag-and-drop interface.
- Batch Detail View: Clicking any batch opens a dedicated page showing individual asset cards, processing statistics (Success vs. Failed), and specific error messages for failed files.
Main Features
File Ingestion Zone
- What it's for: The primary interface for adding new files to the DAM.
- Typical use: Dragging a folder of images into the browser or clicking to browse local files.
- Result: Files are queued, validated for size and type, and then uploaded in chunks to ensure reliability.
Batch Management
- What it's for: Organizing groups of uploads into named collections.
- Typical use: Clicking the name on a batch tile to rename it from a generic timestamp to something descriptive like "Q4 Campaign Assets."
- Result: The batch is updated across the system, making it easier to find in the history.
Duplicate Detection & Resolution
- What it's for: Preventing the library from becoming cluttered with identical or visually similar files.
- Typical use: Reviewing a "Flagged" asset to see if it matches an existing file already in the gallery.
- Result: You can choose to keep both, replace the existing file, or delete the new upload.
Detailed Feature Documentation
Uploading Files
- Purpose: To securely add new assets to the system.
- Where to find it: Click the Upload Files button in the top right of the Uploads page.
- What you'll see: A split-screen interface appears. The left side is the drop zone; the right side is the file queue and progress area.
How to use it:
- Drag files into the area labeled "Drag and drop files here" or click to browse.
- Review the file list on the right. You can click the X on a file card to remove it before starting.
- (Optional) Check the New batch box if you want these files isolated from your current session's batch.
- Click Start Upload.
- Once the progress bars reach 100%, the system will automatically redirect you to the batch detail page to watch the processing phase.
Filtering Upload History
- Purpose: To find specific past uploads among hundreds of batches.
- Where to find it: The horizontal bar at the top of the batch grid.
- What you'll see: The grid updates instantly as you change criteria.
How to use it:
- Select a status from the All Statuses dropdown (e.g., select "Failed" to find uploads that need attention).
- Click Date from to select a start date on the calendar.
- Type a partial filename into the Search filenames... field and click Search.
- Click Clear (if available) to reset all filters and see the full history.
Resolving Duplicates
- Purpose: To handle files that the system identifies as already existing.
- Where to find it: In a Batch Detail page, look for assets with a red "Flagged" badge or a duplicate icon.
- What you'll see: A "Duplicate Detection" dialog with side-by-side previews and metadata comparisons.
How to use it:
- Click the duplicate icon on a flagged asset card.
- Use the Side-by-Side tab to compare file sizes and dimensions.
- Use the Overlay Slider tab to slide a divider across the images to spot visual differences.
- Select one of three actions:
- Delete Uploaded: Discards the new file and keeps the one already in the DAM.
- Replace Existing: Keeps the new file's data but attaches it to the existing asset's metadata.
- Keep Both: Ignores the warning and imports the file as a new, separate asset.
These three choices are the only outcomes available - Freedam will wait for a human decision on each flagged file rather than guessing.
Complete Workflows
Workflow: Tracking a Large Batch to Completion
- Goal: Ensure 100+ files are successfully ingested and available in the gallery.
- Prerequisites: Assets must be within the maximum file size limit displayed in the upload zone.
Steps:
- Upload your files using the Upload Files zone.
- Wait for the "All uploads complete!" message and the automatic redirect.
- On the Batch Detail page, observe the Processing progress bar at the top.
- Monitor the success and failed counters in the header.
- Once the status badge changes to Completed, click View in Gallery to begin tagging your new assets.
- Expected result: The progress bar disappears, and all assets show high-quality thumbnails.
- If it doesn't work: Check the red error banner at the top of the page for system-wide issues or individual file error messages.
Workflow: Retrying Failed Uploads
- Goal: Recover files that failed due to network interruptions.
- Prerequisites: The upload must still be in the "Pending" or "Failed" state in the upload queue.
Steps:
- Open the Upload Files zone.
- If files in the right-hand list show a red "Error" status, click Retry Failed.
- If the error persists, click Clear All and try uploading the specific file again individually.
- Expected result: The file status changes from "Error" to "Uploading" and then "Completed."
Tips and Best Practices
- Batch Naming: Always rename your batches immediately after uploading. Generic names like "Batch a1b2c3d4" make it difficult to audit your history later.
- Chunked Reliability: Freedam uses chunked uploading. If your internet cuts out, the system can often resume where it left off rather than starting the whole file over.
- Virus Scanning: Every file is scanned. If a file is flagged as a "Virus Detected," it will be blocked automatically and cannot be moved to the gallery.
Troubleshooting
Issue: "Storage full - uploading is temporarily disabled"
- Symptoms: The upload zone is greyed out, and a red alert banner appears at the top.
- Cause: Your organization has reached its total storage capacity.
- Fix: Contact an administrator to upgrade your plan or delete unused assets from the gallery to free up space.
Issue: "1 file failed - Virus Detected"
- Symptoms: A specific file in a batch shows a "Virus Detected" badge and a red border.
- Cause: The automated security scan identified a threat in the file.
- Fix: This file is permanently blocked for security. You must remove the threat from your local file and attempt a clean upload, or discard the file.
Issue: "Duplicate file detected"
- Symptoms: An error message appears during the upload phase stating the file already exists in the batch.
- Cause: You have selected the same file twice within the same upload session.
- Fix: The system automatically prevents the second copy from uploading. No action is required; the first copy will continue processing.