
Asset Detail
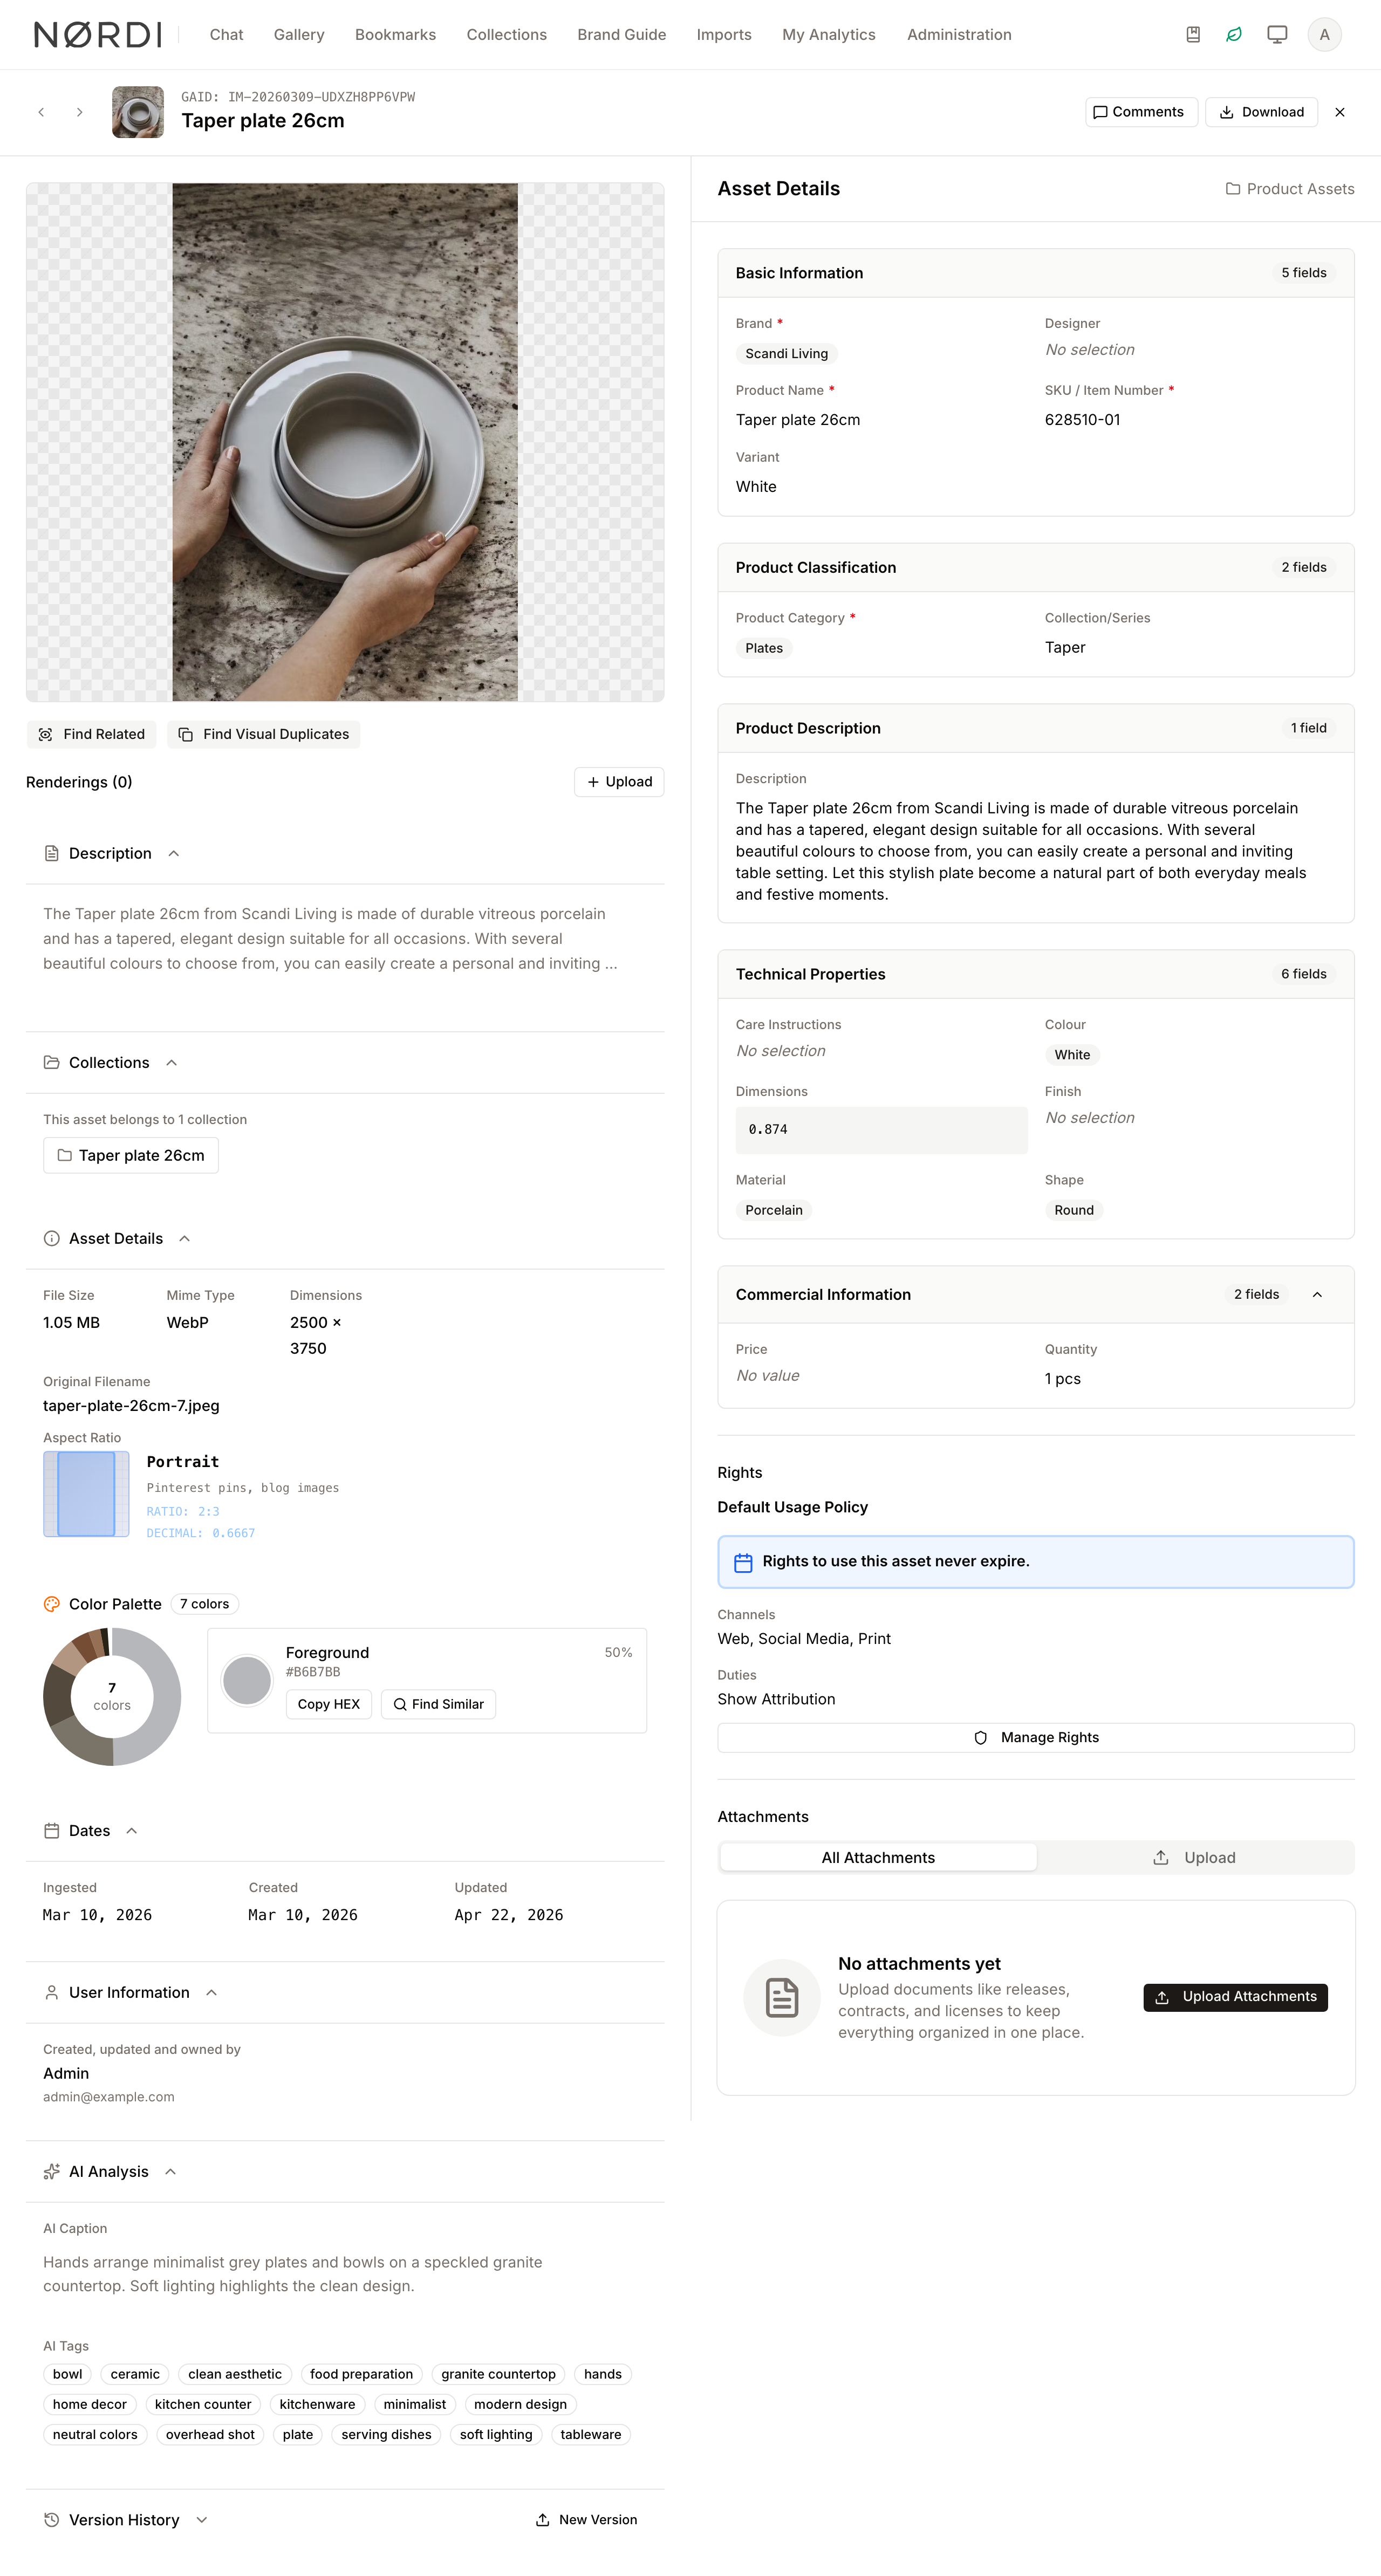
The Asset Detail page is the central hub for managing a single digital asset within Freedam. It provides a comprehensive view of an asset's content, technical specifications, and associated metadata, allowing users to perform high-level actions such as versioning, rights assignment, and performance tracking.
This feature is designed for creative teams, marketing managers, and administrators who need to ensure asset accuracy, track engagement, or prepare assets for distribution across various channels.
Page Overview
- Purpose: To provide a deep-dive view and management interface for a specific digital asset.
- When to use it: Use this page when you need to update metadata, download specific resolutions, view who has engaged with the asset, or upload a new version of a file.
- What you can do here:
- Preview images, videos, audio, and PDF documents.
- Edit descriptive metadata and custom fields.
- Manage version history and restore previous file versions.
- View detailed engagement analytics and search trends.
- Export assets with specific crops for social media.
- Apply and manage rights and usage policies.
Page Layout
- Top bar: Contains navigation controls (Back, Previous/Next asset), the asset thumbnail, the unique Asset ID (GAID), and the editable asset title on the left; Comments, Download, and a Close button sit on the right.
- Main area (Left): The Preview Panel, which displays the asset media, technical details (dimensions, file size), color palettes, and detected faces.
- Main area (Right): The Form Panel, containing categorized metadata fields, rights management information, and file attachments.
- Floating Action Bar: A persistent toolbar at the bottom of the screen. Each button shows an icon plus a text label so the action is clear at a glance. Primary actions sit at the top level: Edit, Bookmark, Studio (when available), Social Export, and Apply template. Less-frequent actions - New Version, Duplicate, and Analytics - live behind the More ▾ dropdown. Delete stays on the far right.
Main Features
Asset Preview and Zoom
- What it's for: Inspecting the visual quality of an asset.
- Typical use: Click the "Zoom in" icon or use the keyboard shortcut (Ctrl/Cmd + Z) to open a high-resolution viewer.
- Result: A full-screen modal opens allowing you to pan across the image or select specific areas to inspect.
Metadata Management
- What it's for: Organizing assets with searchable information.
- Typical use: Click "Edit" in the action bar to unlock fields like Description, Keywords, and Custom Metadata.
- Result: Changes are saved to the asset record, making it easier for other users to find via search.
Version History
- What it's for: Tracking changes to the underlying file over time.
- Typical use: Expand Version History under the preview to see every version, newest first. The live file is marked Current, and each entry shows who created it and the note they left with it. Hover an earlier version to Download this version or Restore this version. Click New Version to replace the current file.
- Result: The old file is kept in the list and the new one becomes current. Restoring asks you to confirm first, then keeps a copy of the current file in the list; the restored file gets its own entry marked "Restored from version N". Downloading, restoring and uploading versions need the Replace asset binary with a new version permission.
Asset Analytics
- What it's for: Measuring the performance and engagement of an asset.
- Typical use: Open the More ▾ menu in the action bar and choose Analytics to view total views, downloads, and the specific search terms users used to find the asset.
- Result: The Analytics dialog opens with the trend, totals, Search Terms and Performance Over Time for the last 7, 30 or 90 days or the last year. Recent Viewers and Recent Downloaders, listed by name and email address, and the search by name or email only appear for users with the Access system health monitoring interface permission, the one that also opens the administration analytics dashboard. Everyone else sees the totals and search terms, without names.
Detailed Feature Documentation
Social Media Export
- Purpose: To generate crops of an image sized for social platforms.
- Where to find it: Click Social Export in the floating action bar. You need the Edit and manage attachments on assets permission.
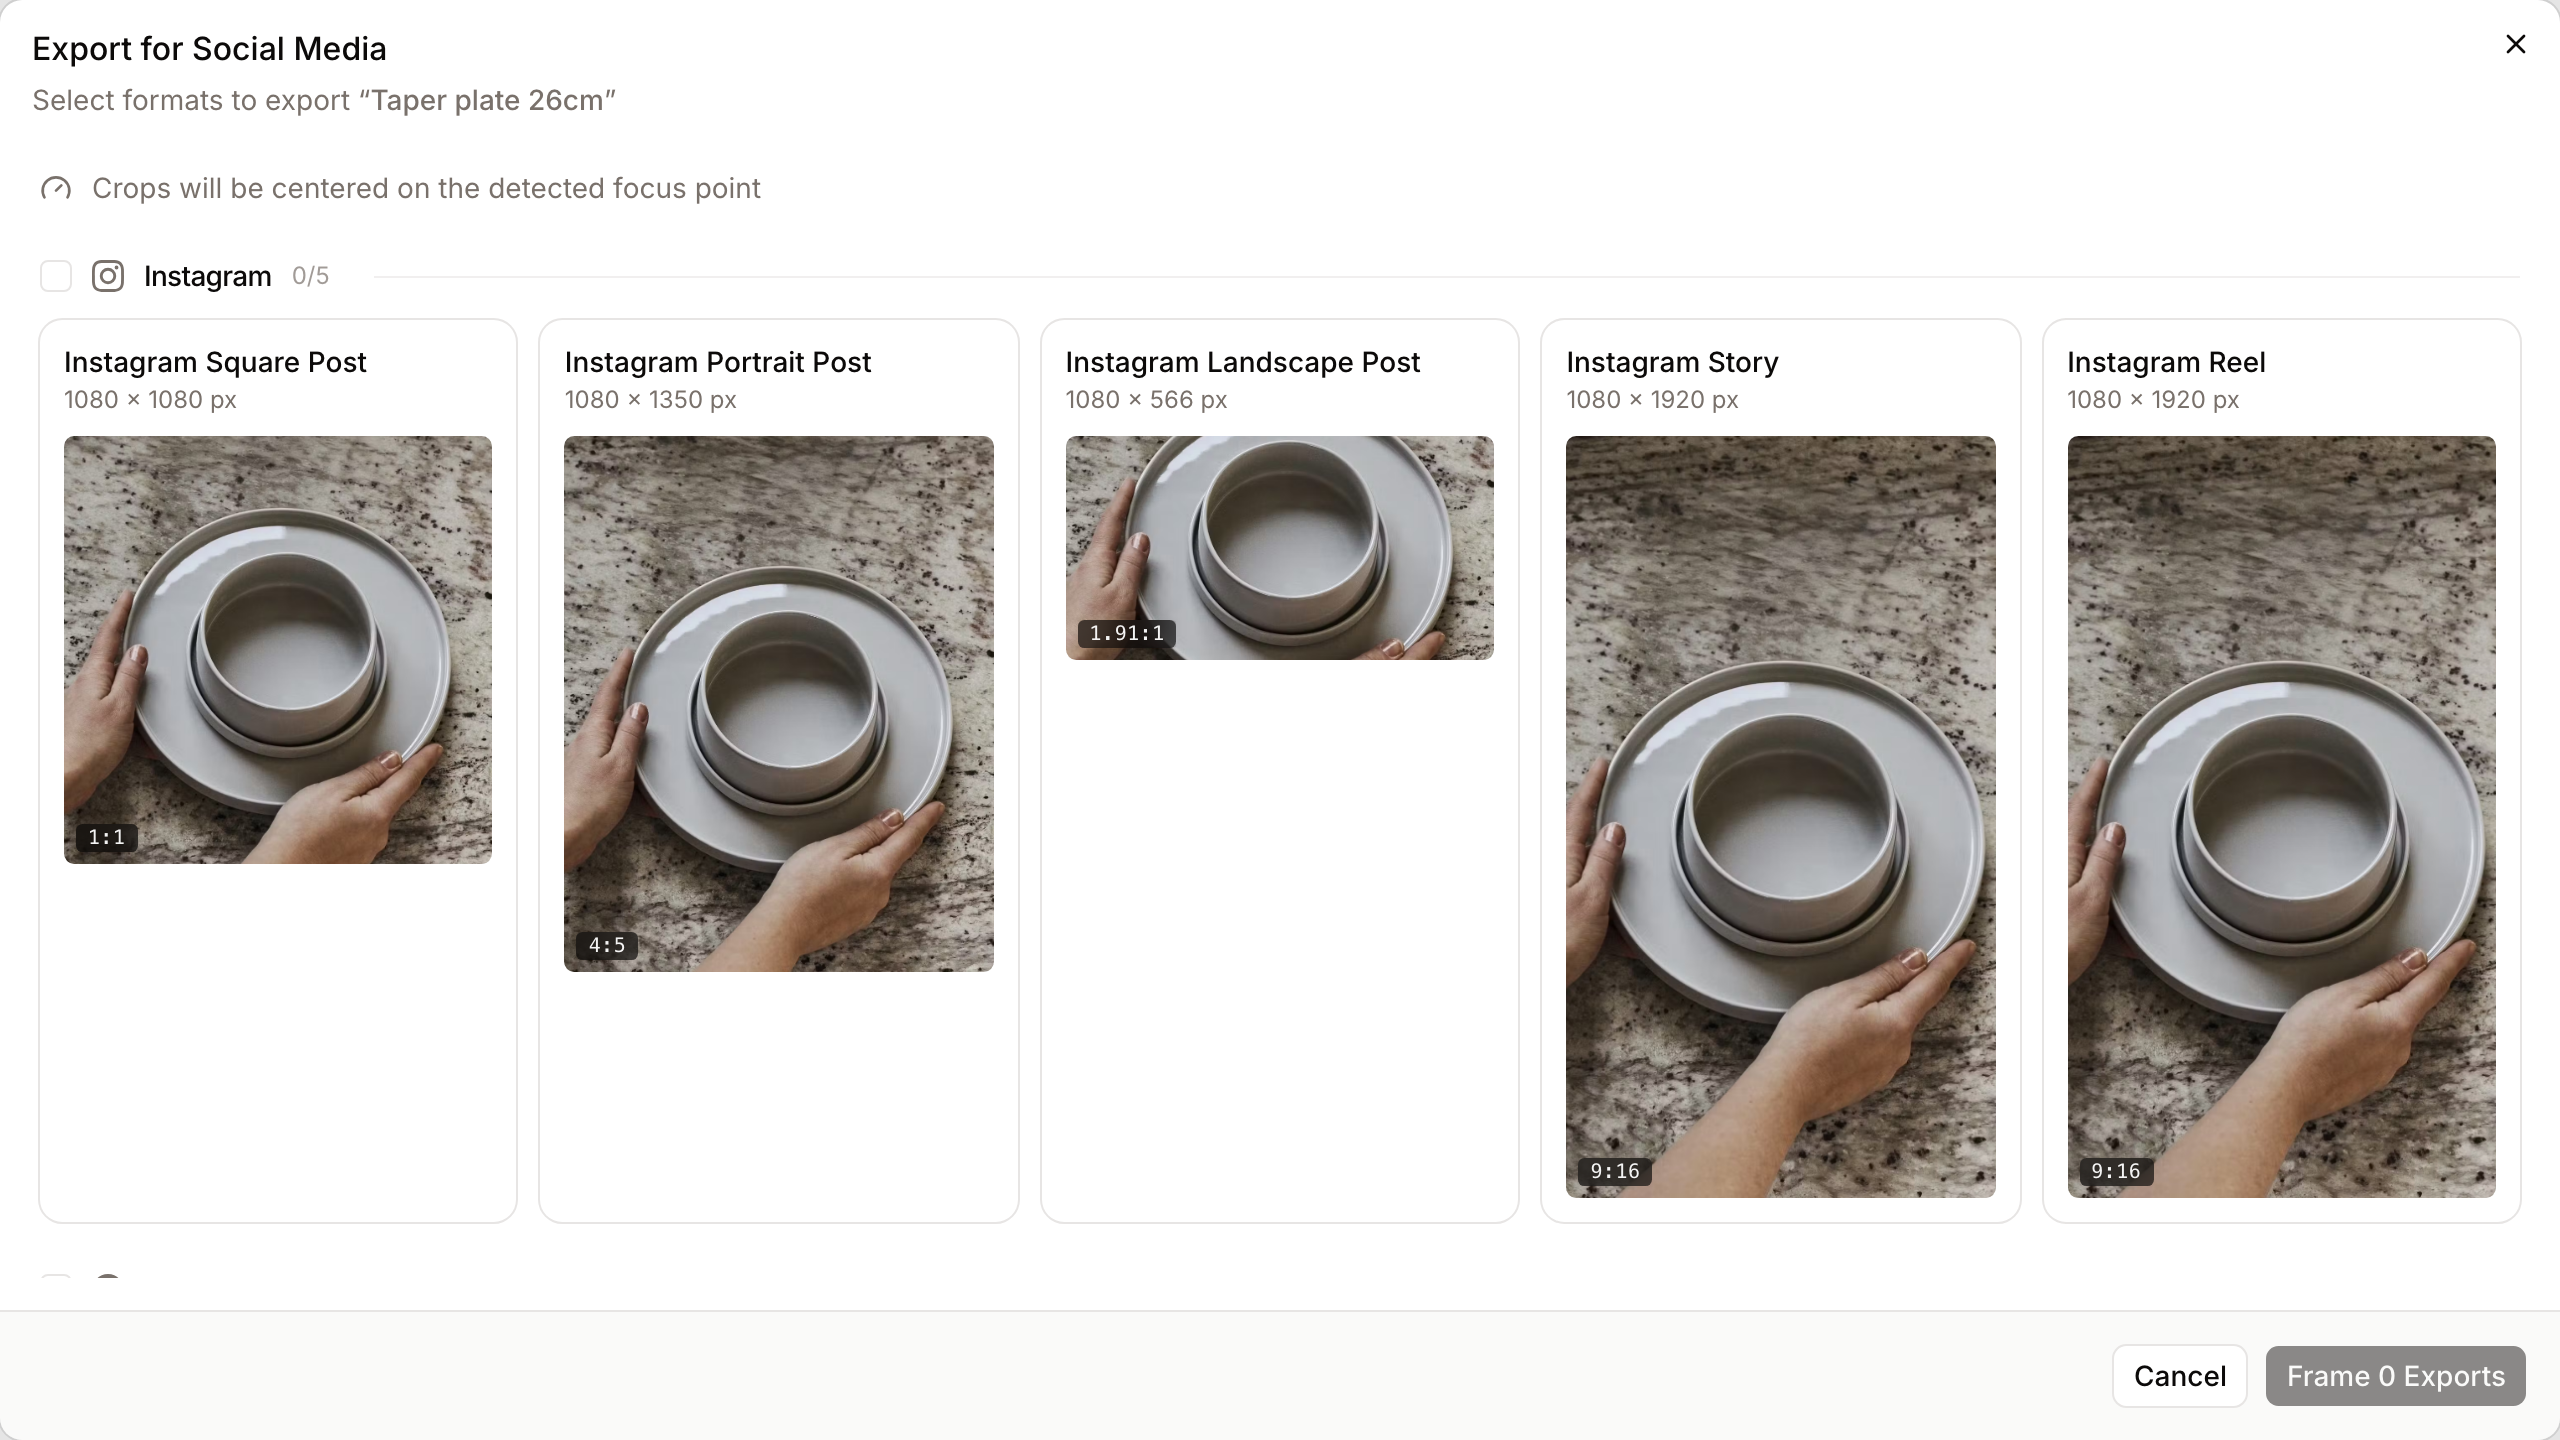
- What you'll see: The Export for Social Media dialog with formats grouped by platform, then Adjust Framing to position each crop.
Exports are saved as renderings on the asset. The full walkthrough is in Renderings.
Rights & Usage Management
- Purpose: To ensure assets are used according to legal or brand guidelines.
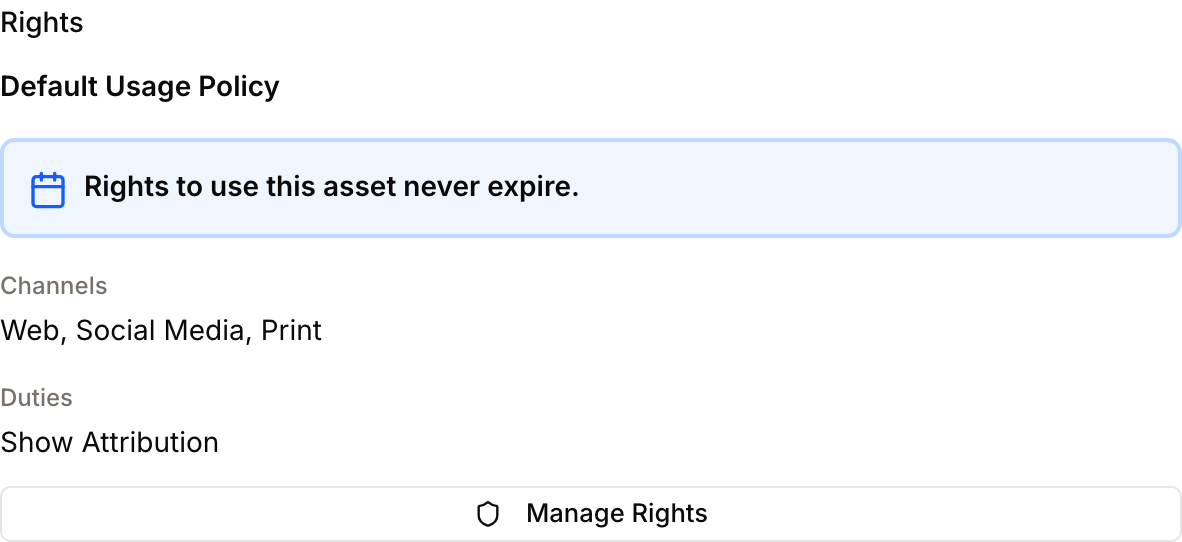
- Where to find it: The Rights section of the right-hand Form Panel.
- What you'll see: A summary of the asset's rights policy, including its expiration and usage restrictions.
How to use it:
- Click Manage Rights in the Rights section.
- Keep Attach Policy selected to apply a policy, or choose Detach Policy to remove the current one and fall back to the default policy.
- Select a policy in Rights Policy. Its default expiration is shown under the list.
- Optionally tick Override expiration date for these assets and pick 60 days, 1 to 3 years, Perpetual, or a custom date. Freedam then creates a copy of the policy with that expiration, titled for example "Standard Commercial Use (Expires 2027-03-01)".
- Click Attach Policy.
An asset has one rights policy: attaching a policy replaces the current one. You need the Assign and manage rights policies on assets and Edit metadata fields on assets permissions; you do not need the permission to create rights policies, the list shows every active policy. To change many assets at once, select them in the Gallery and click Rights in the selection bar.
When you detach a policy from several assets, only the assets that carry it are changed, including assets that carry one of its copies with an overridden expiration. The confirmation message counts the assets that were detached and, separately, the ones that did not have the policy.
Template Generation
- Purpose: To place the asset into brand templates, such as banners and social cards.
- Where to find it: Click Apply template in the floating action bar.
- What you'll see: The Generate from Template dialog, with templates and template sets.
Results are drafts that are deleted after 24 hours unless you save or download them. The full walkthrough is in Template Generation.
Translating Multilingual Fields
- Purpose: To fill a field's other languages from the text in the main language.
- Where to find it: In edit mode, on text and vocabulary fields marked as multilingual. Each language has its own tab, with the workspace's main language first.
- What you'll see: A translate icon in the language tabs, and a translate button inside each other language's input.
How to use it:
- Type the text in the main language tab.
- When you leave the field, Freedam translates it into the other languages automatically. You can also click the translate icon in the tabs, or press Enter in a single-line field (Cmd/Ctrl+Enter in a multi-line field), to fill only the empty languages.
- Languages that were empty are filled straight away.
- Languages that already have text are not overwritten. They turn amber with the suggested translation; click into one and choose Replace with Translation or Keep Current.
- Review the translations, then save the asset.
Translations use the AI model your administrator chose, and follow the workspace Glossary. If the service is unavailable, you can still type translations by hand.
- Freedam translates into as many workspace languages as you have configured, a few at a time.
- A language automatic translation does not support is skipped, and a message names it so you can fill it in by hand. The other languages are still translated.
- If translation is not configured, or you have sent too many requests in a short time, a message says so instead of a generic error.
Complete Workflows
Workflow: Updating an Asset Version
- Goal: Replace an outdated file with a new version while keeping all metadata intact.
- Prerequisites: You need the Replace asset binary with a new version permission.
Steps:
- Open More ▾ in the floating action bar and choose New Version (or click New Version in the Version History section).
- Drag and drop your new file into the upload zone or click to browse.
- In Version note, type a brief description of what changed (e.g., "Updated logo for 2024"), up to 255 characters.
- Click Upload Version.
- Expected result: The dialog shows Processing… and closes. The new file is checked and processed in the background, so the preview updates after a short while. In Version History the new version sits at the top, marked Current, with your name and note; the previous file appears just below it.
Workflow: Requesting Download Access
- Goal: Obtain permission to download an asset that is currently restricted.
- Prerequisites: The asset must be configured with a request workflow.
Steps:
- Click the Request Access button (lock icon) where the Download button usually appears.
- In the Reason for Request field, type at least 10 characters explaining your need for the asset.
- Click Submit Request.
- Expected result: A success message appears. You will receive an email once an administrator approves or denies your request.
Workflow: Analyzing Search Trends
- Goal: Understand how users are discovering a specific asset.
- Prerequisites: Analytics feature must be enabled on your plan.
Steps:
- Open More ▾ in the floating action bar and choose Analytics.
- Select a timeframe from the Select period dropdown (e.g., "Last 30 days").
- Scroll to the Search Terms card.
- Review the list of terms and the number of searches for each.
- Expected result: You see a list of keywords or filters users applied to find this asset, helping you refine your metadata strategy.
Actions available on the asset
From the floating action bar and surrounding panels you can:
- Download the original file - gets the exact file that was uploaded. The Download dialog lets you pick the size, copy a live CDN URL instead of saving to disk, and capture any required usage details before the file is delivered.
- Download a rendition - grab a specific pre-generated size or format (for example, a web-friendly preview or a thumbnail).
- Generate a social-media export - produce cropped variants sized for popular platforms (Instagram, Facebook, LinkedIn and more). Exports are kept as renderings, and exporting the same format with the same framing again reuses the existing one. See Renderings.
- View and manage versions - see every version with its author and note, download one, upload a new version, or restore an earlier version as the current file.
- Name the people in a photo - on images where faces were detected, the People panel lets you name each face, identify the same person in similar photos, or remove a wrong name. See Faces and People.
- Bookmark the asset - a one-click toggle that adds the asset to your personal bookmarks so you can find it again on the Bookmarks page in the main navigation.
- Share the asset - share it from its card in the Gallery, or add it to a collection and share the collection. Videos also have an Embed button under the player, see Video Posters and Subtitles. See Share Links.
- Comment on the asset - open the Comments panel from the top bar to leave notes for your team, reply to existing threads, or @mention a teammate to notify them directly. See Comments.
- Link related assets, find look-alikes, duplicate the asset or change its class - see Linked and Related Assets.
- Attach supporting files such as releases and contracts - see Attachments.
- Contact the asset owner - click Contact next to the owner's name in User Information, write a message of 10 to 2,000 characters, and click Send Message. The owner receives it by email, with your address to reply to. You can send up to 10 messages an hour. An asset whose owner account no longer exists cannot be contacted, and you are told so.
- Upload renderings and apply templates - add crops, translations and edits next to the asset, or generate branded images. See Renderings and Template Generation.
Which actions you actually see depends on your workspace role, your plan, and the asset's rights policy. If an action is hidden, check with your administrator.
What happens behind the scenes
- Focus-point detection runs automatically after upload. Once the system has generated previews for a new image or document, an AI vision step analyses the preview and sets an optimal focus point so that thumbnails and social-media crops stay centred on the important part of the picture. This works for photos and for Adobe PDFs, vector files, and office documents that are rasterised during ingestion. You don't need to trigger anything - it simply happens in the background during the minute or two after upload.
- Face detection also runs automatically after upload for image assets, whenever the face-recognition service is available to your workspace. Detected faces are stored with the asset so face-tagging can be used later, even if the face-search feature isn't part of your current plan.
- Restoring a previous version asks you to confirm, then snapshots the current file into the version history (so you can undo the restore) and promotes the older file to become the live version. The restored file gets its own entry, marked "Restored from version N". The asset keeps its metadata, rights, collections, and share links - only the underlying file and its preview are replaced. The system then re-runs AI enrichment, preview generation, and focus-point detection on the restored file in the background, so give it a moment before everything is back to normal.
- Viewing an asset is recorded. Each time you open the detail page, a view event is logged toward your personal analytics and toward the asset's performance statistics. If you clicked through from a search, the system links the view back to that search so administrators can tell which searches led to which assets.
- Analytics calls respect a time range. The period dropdown in the Analytics dialog accepts values between 1 and 365 days; anything outside that range falls back to 30 days. Figures are cached and refresh every few minutes.
Tips and Best Practices
- Keyboard Shortcuts: Use
ArrowLeftandArrowRightto navigate between assets in your current search results without leaving the detail view. PressEto quickly enter edit mode,Ctrl/Cmd + Sto save while editing,Ctrl/Cmd + Zto open the zoom viewer, andEscapeto close the page and return to your previous view. - GAID Copy: Click the small copy icon next to the GAID in the header to quickly grab the unique ID for support requests or external linking.
- Inline Editing: You can click directly on the asset title in the header to rename it without entering full "Edit" mode.
- Version restores are reversible: Because the system snapshots the current file before restoring, you can always walk the asset back to where it was by restoring the version listed just below Current.
Troubleshooting
Issue: "Preview Not Available" message
- Symptoms: The main preview area shows a generic file icon instead of the image or video.
- Cause: The system is still processing the file, or the file format is not supported for web preview.
- Fix: Wait 60 seconds and click the Reload icon in the preview panel.
- Prevention: Ensure files are uploaded in standard formats (JPG, PNG, MP4, etc.).
Issue: Cannot save metadata changes
- Symptoms: The "Save" button is disabled or an error message appears after clicking.
- Cause: One or more required fields are empty, or a field contains invalid data (e.g., text in a number field).
- Fix: Look for red highlighting or the "Please fix the following errors" summary at the bottom of the form. Fill in all fields marked with a red asterisk (*).
Issue: "Analytics requires an upgraded plan"
- Symptoms: A dialog appears stating the feature is blocked.
- Cause: Your current subscription level does not include advanced engagement tracking.
- Fix: Contact your administrator to discuss upgrading your Freedam plan.
Issue: Restore button says "Version file is no longer available"
- Symptoms: Clicking Restore on an old version returns an error instead of rolling back.
- Cause: The underlying file for that historical version has been removed from storage (for example, by a retention cleanup).
- Fix: Restore a different version from the list, or ask an administrator whether the file can be recovered from backups.
Issue: Focus point or face tags haven't appeared yet
- Symptoms: A newly uploaded image still shows default centre cropping, or no faces are listed.
- Cause: Focus-point detection and face detection run in the background shortly after previews are generated.
- Fix: Wait a minute or two and reload the page; both processes typically finish within the first few minutes after upload. If nothing appears after several minutes, ask an administrator to check the processing queues.