
Watermarks
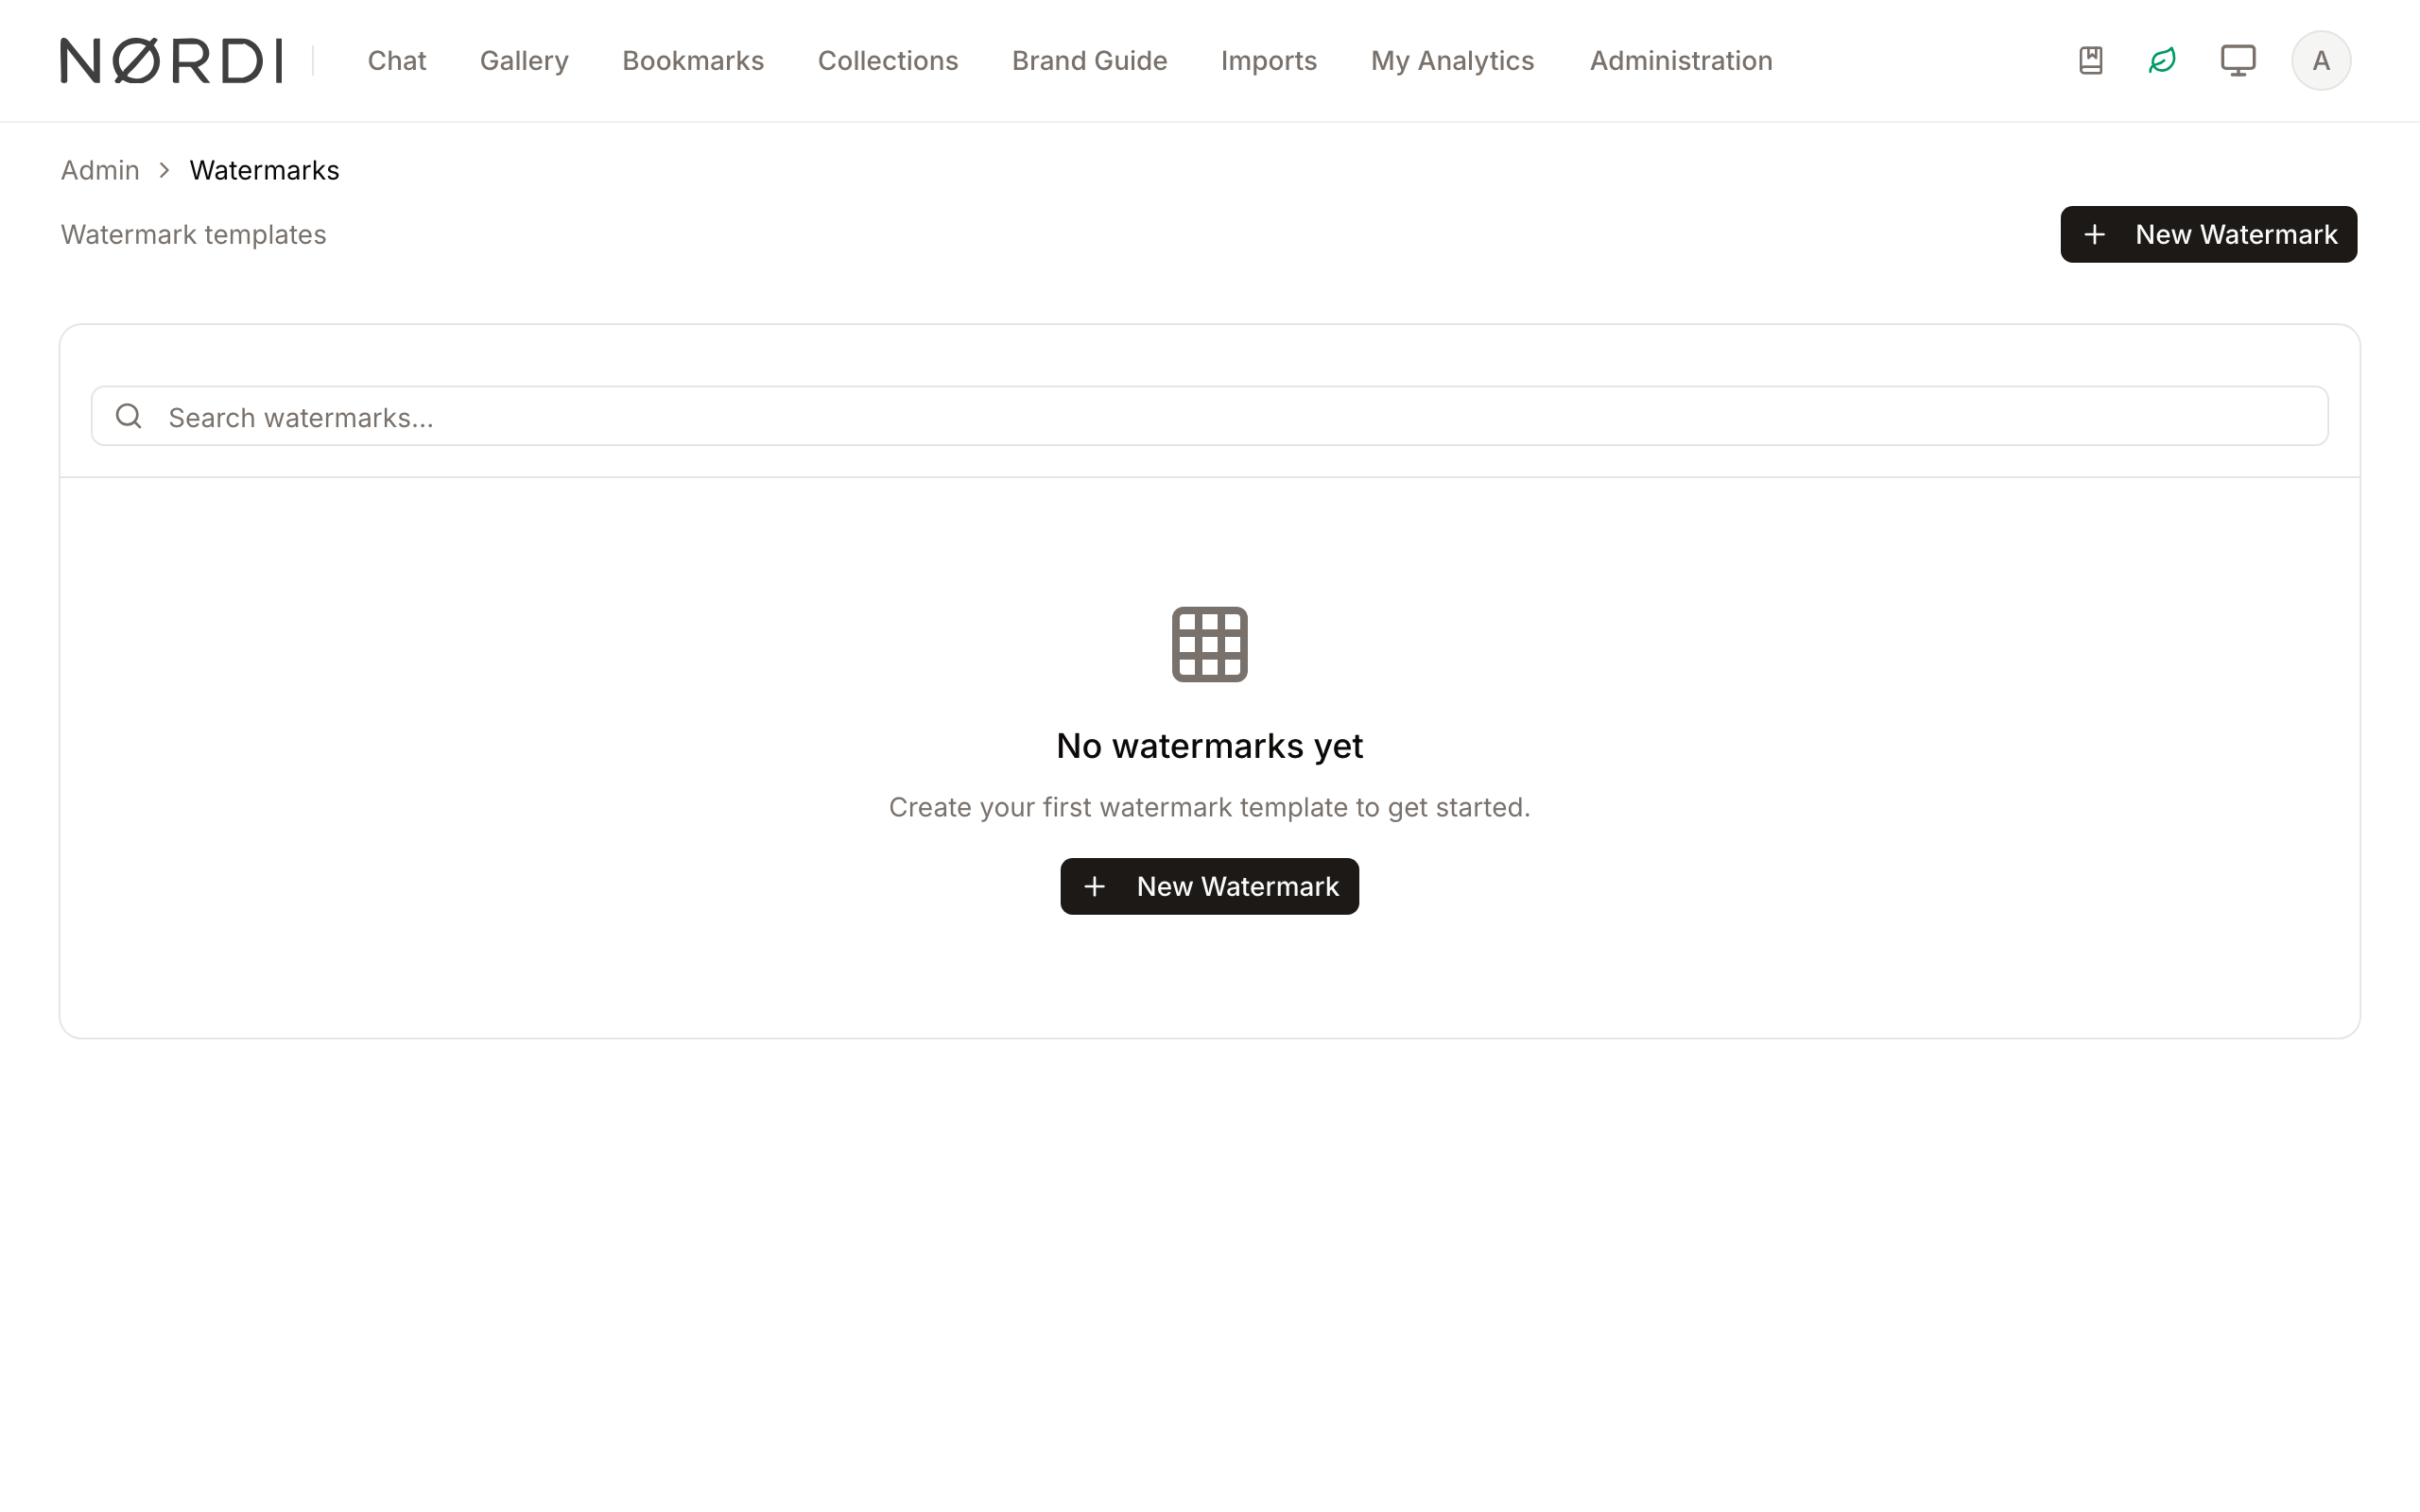
The Watermarks feature allows administrators to design and manage visual overlays for digital assets. These watermarks ensure brand consistency and asset protection by applying logos, copyright notices, or dynamic metadata directly onto images.
With the integrated designer, you can combine static images with dynamic text that automatically pulls information from the asset or the user viewing it. This allows for personalized or context-aware branding that updates in real-time.
Page Overview
- Purpose: Centralize the creation and configuration of visual watermarks.
- When to use it: Use this page when you need to establish new branding rules, update existing copyright overlays, or manage how watermarks scale across different image sizes.
- What you can do here:
- Create new watermarks using a drag-and-drop designer.
- Search and filter existing watermark configurations.
- Duplicate existing designs to quickly create variations.
- Configure tiling, opacity, and blend modes.
- Insert dynamic placeholders for automated text.
Page Layout
- Top bar: Contains the page title, a description of the feature, and the New Watermark button to start a new design.
- Main area: Displays a searchable table of all saved watermarks, showing their name, unique code, configuration summary (like tiling or scaling), and the last update timestamp.
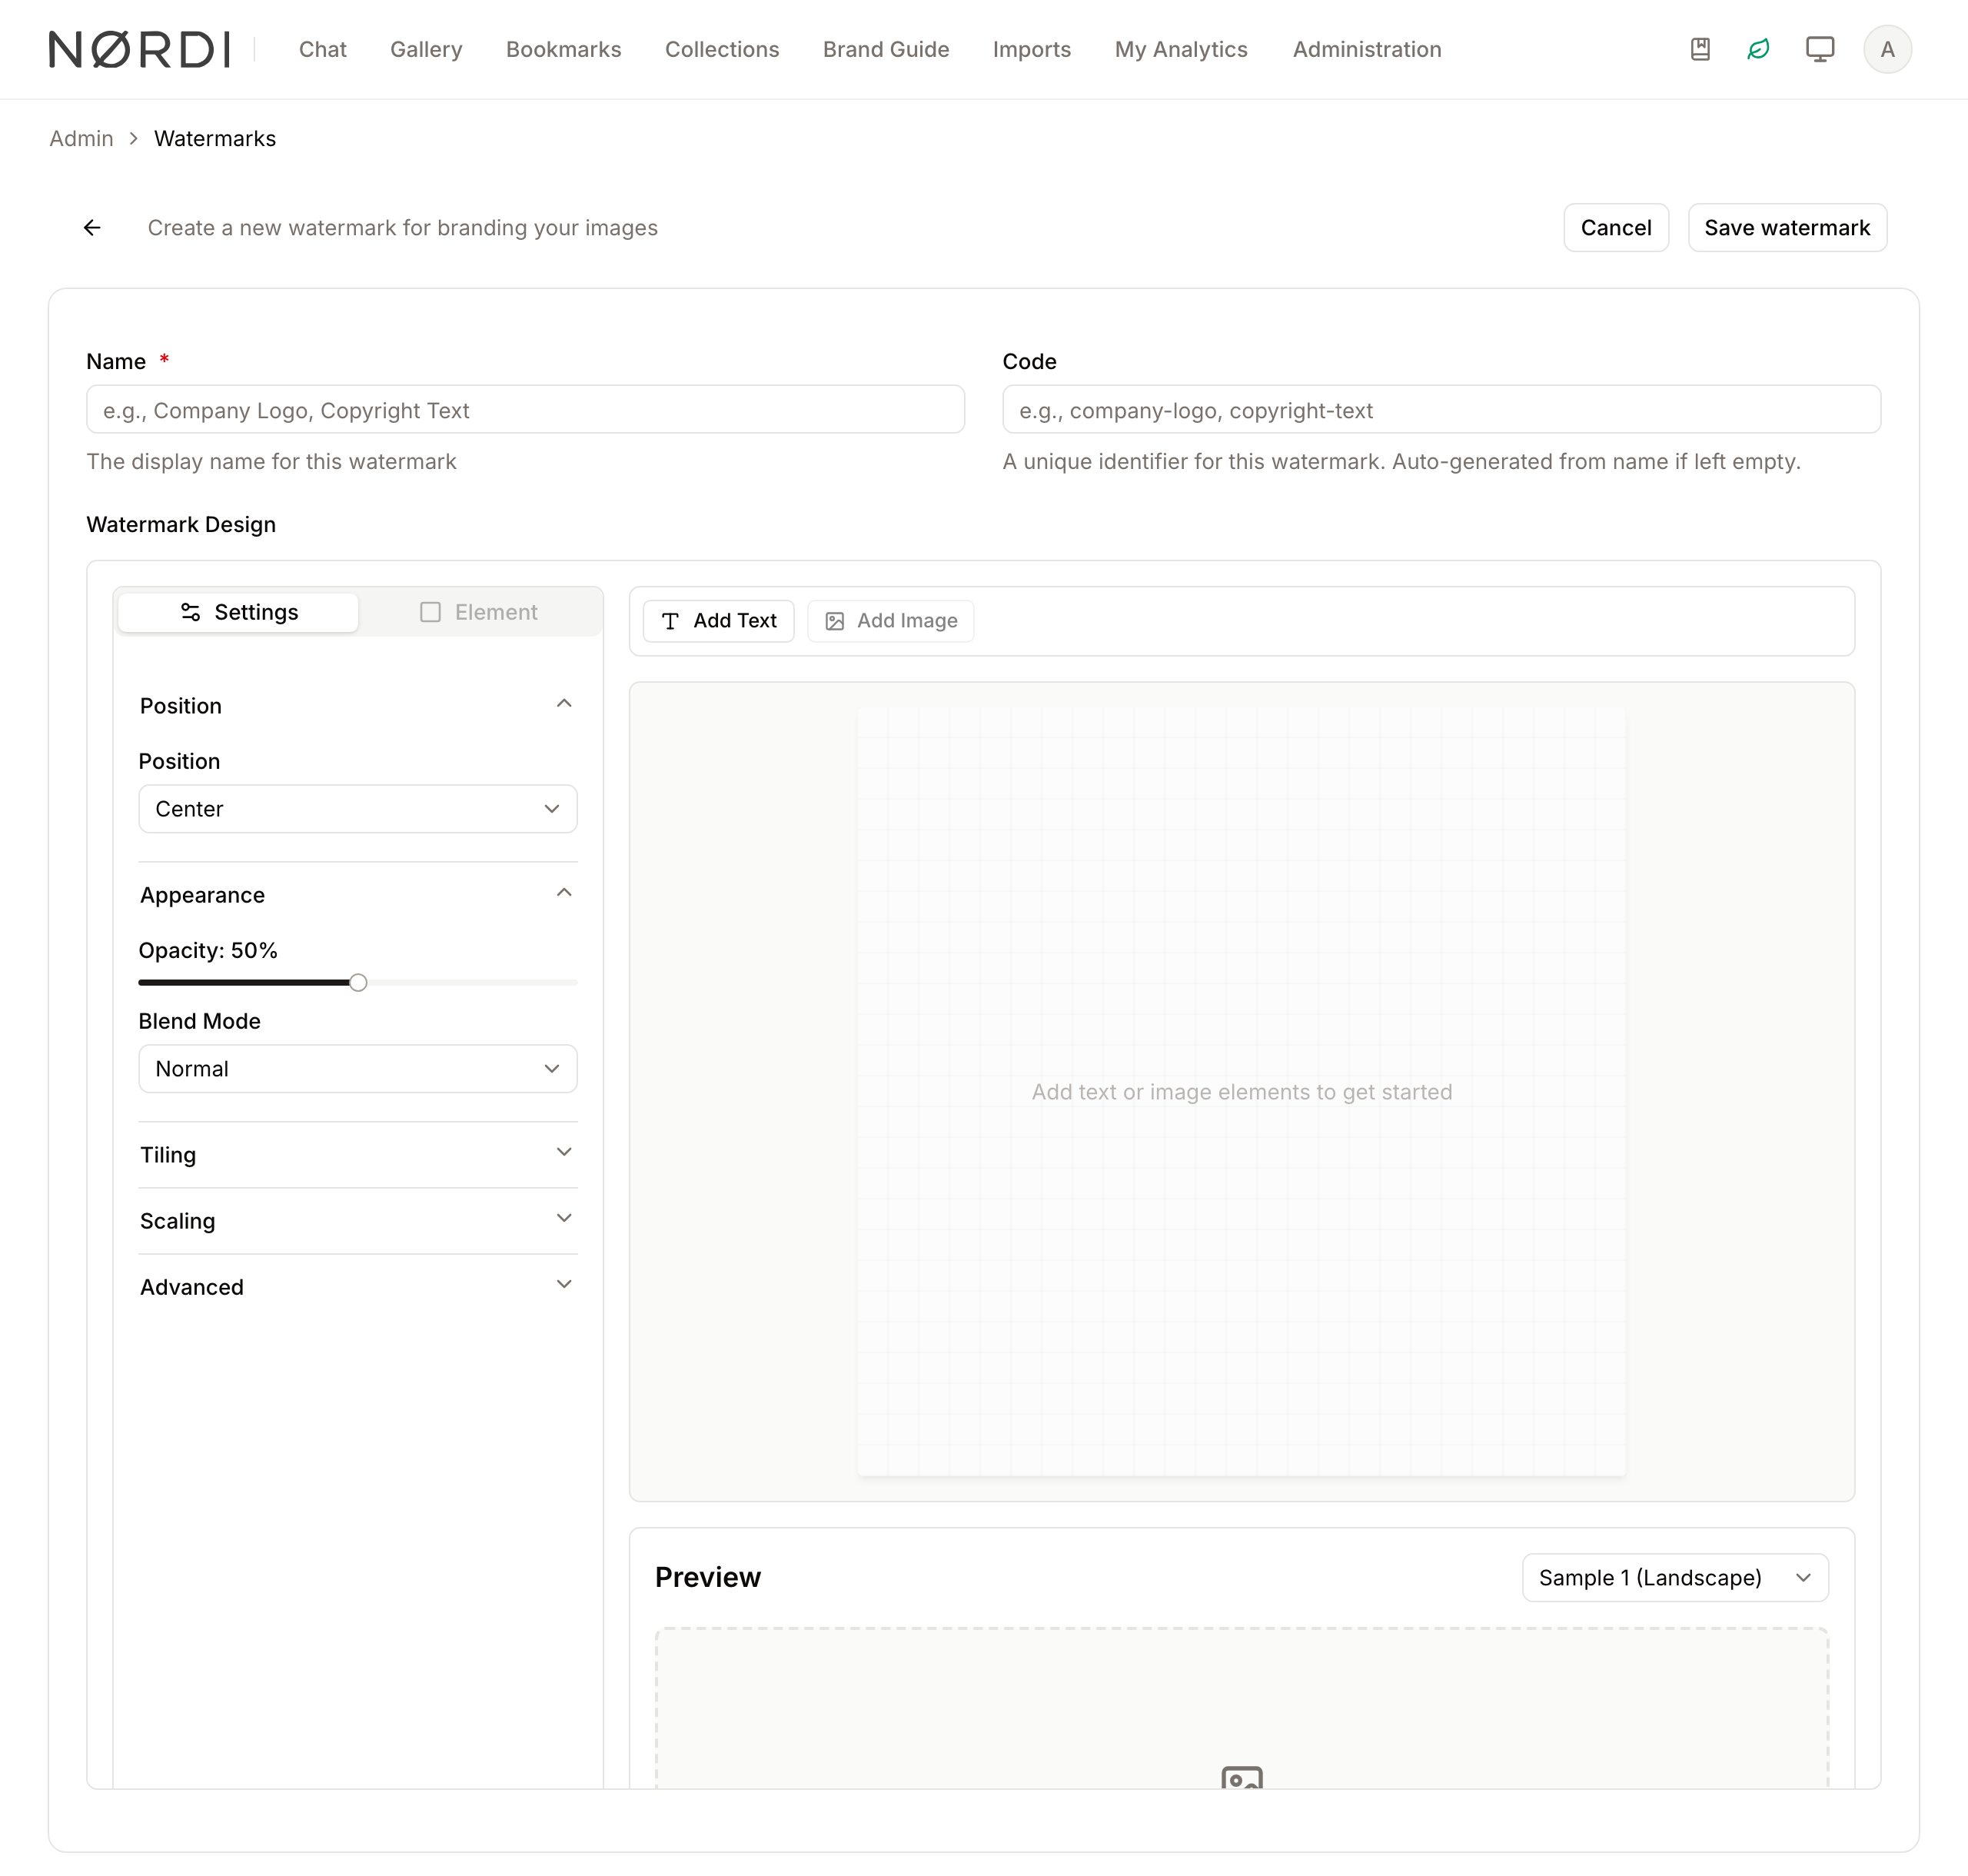
- Designer Workspace: When creating or editing, this region provides a canvas for positioning elements and a sidebar for adjusting specific settings.
- Preview Panel: Located below the designer, this area shows how your watermark will look on various sample image orientations (Landscape, Portrait, Square, Banner).
Main Features
Watermark Designer
- What it's for: A visual canvas to arrange text and image elements.
- Typical use: Dragging a company logo to the corner and adding a text element for a copyright year.
- Result: A saved design that can be applied to any asset in the system.
Dynamic Content Placeholders
- What it's for: Inserting "smart" text that changes based on the asset or user.
- Typical use: Using
{{asset.title}}to show the filename or{{user.name}}to track who downloaded the file. - Result: The watermark text automatically updates for every individual asset it is applied to.
Responsive Sizing
- What it's for: Automatically adjusting the watermark size based on the target image dimensions.
- Typical use: Ensuring a watermark doesn't look tiny on a 4K image or huge on a small thumbnail.
- Result: The system intelligently scales the watermark between 10% and 25% of the image size depending on total pixels.
Tiling and Patterns
- What it's for: Repeating the watermark across the entire image.
- Typical use: Creating a "Grid" or "Diagonal" pattern to prevent unauthorized use of the entire image area.
- Result: The watermark repeats with custom spacing and rotation across the asset.
Detailed Feature Documentation
Creating a Watermark
- Purpose: To define a new branding overlay from scratch.
- Where to find it: In the Top bar, click the New Watermark button.
- What you'll see: A form to enter a Name and Code, followed by the Watermark Designer workspace.
How to use it:
- Enter a descriptive name in the Name field (e.g., "Standard Copyright").
- Use the Add Text or Add Image buttons in the toolbar to place elements on the canvas.
- Select an element on the canvas to open its specific properties in the Element tab.
- Click Save watermark in the top header to finalize.
Using Placeholders
- Purpose: To automate text content within a watermark.
- Where to find it: Select a text element on the designer canvas, then look for the Insert Placeholder button in the Element tab.
- What you'll see: A categorized list of available data points like Asset Title, User Email, and Current Date.
How to use it:
- Click on a text element you have added to the canvas.
- In the Text Content area of the sidebar, click Insert Placeholder.
- Select a category (e.g., Date & Time) and click a specific placeholder like Current Date.
- The code (e.g.,
{{date}}) will appear in your text box and render as the actual date in the preview.
Configuring Global Settings
- Purpose: To control how the entire watermark behaves on an image.
- Where to find it: In the designer sidebar, under the Settings tab.
- What you'll see: Accordion sections for Position, Appearance, Tiling, Scaling, and Advanced.
How to use it:
- Open the Position section to choose a corner or center alignment.
- Adjust the Opacity slider in the Appearance section to make the watermark more or less transparent.
- Select a Blend Mode (like Multiply or Overlay) to change how the watermark interacts with the image colors.
- Toggle Enable Tiling if you want the design to repeat in a pattern.
Complete Workflows
Workflow: Creating a Tiled Security Watermark
- Goal: Create a watermark that repeats across the whole image to prevent screenshots.
- Prerequisites: Access to the Administration panel.
Steps:
- Click New Watermark on the Watermarks index page.
- Type "Security Grid" in the Name field.
- Click Add Text and type "CONFIDENTIAL" in the Text Content field.
- Go to the Settings tab in the sidebar and open the Tiling section.
- Toggle Enable Tiling to "On".
- Set Pattern to "Diagonal" and adjust Spacing to "150px".
- Click Save watermark.
- Expected result: The preview panel will show the word "CONFIDENTIAL" repeating diagonally across the sample images.
Workflow: Adding a Dynamic User-Specific Watermark
- Goal: Create a watermark that shows the name of the user who is viewing the asset.
- Prerequisites: Basic understanding of placeholders.
Steps:
- Edit an existing watermark or create a new one.
- Click Add Text in the designer toolbar.
- In the Element tab, click Insert Placeholder.
- Select User Name from the User Information category.
- Add static text around it, such as: "Viewed by:
{{user.name}}". - Adjust the Font Size and Color to ensure it is legible.
- Click Save watermark.
- Expected result: When the watermark is applied, it will display the actual name of the logged-in user.
Full list of placeholders
Placeholders are written with double curly brackets - for example {{asset.title}} - and are replaced with real values when the watermark is applied. The following variables are available:
- Asset information:
{{asset.name}}(original filename),{{asset.title}},{{asset.description}},{{asset.type}}(image, video, document, etc.),{{asset.file_size}},{{asset.dimensions}}(width × height),{{asset.created_at}},{{asset.updated_at}},{{asset.mime_type}},{{asset.extension}}, and{{asset.gaid}}(the Global Asset ID shown in the asset details panel). - User information (the person currently viewing or downloading the file):
{{user.name}},{{user.email}},{{user.organization}},{{user.role}}, and{{user.id}}. - Date and time:
{{date}},{{time}},{{datetime}}, plus formatted variants like{{date:Y-m-d}}or{{time:H:i}}for custom layouts. - System and application:
{{app.name}},{{app.version}},{{app.environment}},{{watermark.name}},{{watermark.code}},{{watermark.id}}. - Custom metadata:
{{field:your_field_name}}inserts the value of any custom field defined on the asset. - Conditional text: wrap content in
{{if:condition}}...{{endif}}- with an optional{{else}}branch - so the same design can render differently for images vs. videos, for example{{if:asset.type==image}}Image Asset{{else}}Other Asset{{endif}}.
If a placeholder is misspelled or the referenced data is missing, the system logs a warning and leaves the original text in place rather than breaking the design.
How sizing and scaling work
When Scale Mode is set to "Adaptive" (the default), the system chooses a watermark size based on how big the target image is, not a fixed pixel amount. The rules are:
- Under 0.5 megapixels - 25% of the image
- 0.5 to 1 megapixel - 20%
- 1 to 2 megapixels - 15%
- 2 to 5 megapixels - 12%
- Over 5 megapixels - 10%
This is why a watermark looks proportional whether it is applied to a small thumbnail or a 50-megapixel RAW. For tiled watermarks, a floor of 15% of the image size is enforced so the pattern remains legible even on small previews. New watermarks start at 50% opacity, centered, with tiling disabled and the "Normal" blend mode - change any of these in the Settings tab.
What happens behind the scenes
Watermarks are not "baked in" when you save a design - they are rendered on demand, at the moment an asset is previewed or downloaded, using the current viewer's identity and the asset's own metadata. That is why every placeholder (the person's name, the asset title, today's date) is always up to date, and why the same watermark can personalise a million different downloads without you creating a million files.
Designs that contain dynamic placeholders are re-rendered for each viewer, while completely static designs are cached for speed. When you edit or save a watermark, any cached copies are invalidated automatically so the next preview or download reflects your changes in real time.
The designer auto-saves uploaded images to a temporary system watermark slot on the first upload, then attaches them to your real watermark once you click Save watermark. If you navigate away without saving, those orphaned images are cleaned up on the next save so the library stays tidy.
Limits and guardrails
- Watermark images accept JPG, PNG, GIF, and WebP files up to 5 MB each.
- The watermark list displays 20 entries per page, and the search box matches on both the name and the code.
- Four sample canvases are available in the live preview: Landscape (1920×1080), Portrait (1080×1920), Square (1200×1200), and Banner (2400×600). Always step through each to make sure your design does not fall outside the frame.
- Duplicating a watermark clones its full design, settings, and uploaded images, and appends "(Copy)" to the name plus "-copy" to the code so the original stays untouched.
Who can use it
Only users whose role includes the Manage watermarks permission can create, edit, duplicate, or delete watermarks - this is usually limited to workspace administrators. Other users never see the Watermarks page, but they do see watermarks applied to the assets they download or share, based on the workspace's access and sharing rules. The Watermarks module itself is a premium feature, so the navigation link only appears on plans where it is included.
Tips and Best Practices
- Use Adaptive Scaling: For most use cases, keep Scale Mode set to "Adaptive". This ensures the watermark remains proportional whether the image is a small web preview or a high-resolution print file.
- Check the Placeholder Guide: Click the Placeholder Guide link in the text editor to see advanced options, such as conditional logic (e.g., only showing dimensions if the asset is a video).
- Test on All Samples: Always toggle between the Landscape, Portrait, and Square options in the Preview panel to ensure your watermark doesn't overlap critical areas in different orientations.
- Duplicate for Variations: Instead of starting from scratch, use the Duplicate action in the main table to create "Light" and "Dark" versions of the same logo watermark.
- Personalise downloads: Combining
{{user.name}}with{{date}}in a tiled pattern creates a traceable audit trail - every download carries the name of the person who took it and the day they took it.
Troubleshooting
Issue: Watermark elements are not appearing in the preview
- Symptoms: The preview panel shows the sample image but none of your text or logos.
- Cause: The opacity might be set to 0%, or elements are positioned outside the canvas boundaries.
- Fix:
- Check the Appearance tab and ensure Opacity is above 0%.
- Select the element in the Element tab and check the X and Y positions.
- Prevention: Use the Align tools in the toolbar to center elements if they get lost.
Issue: Placeholder text shows as literal code (e.g., "{{user.name}}")
- Symptoms: The watermark on the image literally says "{{user.name}}" instead of the person's name.
- Cause: Typo in the placeholder brackets or using a placeholder that doesn't exist.
- Fix:
- Ensure there are two curly brackets on each side:
{{and}}. - Use the Insert Placeholder button instead of typing manually to avoid spelling errors.
- Ensure there are two curly brackets on each side:
- Prevention: Always verify the placeholder in the Preview panel before saving.
Issue: Cannot upload an image for a new watermark
- Symptoms: The Add Image button is disabled or shows a tooltip.
- Cause: The watermark must be named and saved initially before the system can accept file uploads for specific elements.
- Fix:
- Enter a Name.
- Click Save watermark.
- Return to the designer to upload your image.
- Prevention: Follow the on-screen tooltip instructions which indicate that saving is required first.