
Gallery
The Gallery is the central hub of Freedam, providing a powerful interface to browse, search, and manage your entire digital asset library. It is designed for all users to find content quickly and for administrators to perform high-volume management tasks like bulk metadata updates and rights assignments.
You can use the Gallery to organize assets into collections, share files with external partners, and utilize AI-powered search tools to find specific images based on visual similarity or facial recognition.
Page Overview
- Purpose: To provide a searchable, manageable view of all digital assets in the system.
- When to use it: Use the Gallery when you need to find specific files, download assets in various formats, share content with others, or perform bulk updates to asset information.
- What you can do here:
- Search using natural language or advanced rule-based filters.
- Perform visual searches by uploading an image to find similar content.
- Select multiple assets to download, share, or move to collections.
- Edit metadata for hundreds of assets simultaneously using the Bulk Metadata Edit or Spreadsheet views.
- Bookmark important assets for quick access later.
- Monitor the real-time processing status of newly uploaded files.
Page Layout
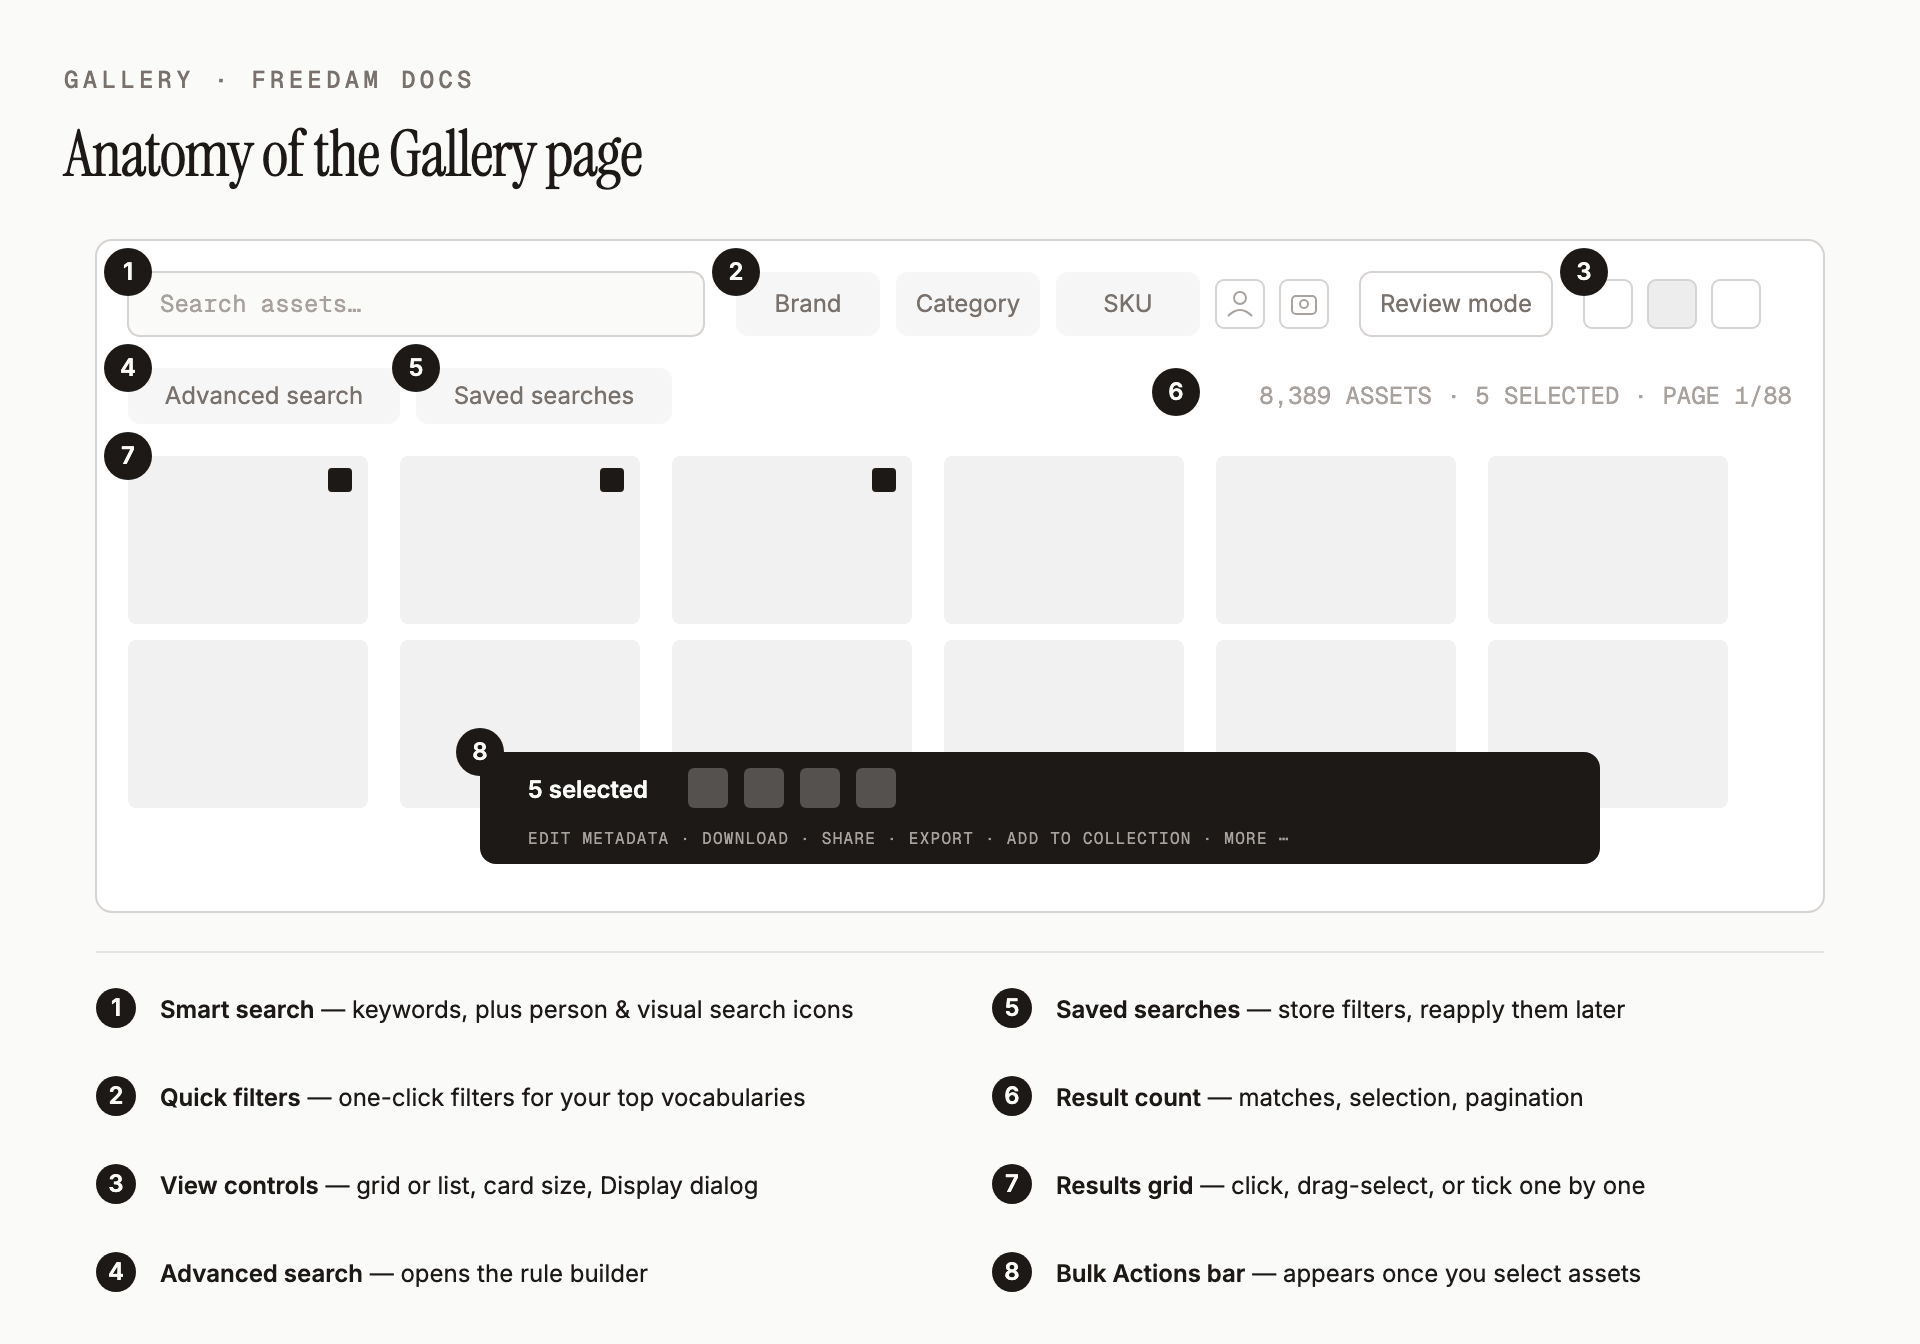
The diagram above maps each part of the page. In detail:
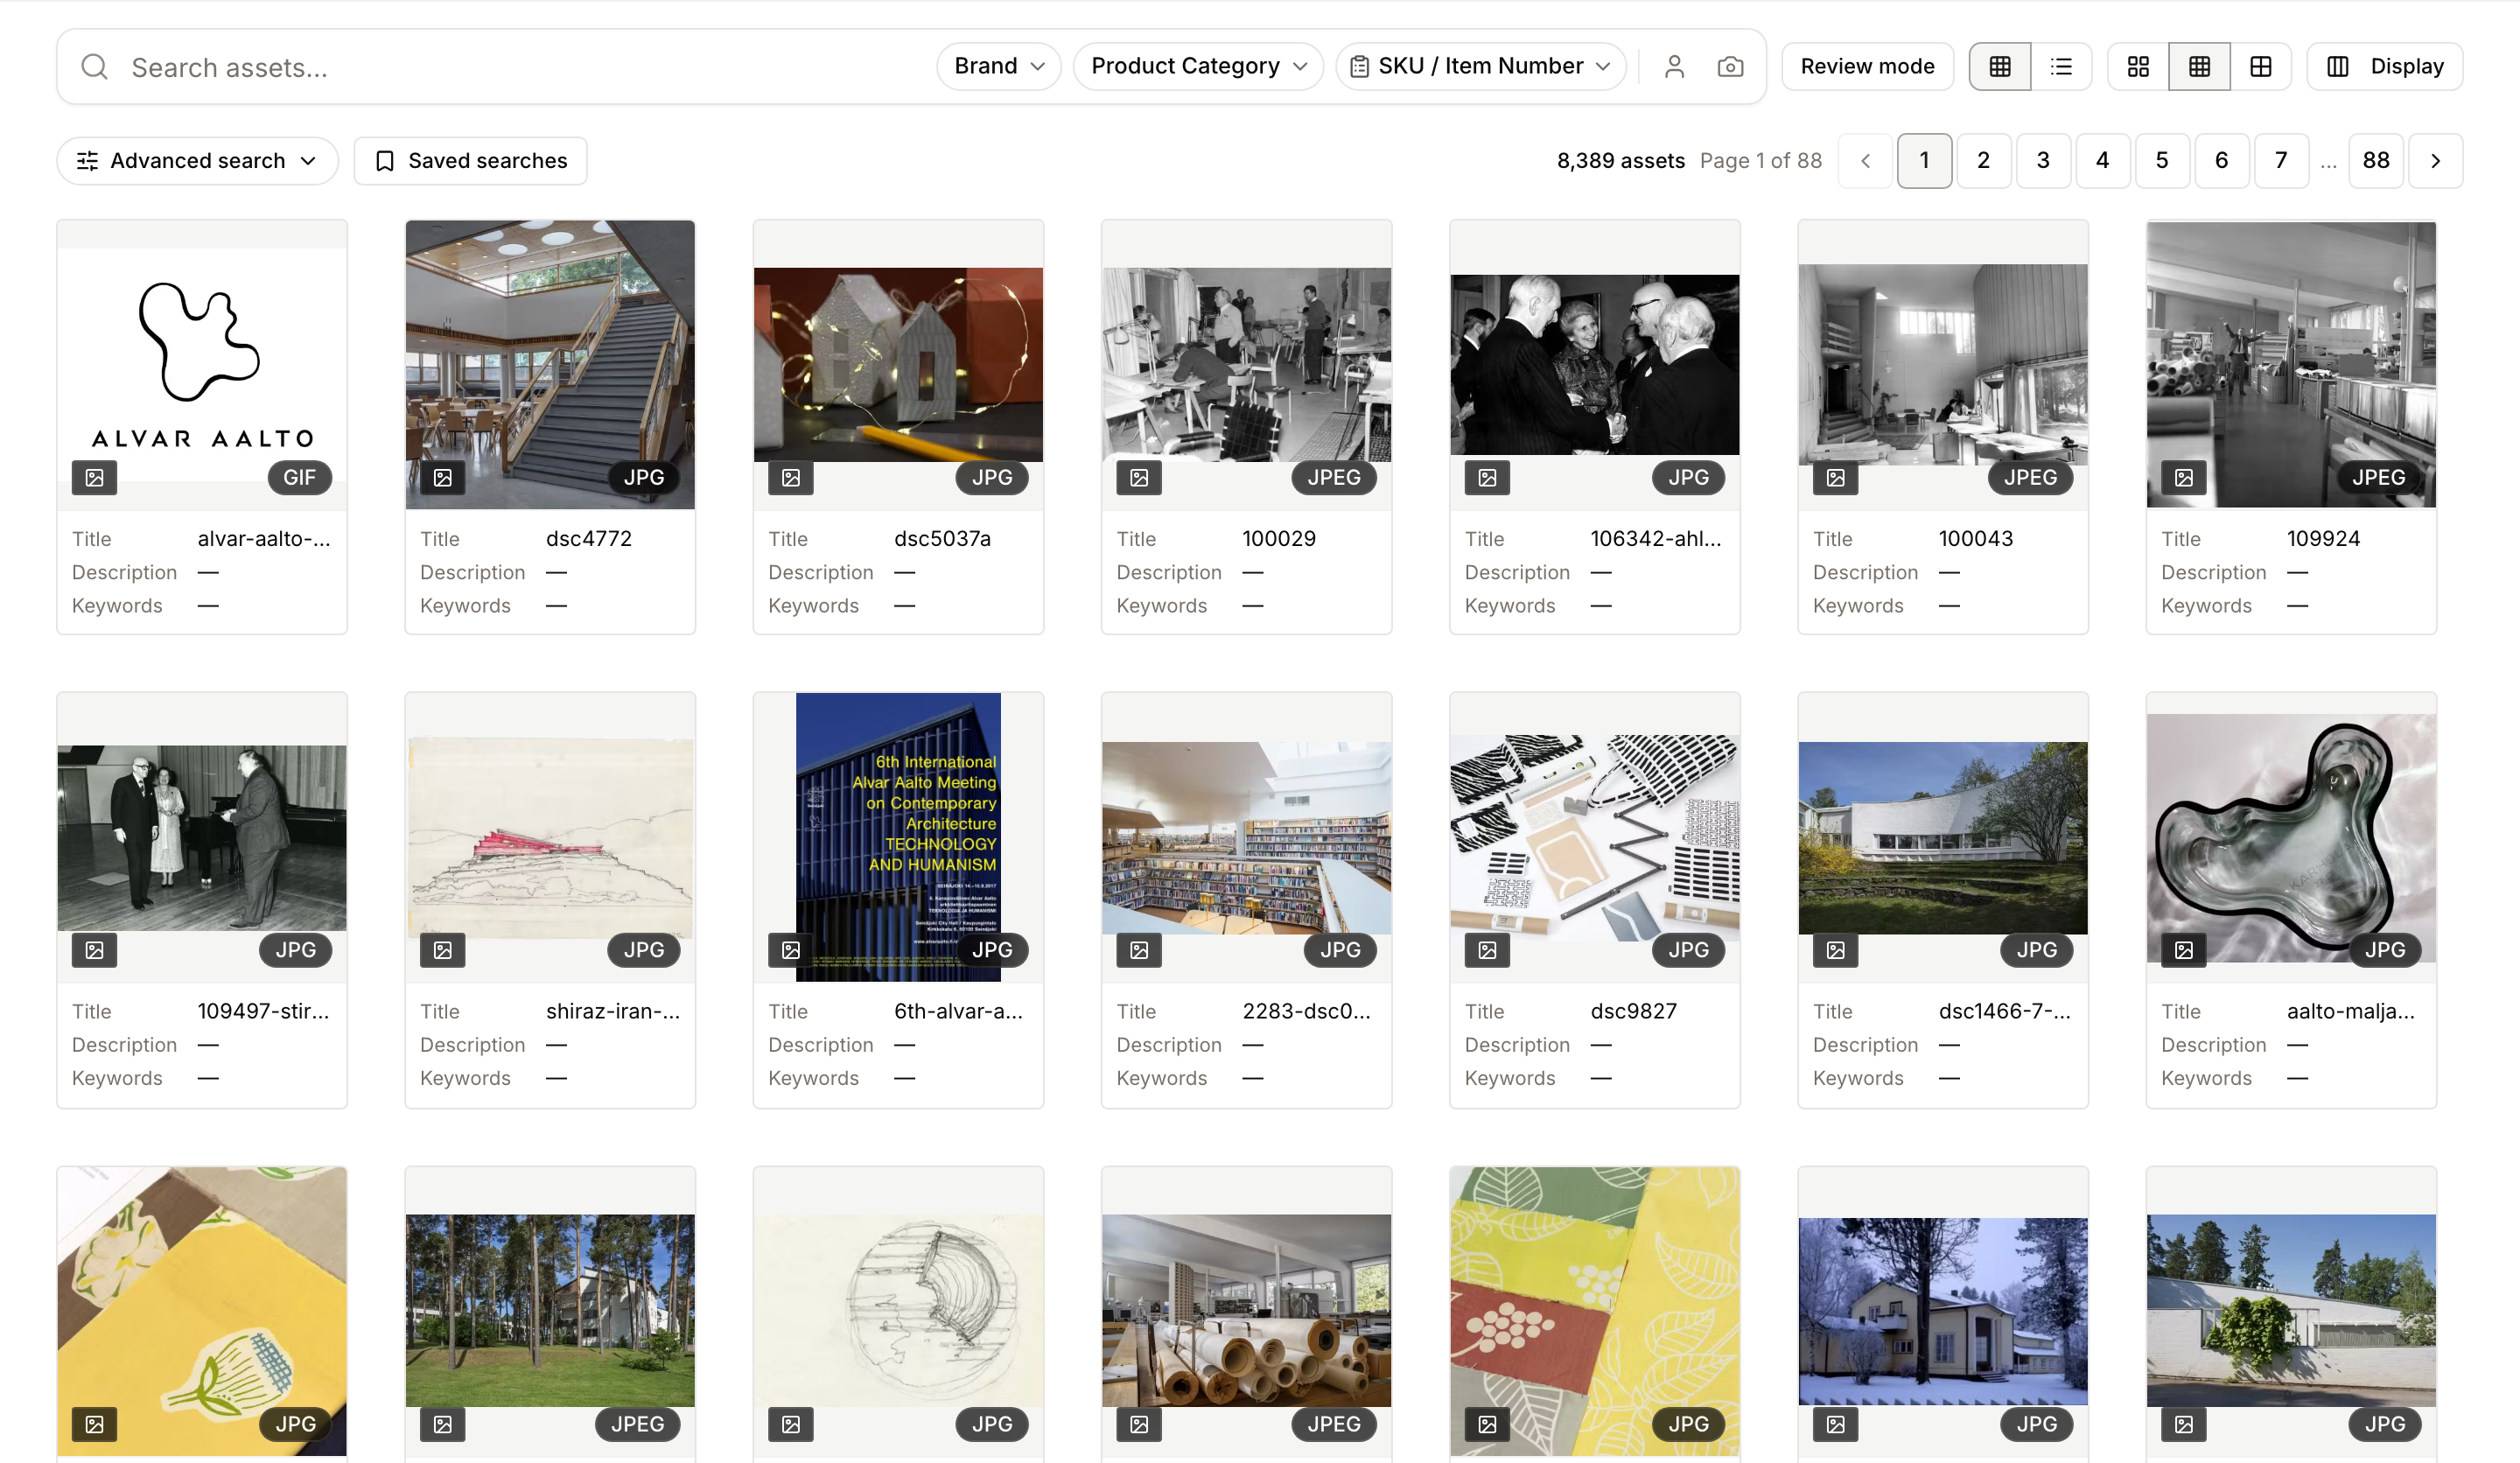
- Search row: The Smart Search field, with quick filters for your most-used vocabularies and two icons at its right end - person search (user icon) and visual search (camera icon). To the right of the field sit Review mode, the Grid/List toggle, the card-size toggle, and Display.
- Controls row: Advanced search (opens the rule builder), Saved searches, and - on the right - the result count, the selected count, and pagination.
- Filter panel: An expandable area that opens under the controls row when you click Advanced search, where you build complex, multi-rule filters.
- Main area: Displays your assets as cards (Grid view) or rows (List view). This area supports drag-to-select for highlighting multiple files.
- Bulk Actions bar: A floating dark bar that appears at the bottom of the screen as soon as one or more assets are selected. It has two rows - your selection on top, the actions underneath.
Main Features
Smart Search & Autocomplete
- What it's for: Finding assets using keywords, specific fields, or suggested terms.
- Typical use: Typing "sunset" to find images, or using field expressions like "size > 10MB" to find large files.
- Result: The gallery updates in real-time to show only assets matching your query. Word searches come back ranked by relevance; date, field and asset-ID searches come back newest first, and the sort control reflects whichever ordering applies.
Visual & Person Search
- What it's for: Finding assets based on what they look like or who is in them.
- Typical use: Uploading a reference photo to find similar images or selecting a detected face to find all photos of that person.
- Result: A specialized results view showing visual matches or assets containing the selected person.
Bulk Metadata Edit
- What it's for: Updating information across many assets at once.
- Typical use: Adding a specific copyright notice or campaign tag to 50 selected images.
- Result: A queue of operations such as set, clear, find and replace, or add keywords, applied in the background. See Bulk Metadata Edit.
- Good to know:
- Setting a field that an asset has never had a value for creates that value, for core fields (such as Creator, Copyright or OCR Text) and custom fields alike.
- On multilingual fields, operations edit the value in the default language and keep the other translations. Clear removes every language. To edit one specific language, use the Spreadsheet View or the asset page.
- Replace option swaps one option or vocabulary term for another wherever it is selected, including inside fields that hold several terms.
- If a change cannot be applied to an asset (the field does not exist for that asset's class, or the value does not fit the field, for example text in a number field), that asset is counted as failed with the reason, and none of the operations are applied to it.
Spreadsheet View
- What it's for: High-speed data entry in a familiar grid format.
- Typical use: Rapidly filling in required fields for a new batch of uploads using "Fill Down" and keyboard shortcuts.
- Result: Opens a full-screen spreadsheet where every cell is editable and changes auto-save.
Detailed Feature Documentation
Smart Search Bar
- Purpose: To provide a fast, intuitive way to filter the gallery using text.
- Where to find it: At the top of the Gallery page.
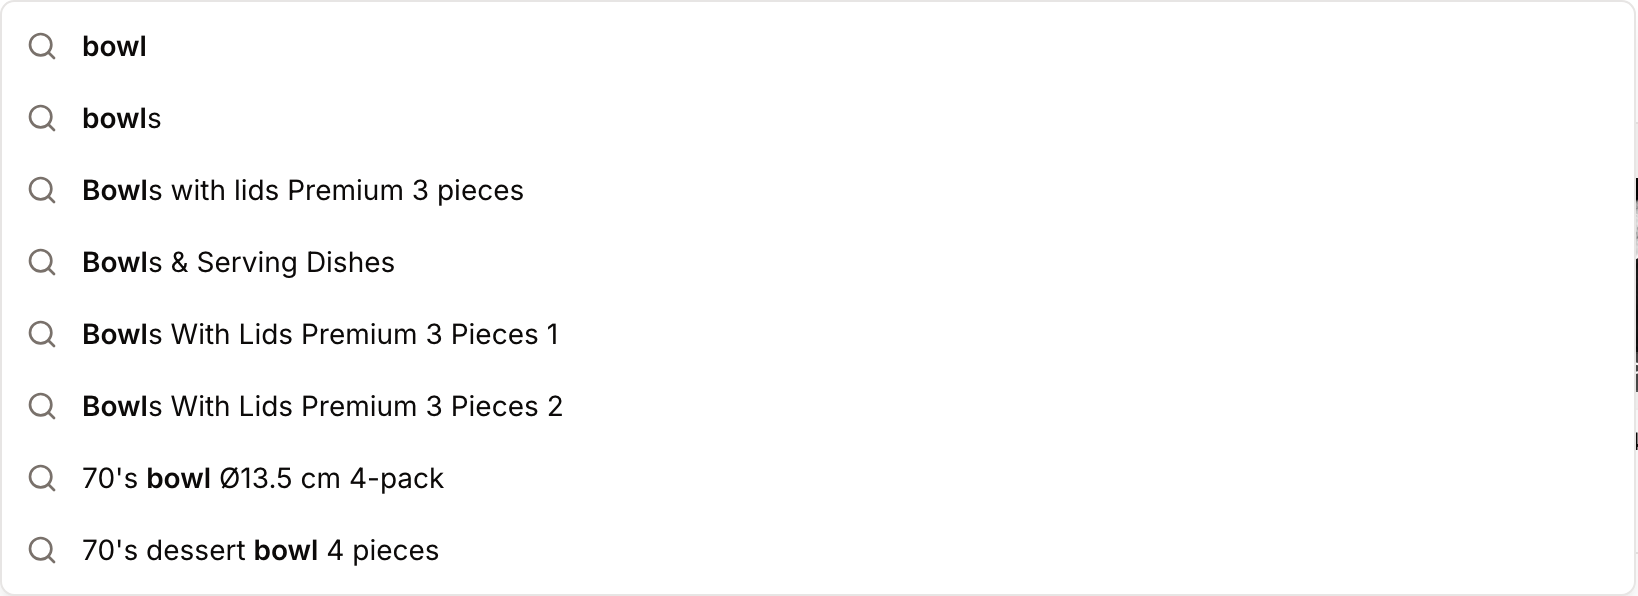
- What you'll see: As you type, a dropdown appears with "Did you mean" suggestions and autocomplete results for categories, tags, and filenames.
How to use it:
- Click into the Search assets... field.
- Type your keywords. If you see a relevant suggestion in the dropdown, click it or use the Arrow Keys and Enter to select it.
- To clear your search, click the X icon on the right side of the bar.
If you type something the search can't interpret - unbalanced quotes, an OR with a missing side, exclusion syntax like NOT - the search doesn't run: your current results stay in place and a short message explains what to adjust. See Searching by Keyword for the full syntax.
Bulk Actions Bar
- Purpose: To manage multiple assets simultaneously.
- Where to find it: Appears at the bottom of the screen when assets are selected.
- What you'll see: Two rows. The top row shows the selected count and a thumbnail strip of what you picked; the bottom row holds the actions - Edit Metadata, Download, Share, Export, Template, Add to Collection, Create Collection, Attachments, Rights, Unlink, a More (
…) menu, and an X to clear the selection.
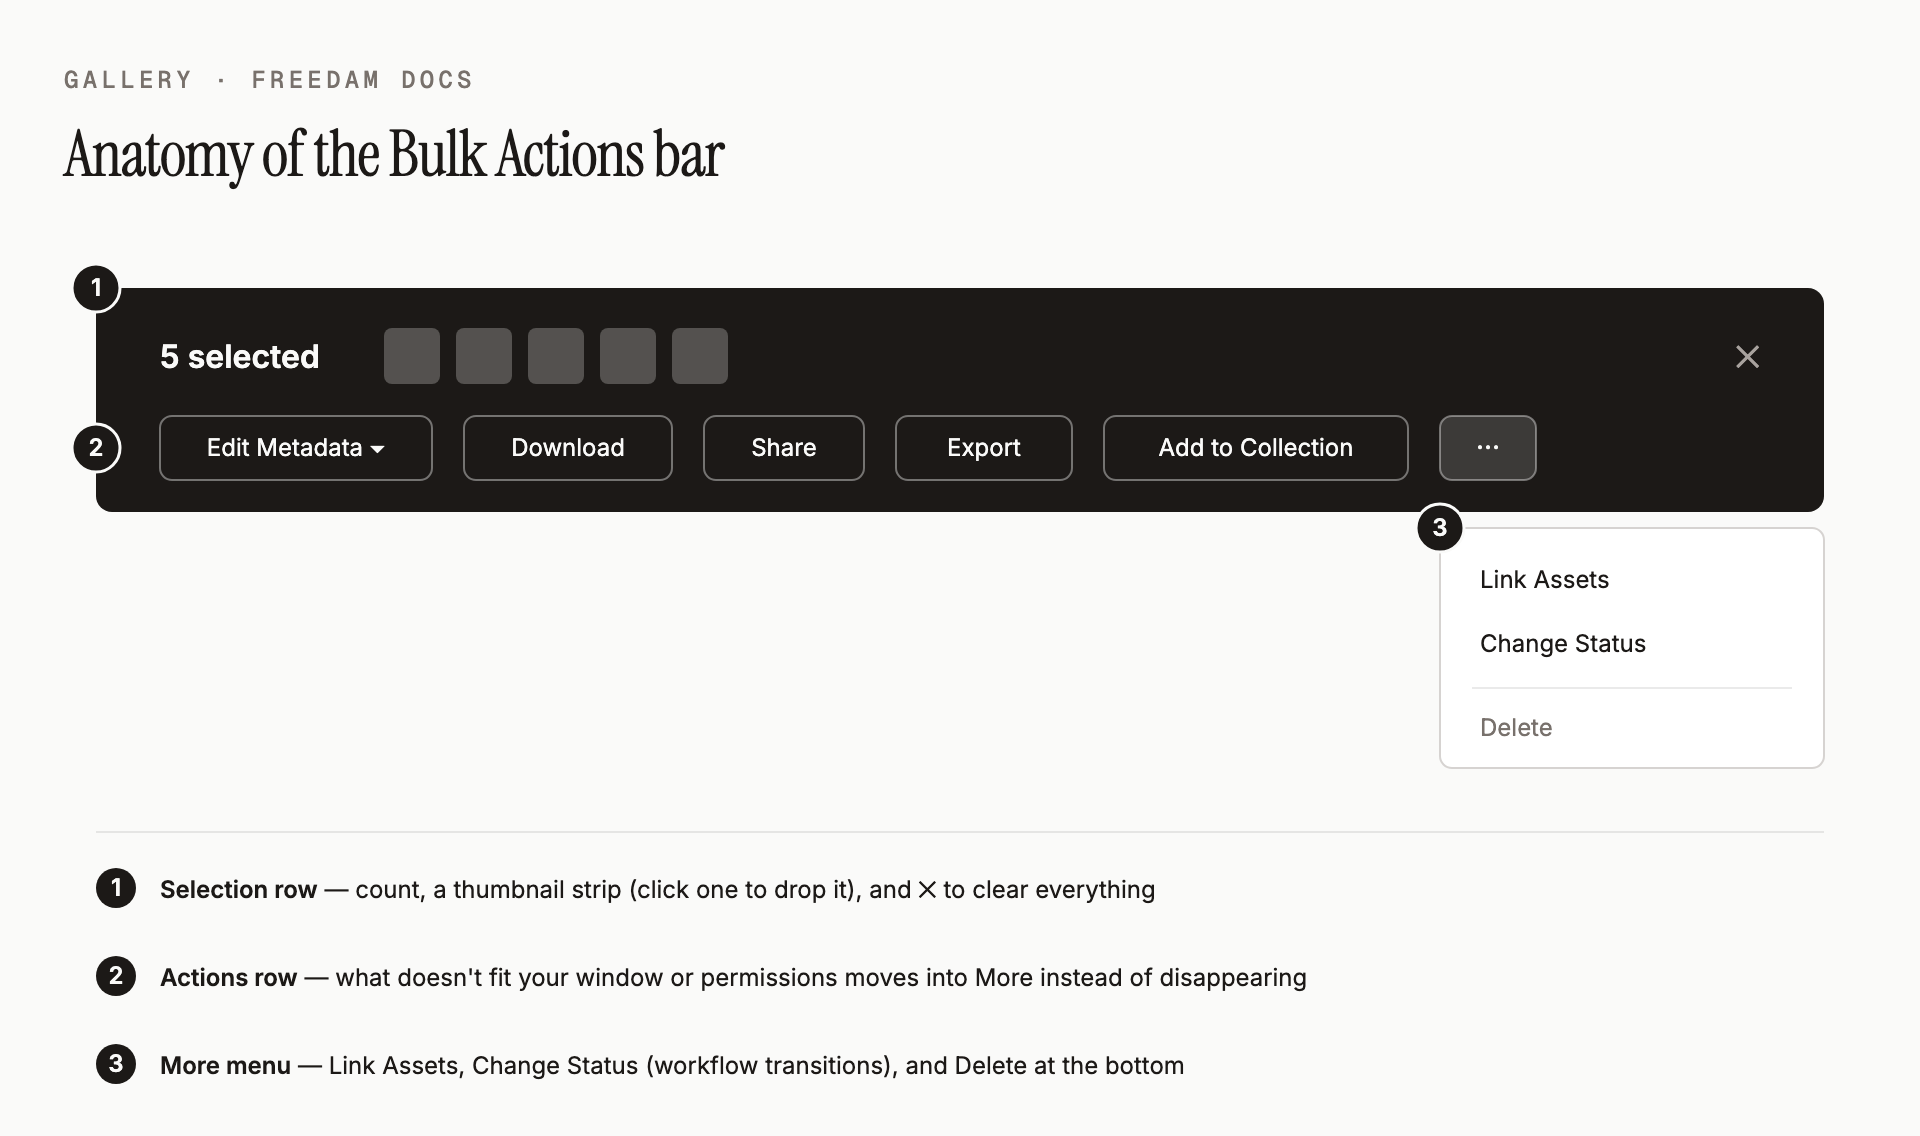
The bar adapts to the width of your window and to your permissions: actions that don't fit - and actions you aren't allowed to use - move into the More menu instead of disappearing.
How to use it:
- Select assets by clicking the checkbox on their cards or by dragging your mouse over a group of assets.
- Click Edit Metadata to choose between Bulk Operations and Spreadsheet View, or Add to Collection to organize them.
- Open the More (
…) menu and pick a transition under Change Status to move assets through a workflow (for example "Draft → Pending Review"). Delete lives at the bottom of the same menu. - Click a thumbnail in the top row to drop that one asset from the selection, or the X at the far right to clear the selection entirely. Clicking the check-square icon next to the count opens the deselect dialog.
Visual Similarity Search
- Purpose: To find assets that look like an image you already have.
- Where to find it: Click the Camera icon in the search bar.
- What you'll see: A dialog where you can drop an image file.
How to use it:
- Click the Camera icon.
- Drag an image from your computer into the box, or click to browse.
- Click Find Similar Images.
- Review the results, which are ranked by a percentage score (e.g., "95% match").
Display Preferences
- Purpose: To control how results are sorted and paged, which metadata fields appear on each asset card, and whether hovering a thumbnail opens a larger visual preview.
- Where to find it: The Display button at the right-hand end of the search row. Everything lives in the dialog it opens - there are no separate toggles in the header.
- What you'll see:
- Display options at the top: Sort by, Results per page, and two switches - Hover preview and Card metadata.
- Hover preview: when on, pointing at an asset thumbnail opens a larger image or video preview popover. The popover is purely visual - no metadata text is shown inside it.
- Card metadata: when on, each asset card expands to show a small grid of metadata rows (label and value) directly beneath the thumbnail.
- A list of available fields below that, each with two switches - Card Metadata (visibility under the card thumbnail) and List Column (visibility as a column in list view). A drag handle lets you reorder the fields.
How to use it:
- Click Display and turn Card metadata on. Cards expand to show the configured fields beneath each preview.
- In the field list, tick Card Metadata for the fields you want visible - Title, Creator, and Keywords are good starting choices.
- Drag fields up or down to set the order they appear on every card.
- (Optional) Turn Hover preview off if you prefer not to see pop-up previews while browsing.
- Click Save. Reset to Defaults puts everything back.
- Notes:
- Changes apply to your own view only - they do not affect other users.
- Small asset cards (chat picker, analytics tiles, asset-detail thumbnails) never show card metadata even when the setting is on - the layout is too compact.
- List-view columns are independent of the Card metadata switch - they are controlled only by the List Column switch in the field list.
Spreadsheet Indexing
- Purpose: To type metadata for many assets in a grid, one cell at a time.
- Where to find it: Select assets, click Edit Metadata in the Bulk Actions Bar, then Spreadsheet View. You can open up to 500 assets at once; with Select all matching, only the first 500 are loaded.
- What you'll see: The Bulk Indexing grid, with one row per asset and one column per field. The first column shows the asset thumbnail. Column headers mark required fields with *, and multilingual fields with a globe.
How to use it:
- Click a cell to select it. Double-click it, or press Enter or F2, to edit.
- Type the value, or pick it from the list for dates, yes/no, lists and vocabularies. Multilingual cells open a field per language.
- Move to the next cell with Tab or the arrow keys. Each cell is saved automatically half a second after you leave it: a spinner, then a green check, confirms it.
- To copy a value down, select its cell and press Ctrl+D (Cmd+D on a Mac). It fills every visible row below. You can also drag the small blue square at the cell's corner up or down.
- Click Back to Gallery when the header no longer shows Saving.
Use the toolbar to narrow the grid: Filter by Asset Class, Filter to show only rows with empty cells, missing required fields or errors, Columns to hide fields, and Display Language for multilingual fields.
- Cells for fields that don't belong to an asset's class are locked, with the tooltip "Field not available for this asset class". Capture date is read-only.
- A red icon on a cell means it was not saved; hover it to read why. The header shows how many cells have errors.
- Changing a parent field in a cascading vocabulary clears its dependent fields.
- Changing the Asset class cell changes the asset's class.
- Press F1 or ? to see every keyboard shortcut.
Bookmarks
- Purpose: To keep your own shortlist of assets to come back to.
- Where to find it: Bookmark an asset with Bookmark on its card or in its detail page's action bar. Open the list from Bookmarks in the main navigation.
- What you'll see: Your bookmarked assets, 24 per page, sorted by Recently bookmarked. Change the order to oldest bookmarked, title, or asset date.
Bookmarks are personal: nobody else sees your list. From the Bookmarks page you can open, download or share each asset, or remove its bookmark. Selecting several assets is not available there, so use a collection when you need bulk actions on a group of assets.
Assets in the trash, and assets you can no longer access, don't appear in the list.
Task Center
- Purpose: To follow bulk operations that run in the background, such as exports, bulk metadata edits and bulk status changes.
- Where to find it: The Background tasks button in the top bar, on every page.
- What you'll see: A panel listing your recent operations, each with its asset count, a status (Queued, Processing, Completed, Completed with errors, Failed or Cancelled) and a progress bar while it runs.
The button shows a badge while something is running, with the overall progress. When everything has finished, the badge counts the results you have not looked at yet. Its colour tells you how they went: red when an operation failed, amber when an operation completed with some failed assets, green when everything succeeded.
What you can do in the panel:
- Cancel operation stops a queued or running operation. Assets already processed keep their changes.
- Download export appears on a finished export. Export files are kept for 24 hours, then deleted, so download them the same day. See Export.
- Dismiss removes a finished operation from the list. Clear completed dismisses every finished operation at once.
Reading the counts:
- (N processed) shows progress on a running operation.
- N failed counts assets the operation could not change. When a whole operation fails, its error message appears under the status.
- N skipped (access policy) on an export means some selected assets were left out because your access rules hide them or do not allow exporting them. This applies to ZIP, CSV and PDF exports alike.
The Task Center keeps itself up to date: it refreshes often while an operation runs, slows down when nothing is happening, and stays in sync across your open browser tabs.
Complete Workflows
Workflow: Sharing a Selection of Assets
- Goal: Send a link to specific assets to someone outside your workspace.
- Prerequisites: You can share assets, and you can download every asset you select.
Steps:
- Select the assets you want to share in the Gallery.
- Click Share in the Bulk Actions Bar.
- Pick a starting point such as Public View or External Restricted Access, adjust access, dates and download quality, then click Create share.
- Click Copy to copy the link.
- Expected result: A link you can send to your recipient.
- More detail: Every option, the rights check, and managing links afterwards are covered in Share Links. What your recipient sees is in Receiving a Share.
Workflow: Requesting Access to Restricted Assets
- Goal: Obtain permission to download assets that are currently locked.
- Prerequisites: The assets must have a "Request" workflow configured by an administrator.
Steps:
- Click the Lock icon or Download button on a restricted asset card.
- In the dialog that opens, click Request Download Access.
- In the Reason for Request field, type at least 10 characters explaining why you need the file.
- Click Submit Request.
- Expected result: You will see a "Request submitted" toast notification. You will receive an email once an admin approves or denies the request.
Good to Know - Behind the Scenes
The Gallery hides a few things that can surprise new users. Once you know them, day-to-day work is smoother.
"Select all matching" isn't a one-by-one tick list
When you click Select all matching (for example, all 8,234 results of a search), Freedam doesn't quietly load 8,234 IDs behind the scenes. It remembers your current filters and re-runs them on the server when you execute the action.
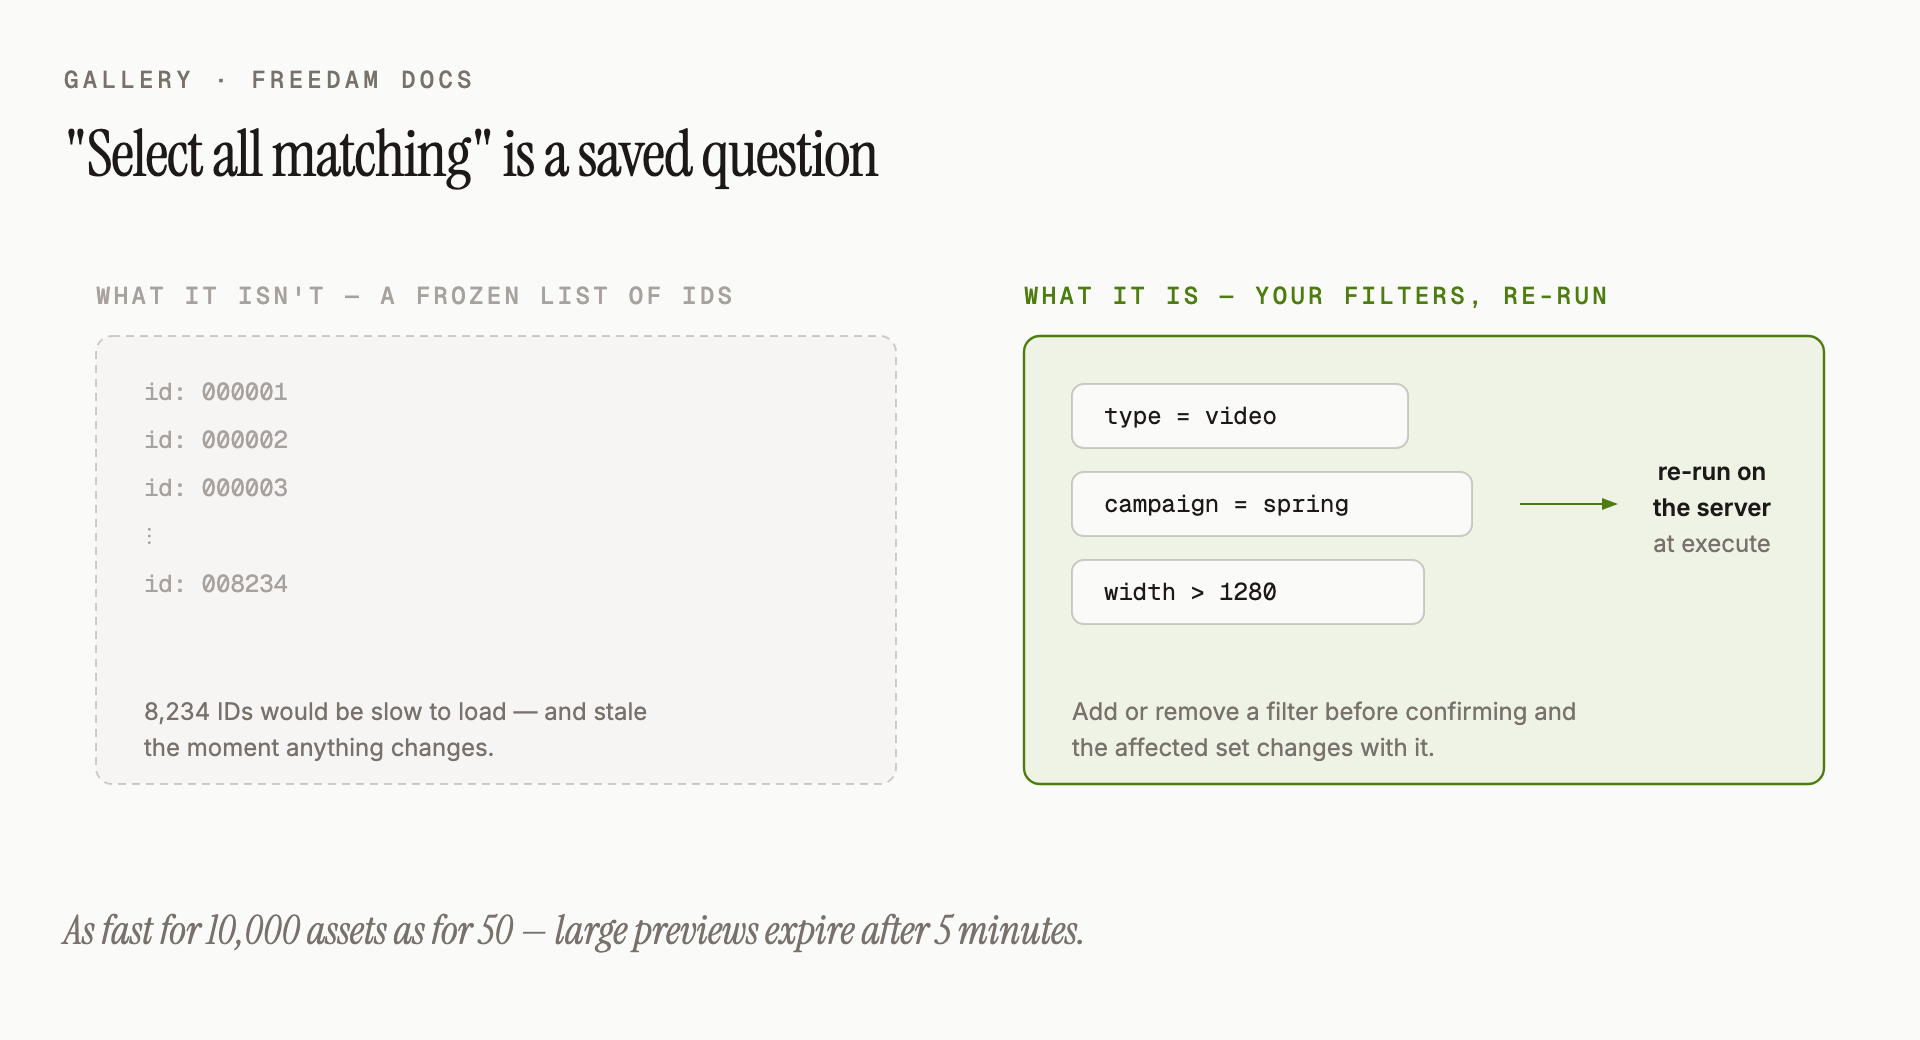
Two practical consequences:
- The action respects your filters exactly. If you add or remove a filter before confirming, the affected set changes with it.
- You have a 5-minute window to confirm large operations. If you walk away after previewing a 10,000-asset delete, you may need to confirm again when you return - the preview "token" expires to keep the system safe.
Bulk actions refuse rather than guess
A bulk action only runs when Freedam can prove exactly which assets it covers. When it can't, the action is refused with a message instead of running on a partial or uncertain set:
- "This selection includes a search whose full result set cannot be verified. Narrow the selection or use filters without a search term." - your "select all matching" is based on a search so broad it hit the result cap, so the full membership can't be pinned down. Use a more distinctive search term, or drop the search term and select using filters alone. Note that adding a filter does not lift this on its own: the result cap is applied to the search before your filters narrow it, so a common word stays unverifiable even inside a small collection.
- "Access rules could not be fully evaluated for this selection. Contact an administrator." - a permission rule failed to evaluate; erring on the side of doing nothing protects restricted content.
- "Some selected assets cannot be downloaded and cannot be included in an export." - the selection names specific assets that your permissions exclude from download.
- "Some selected assets do not exist or are not available to you." - the selection includes assets you cannot see or edit. Bulk Metadata Edit and the Spreadsheet View refuse to open on such a selection, and the spreadsheet never saves a cell on an asset hidden from you.
- "This selection exceeds the maximum of … assets per operation." - split the work into smaller batches.
The same check runs again at the moment a queued operation actually executes. If the selection can no longer be verified by then, the operation is marked failed in the Task Center with the same explanation - it never silently acts on a different set than the one you confirmed.
Some actions are instant, some run in the background
Most bulk actions - delete, change status, add to collection - finish in the time it takes the Gallery to flicker, and downloading a selection starts the ZIP straight away. Exports and bulk metadata edits take longer: they run in the Task Center, which tells you when they are done.
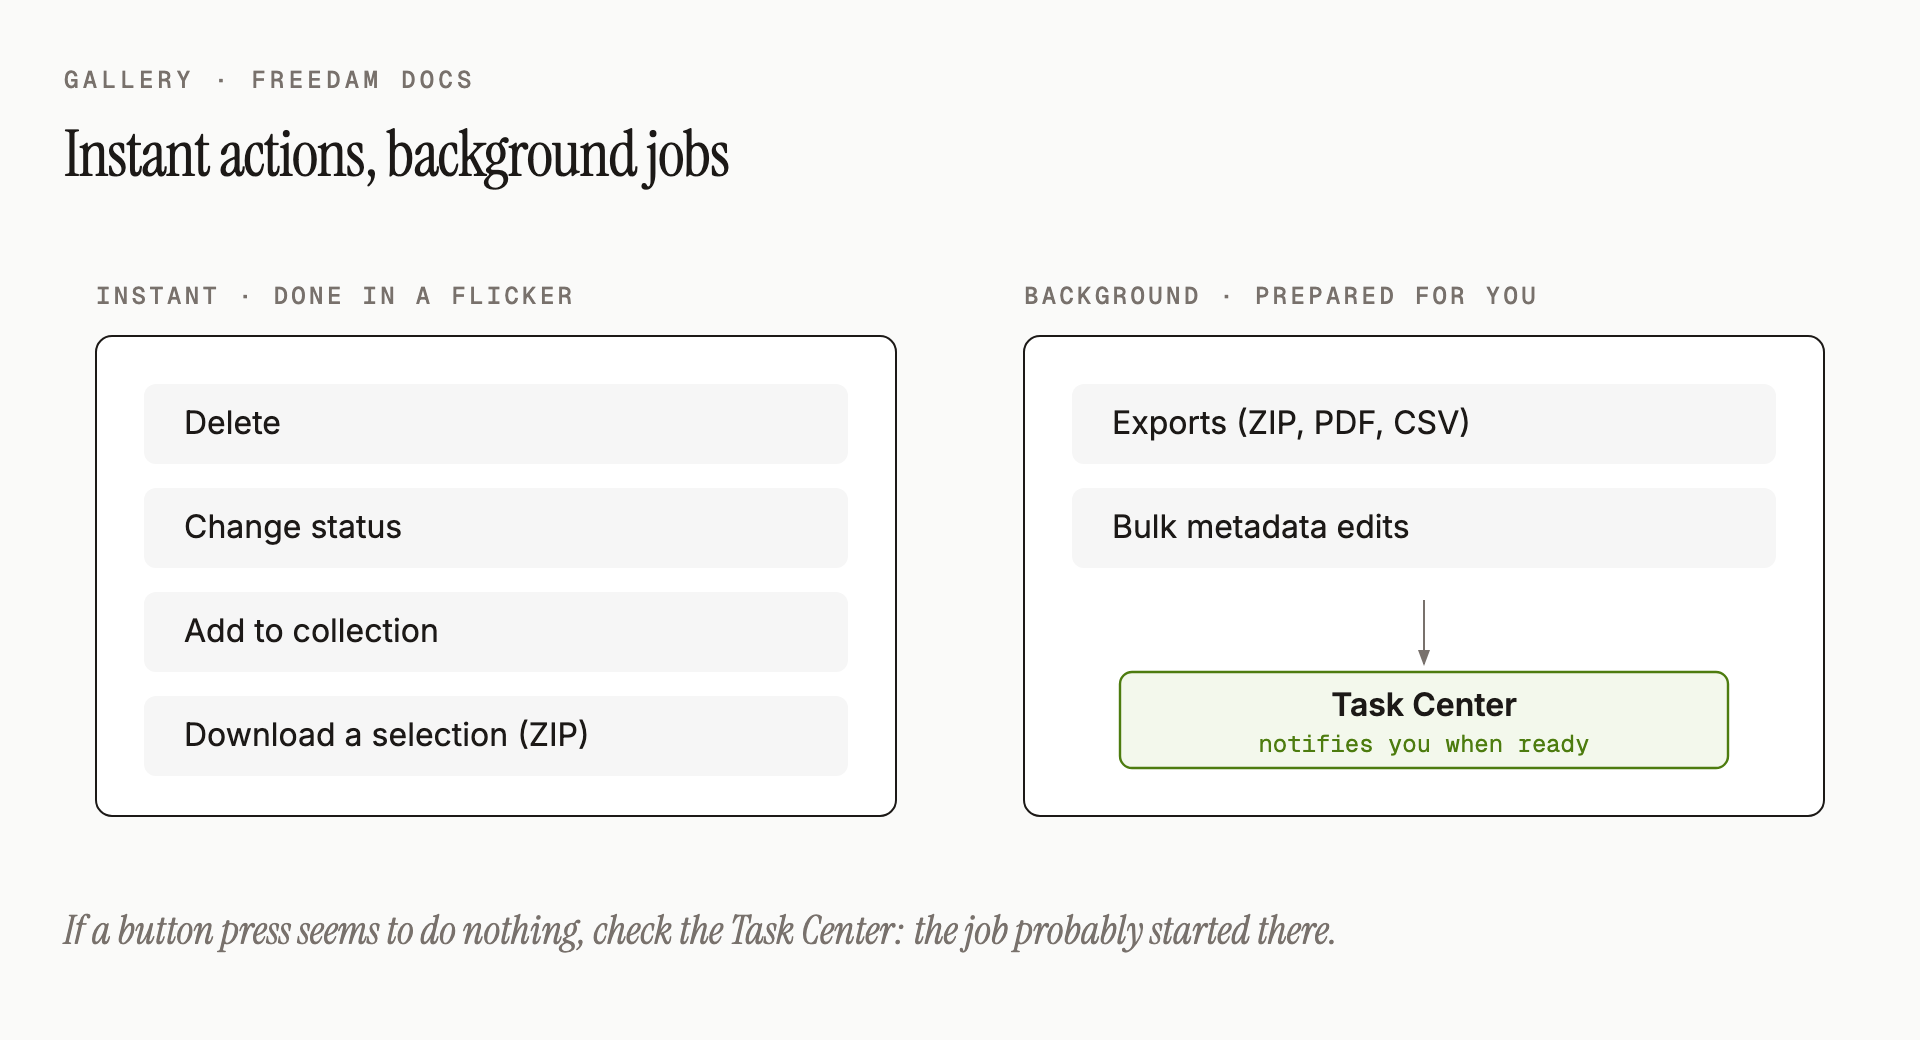
If a button press seems to "do nothing", check the Task Center widget in the top right - the job probably started there.
Delete now, recover later (for a while)
A deleted asset vanishes from the Gallery the instant you click Delete - but it isn't gone. It sits in the Trash for the retention window (typically 30 days), where an administrator can restore it in a click.
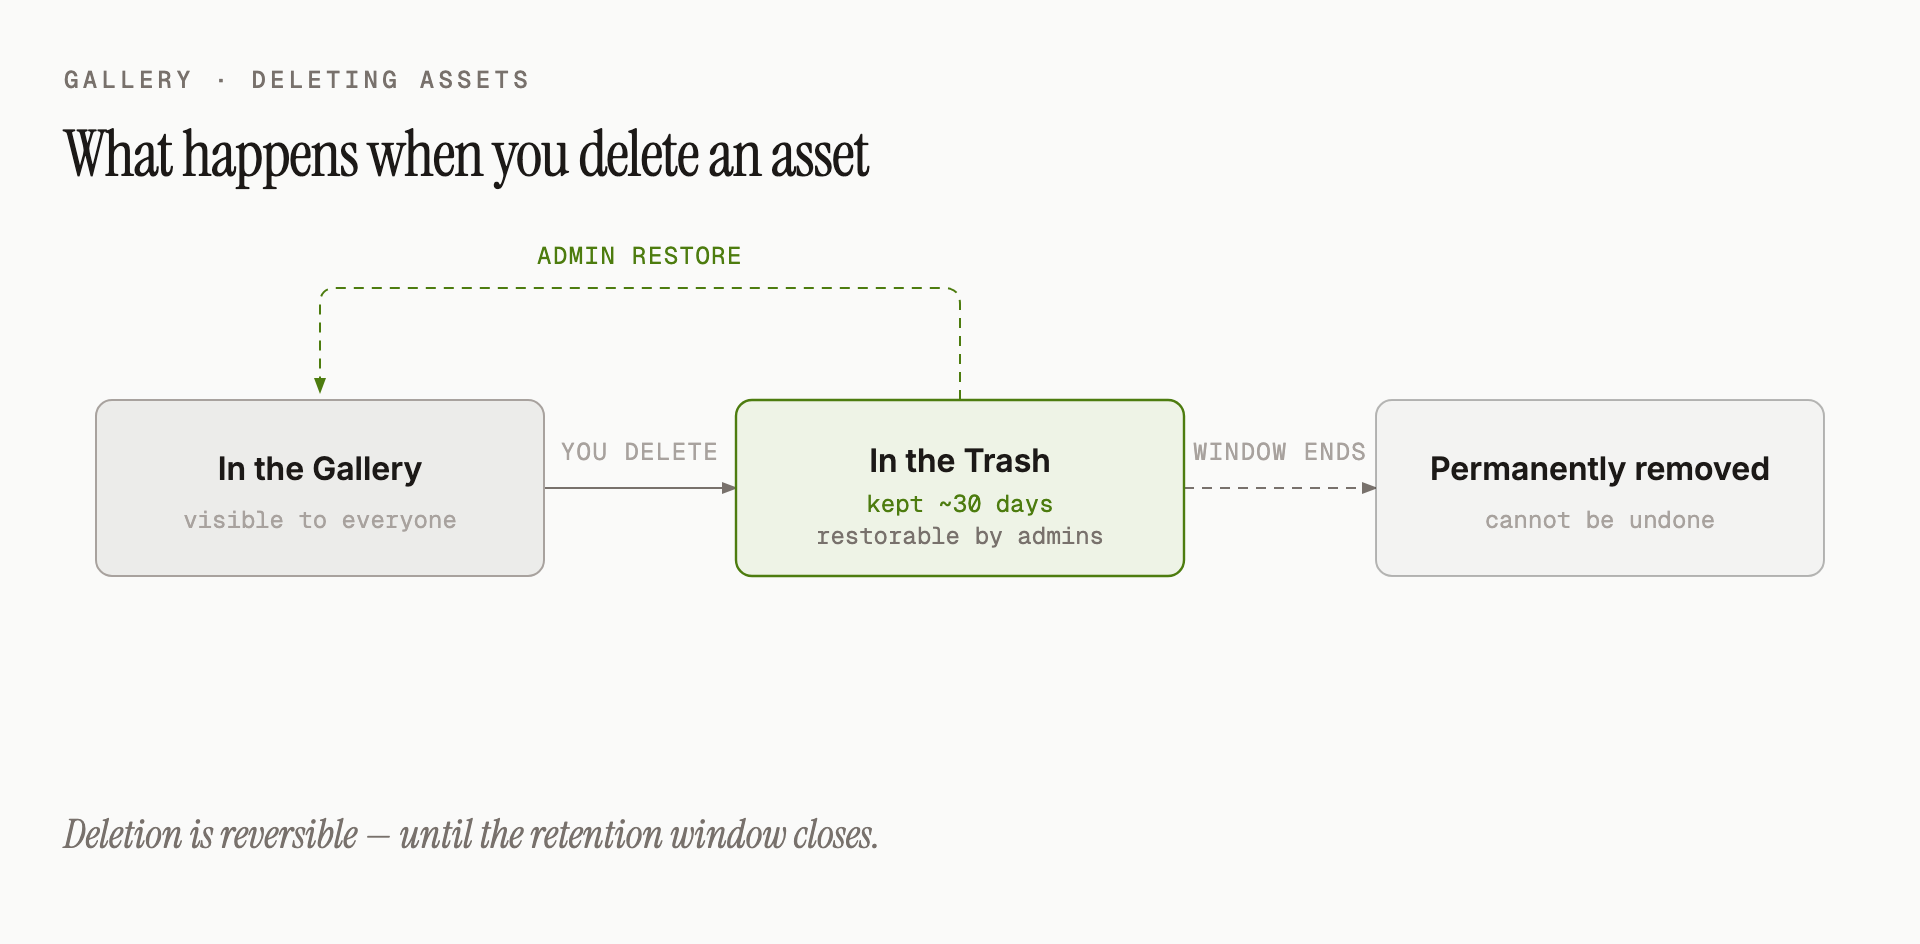
After the retention window, the asset is removed for good and cannot be recovered. Two safety nets prevent accidents:
- Small deletes confirm with one click. Delete fewer than 50 assets and you see a simple confirmation dialog.
- Large deletes ask you to type "DELETE". For bigger selections, the dialog adds a text box that must contain the exact word
DELETE- a deliberate friction step so you can't wipe out a collection by mistake.
A share is a live view, not a snapshot
When you create a share, you're really creating a saved question ("these 100 assets, for this audience") - not a frozen copy of the files. If rights on some of the assets change afterwards, the share updates to reflect the new reality.
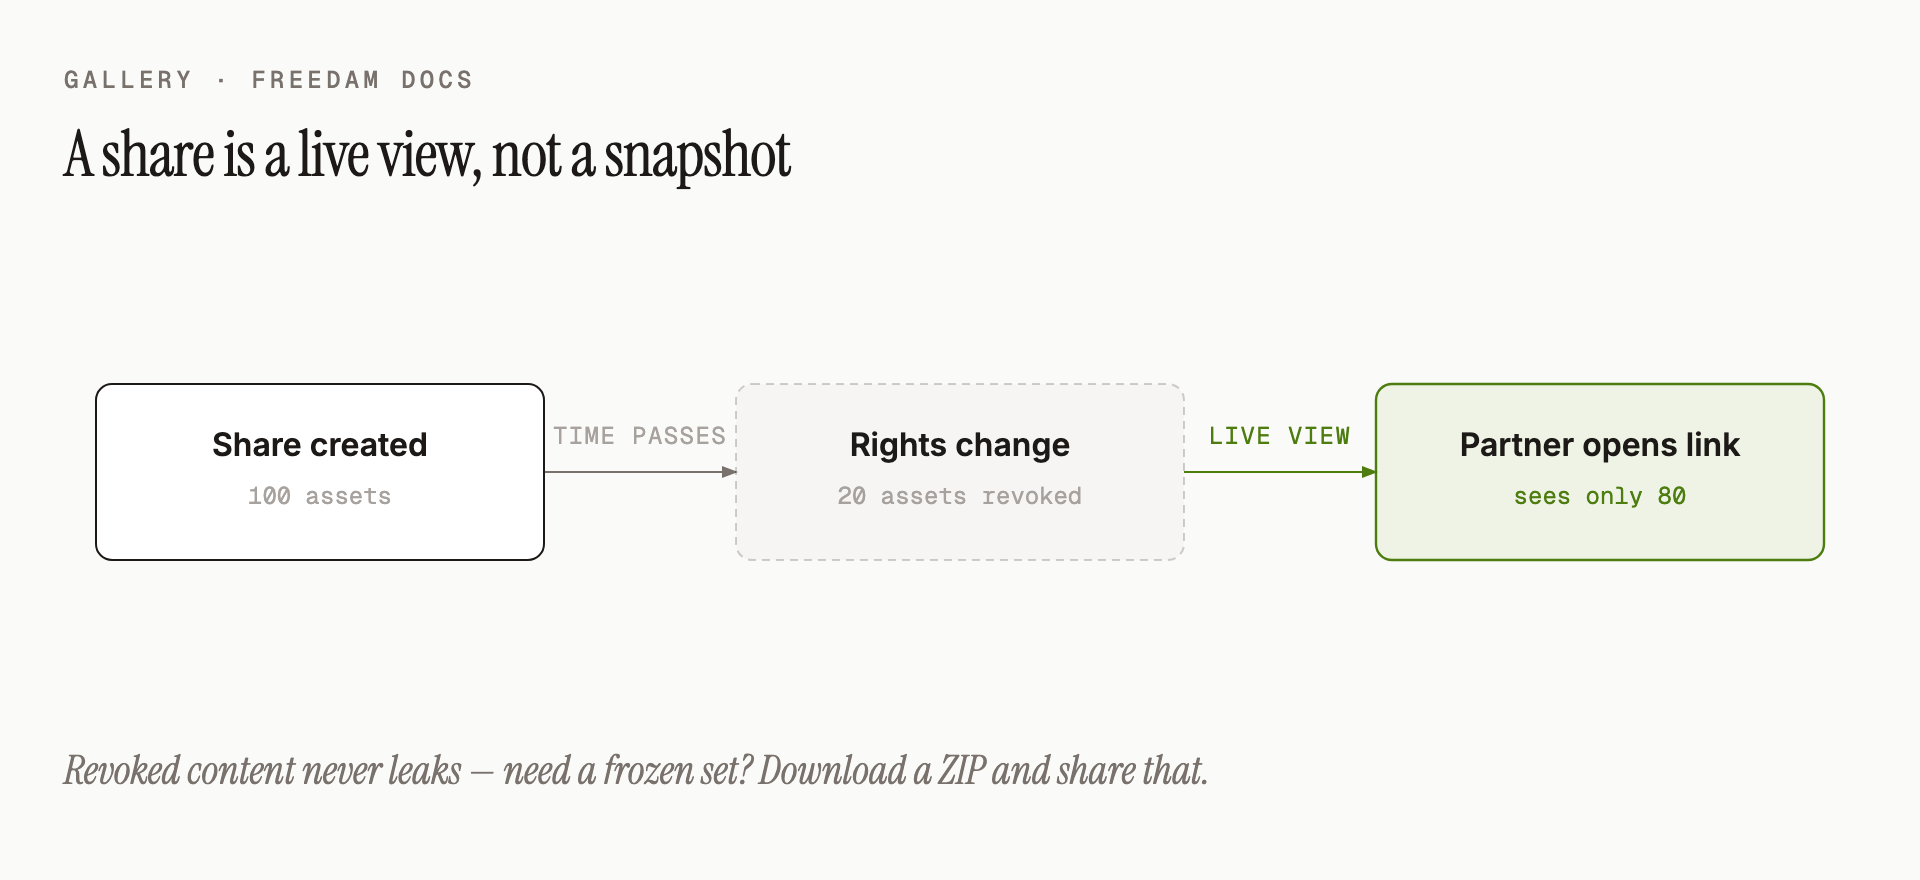
This is almost always what you want: revoked or restricted assets stop being shareable the moment the policy changes. A tip for campaigns: if the content of a share must be locked to a point-in-time version, download the files as a ZIP and share that instead.
The spinner on a new upload
A new upload appears in the Gallery immediately with a spinner overlay. Under the hood, three things are happening - you don't need to watch them, but it's helpful to know why the spinner is there:
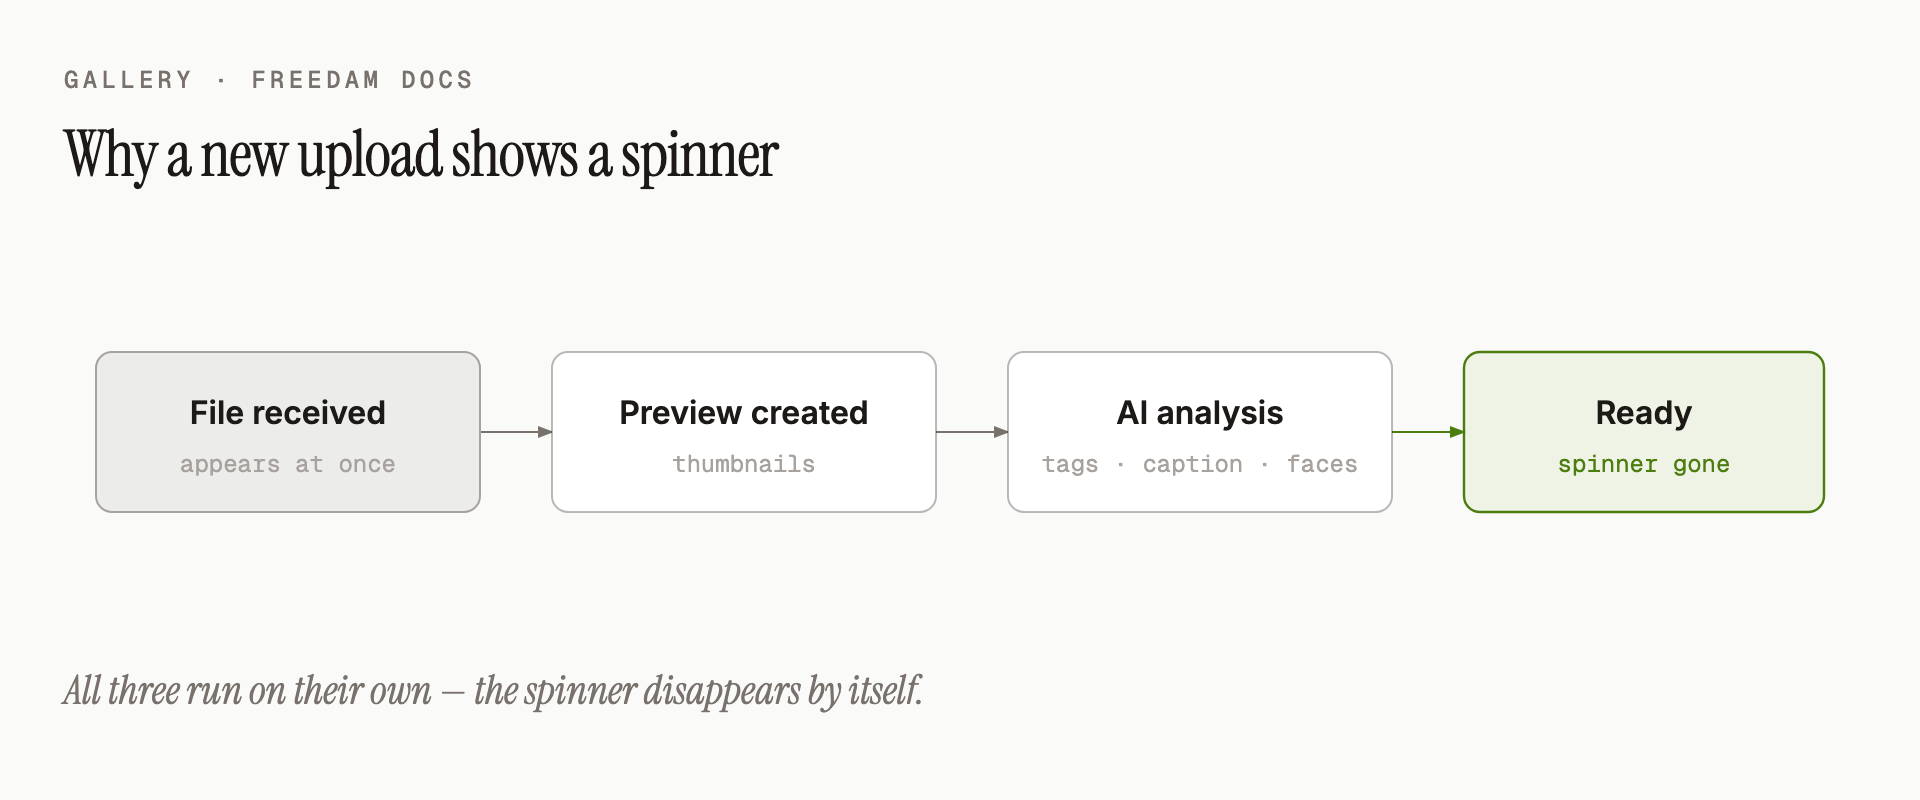
You can keep browsing, filtering and selecting other assets while new uploads finish processing. Freedam keeps a gentle poll running so the spinner disappears on its own once the asset is ready.
Why the result count sometimes seems off
When Access Rules are used to restrict which assets certain users can see, the Gallery applies those rules after it has counted matching assets. A user who is denied access to a handful of assets may see a page with fewer cards than the counter suggests. This isn't a bug - it's permissions doing their job. If the total matters to you (for reporting, for example), log in as a user with broader access or speak to an administrator.
Bulk status changes skip silently when they can't apply
If you select a mixed pile of assets - some "Draft", some "In Review", some already "Approved" - and change them all to Approved, only the ones whose current status allows that transition will move. The rest are left untouched, quietly. A tip: filter by current status before bulk-changing status to see exactly what will move.
Tips and Best Practices
- Drag Selection: In Grid view, you can click and drag on the empty space between cards to quickly select a group of assets. Hold Shift while clicking a second card to select the whole range between them.
- Select all matching: Once a search or filter is active, a Select all link appears next to the result count - it acts on everything that matches, not just the current page.
- Refine with Filters: If a search returns too many results, click Advanced search to add specific criteria like "Asset Type," "Creation Date," or "Color."
- Review mode: If you are a content reviewer, click Review mode in the search row to instantly filter the gallery to only show assets waiting for your approval.
Troubleshooting
Issue: "No Results" or "No Accessible Assets"
- Symptoms: The gallery is empty even though you know assets exist.
- Cause: You may have active filters that are too restrictive, or your user account lacks permission to view the current assets.
- Fix: Click Clear filters next to the result count on the controls row. If the gallery is still empty, contact your administrator to check your access groups.
Issue: "Failed to load fields" in Filter Panel
- Symptoms: An error message appears when trying to open the advanced filter panel.
- Cause: A temporary network interruption or a server-side configuration error.
- Fix: Click the Retry button within the error message.
Issue: A bookmarked Gallery link shows a filter validation error
- Symptoms: Opening an old bookmark or a link someone sent you shows an error about invalid filters instead of results.
- Cause: The filters encoded in that URL are malformed or exceed the current limits - typically a hand-edited or truncated link. Freedam refuses such links rather than silently showing the whole library.
- Fix: Open the Gallery normally and rebuild the search or filter, then bookmark the fresh URL (or save it as a Saved Search).
Issue: "Leave with unsaved changes?" when leaving Bulk Indexing
- Symptoms: Clicking Back to Gallery shows "Leave with unsaved changes?".
- Cause: Some cells are still being saved.
- Fix: Click Stay on Page and wait until the Saving badge in the header disappears, then leave. Closing the browser tab does not warn you, so wait for the badge before closing it too.