
Renderings
A rendering is an alternative file attached to an asset: a crop for a banner, the German version of a brochure, a retouched edit, or a set of social media formats. The asset keeps its own file, and each rendering sits next to it with its own title, type and approval status.
A rendering is different from a version: a new version replaces the asset's file, while a rendering is added alongside it. See Asset Detail for versions.
Where renderings come from
| Type | Created by |
|---|---|
| Manual Crop, Manual Edit, Translation, Custom Export | Someone uploading a file on the asset page. |
| AI Edit | Uploading an AI-edited file, or saving a result from Studio. |
| Social Media Export | The Social Export button on the asset page. |
| Template Generation | Saving a result of Apply template. See Template Generation. |
See an asset's renderings
On the asset page, Renderings appears under the preview, with the number of renderings. Hover a rendering to see its dimensions, size, creator, language and purpose, and its status: Approved, Pending or Rejected.
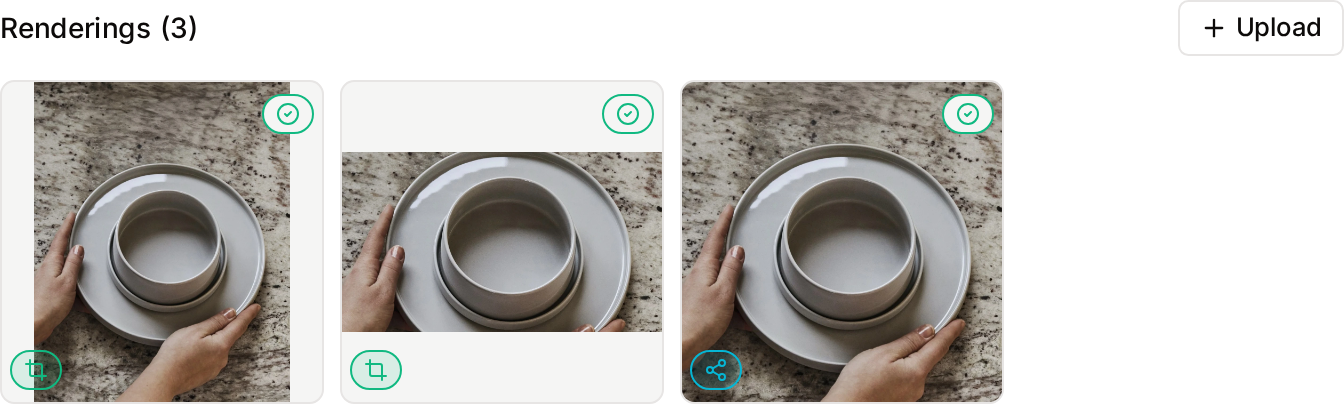
- You need the View attachments on assets permission to see renderings.
- Approved renderings are visible to everyone with that permission.
- Pending and rejected renderings are only visible to the person who created them, the asset's owner, and people who review asset requests.
Upload a rendering
You need the Edit and manage attachments on assets permission.
- Click Upload in the Renderings section.
- Choose the Rendering Type:
- Manual Crop: a cropped version, the default.
- Manual Edit: a retouched or edited version.
- Translation: a version in another language. Choose its Language.
- AI Edit (requires approval): an AI-generated edit.
- Custom Export: any other derived file, such as a print-ready PDF.
- Choose the File, up to 100 MB. Images, videos, audio, documents, 3D models and fonts are accepted.
- Check the Title, filled in from the file name, for example
16:9 Crop for Social Media. - Optionally add a Description and a Purpose / Use Case, such as "LinkedIn campaign, Q3".
- Click Upload Rendering.
Approval
- AI Edit renderings always need approval.
- Other renderings are approved automatically, unless an administrator turned on Require Rendering Approval in Access Settings.
- Template generation results are submitted for approval when you save them. Unsaved drafts are never sent to reviewers.
When a rendering needs approval, Freedam shows Rendering Submitted for Approval and emails you a confirmation. Until it is approved:
- it shows Under Review instead of a thumbnail,
- other people can't see it,
- its Download and delete buttons are disabled.
Reviewers receive an email and approve or deny the rendering in Administration → Asset Requests, where it appears as a submission. See Asset Requests. You receive an email with the decision. A denied rendering is removed.
Download renderings
- From the Renderings section: click Download on an approved rendering.
- From the download dialog: on a single asset, the Renderings group lists the approved renderings. Select one, then use the dialog's download or copy URL button. See Download Dialog.
You get the rendering's file as it was stored. Downloads follow the same rules as the asset itself: if the asset needs a download request, or its access rules don't let you download it, the download is refused with a message such as "Download requires approval." and nothing is downloaded.
Delete a rendering
Click the trash icon on the rendering and confirm with Delete Rendering. You can delete renderings you created, or renderings on assets you own, if you have the Delete attachments from assets permission. Administrators can delete any rendering. Pending renderings can't be deleted until they are reviewed.
Social media exports
Social Export creates renderings sized for social platforms from an image, in one step.
- On the image's page, click Social Export in the action bar.
- Tick the formats you need, up to 20 at a time. Once 20 are ticked, other formats can't be added and a message tells you so. Formats are grouped by platform:
- Instagram: square, portrait and landscape posts, story, reel.
- Facebook: post, cover photo, story, square and landscape ads.
- Twitter/X: post, header, card.
- LinkedIn: post, cover, article.
- YouTube: thumbnail, channel cover, short.
- TikTok and Pinterest: video, pin, board cover.
- Common Ratios: 1:1, 4:5, 16:9, 21:9 and 9:16.
- Click Frame N Exports. Each crop starts centred on the image's focus point, when one was detected.
- In Adjust Framing, drag each image to position it within its frame. Dimmed areas are cropped out. Reset to auto returns to the automatic framing.
- Click Generate N Exports.
- Download each export with Download, or all of them as a ZIP with Download All. Click Done to close.
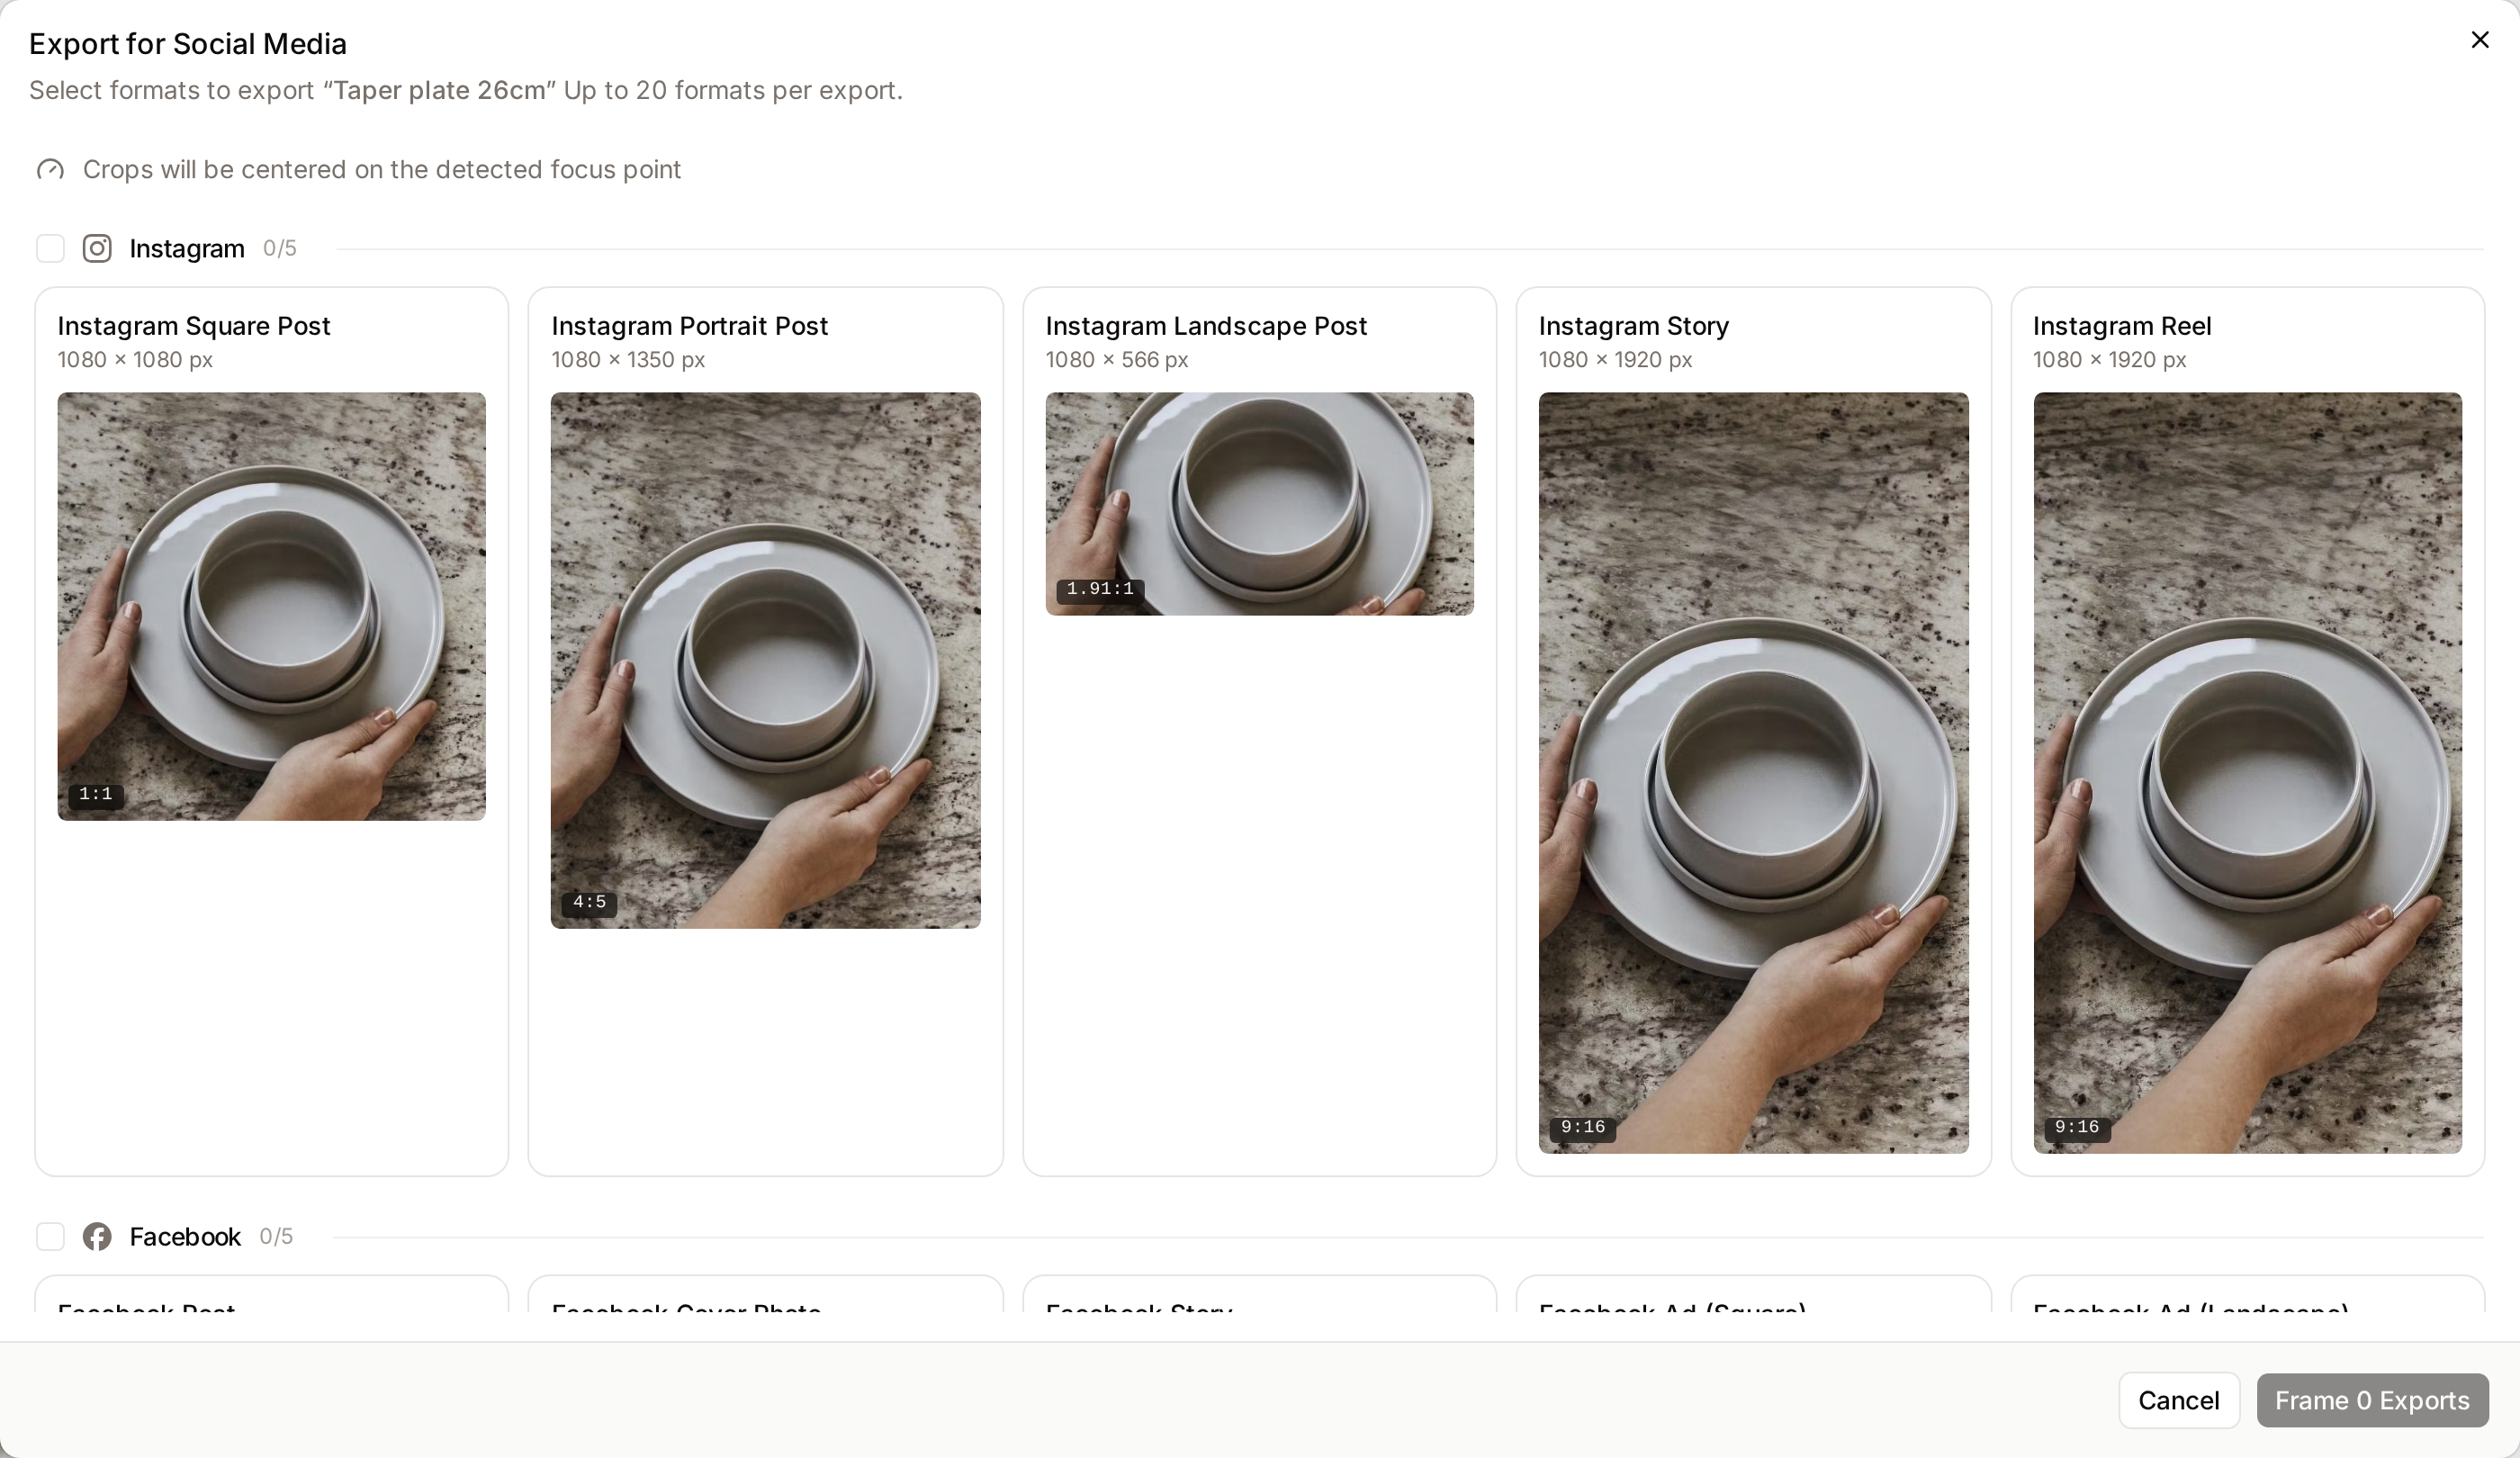
Each export is saved as a Social Media Export rendering on the asset, so it is there the next time someone needs it. Exporting the same format with the same framing again reuses the existing rendering. Exports are resized to the exact pixel size of each format.
You need the Edit and manage attachments on assets permission. Social exports are available for still images, not for videos or animated images. When your workspace requires approval for renderings, exports show Pending Approval until they are approved.
Related pages
- Asset Detail: versions and the rest of the asset page.
- Template Generation: creating renderings from brand templates.
- Studio: AI edits that can be saved as renderings.
- Download Dialog: downloading renderings with the asset.