
Workspace Setup
A workspace is your organisation's own Freedam library, with its own web address, users, and settings. This page is for the person creating it: signing up, the setup checklist, and what happens at the end of the trial.
If someone has already invited you to an existing workspace, you don't need any of this. See Signing In.
Create a workspace
Sign-up starts on the Freedam website, at Start your free trial. Every new workspace gets a 30-day trial of the Team plan, with no credit card needed.
- Name your workspace. Enter a Workspace name, usually your company name, and a Subdomain. The line below the fields shows the address your workspace will have, for example
yourcompany.freedam.io. Click Continue. - Create your account. Enter your Full name, Email address and Password, then confirm the password. Click Start your free trial.
You become the workspace's first administrator and its owner.
A few rules apply at sign-up:
- The subdomain must be unique. Some subdomains are reserved and cannot be used.
- Use a business email address. Personal addresses from free email providers are refused.
- One email address can only create one workspace. If yours is already linked to a workspace, sign in to it instead.
Wait for setup
After you submit the form, Freedam shows Setting up [your workspace] while it prepares your database, settings and administrator account. This usually takes less than a minute.
When the workspace is ready, the page shows Your workspace is ready! and signs you in automatically after a short countdown. You can also click Go to your workspace.
You also receive a welcome email with your workspace address. Keep it: it is the quickest way back to your workspace.
If the page shows Setup encountered a problem, click Try again. If it fails again, click Contact support.
Follow the setup guide
Workspace owners see a setup guide until every step is done or they dismiss it. It appears as a Welcome to your workspace banner on the dashboard while the dashboard is still empty, and on the Gallery while it has no assets. The header also shows a Setup menu with your progress, for example "Setup (2/5)".
| Step | Button | Done when |
|---|---|---|
| Upload your first asset | Go to Uploads | The library has at least one asset. |
| Customize your branding | Set up Branding | Your branding is saved and active. |
| Invite a team member | Send Invitation | You have sent an invitation, or the workspace has a second user. |
| Create your first collection | Create Collection | The workspace has at least one collection. |
| Configure access settings | Open Access Settings | You have changed sign-up or single sign-on settings. |
The invitation step only appears when invitations are available on your workspace.
A step can take up to 5 minutes to show as done after you complete it. Click Dismiss setup guide, or Dismiss in the header menu, to hide the guide. Dismissing applies to the whole workspace and cannot be undone, so every owner stops seeing it.
Each step has its own documentation: Uploads, Branding, Invitations, Collections, and Access Settings.
Find your workspace again
If you don't remember your workspace address, use Sign in to your workspace on the Freedam website.
- Enter your email address and password, or click your single sign-on provider.
- Click Sign in.
Freedam finds the workspace linked to your email address and signs you in there. If it shows "No workspace found for this email address.", check that you used the address you signed up with, or ask a colleague for the workspace address.
Try the demo first
To explore Freedam before creating your own workspace, open the demo on the Freedam website. Enter your Work email and click Enter the Nordi demo. You are signed in to a shared sample workspace for a fictional brand, with no password needed.
The demo is shared with other visitors, so don't upload anything confidential there.
When the trial ends
At the end of the 30 days, Freedam checks whether your workspace fits within the Free plan's limits, such as storage and number of administrators.
- If it fits, your workspace moves to the Free plan. Everything you created stays, and features that are not part of the Free plan are switched off. Administrators receive an email titled "Your [workspace] trial has ended" listing what changed.
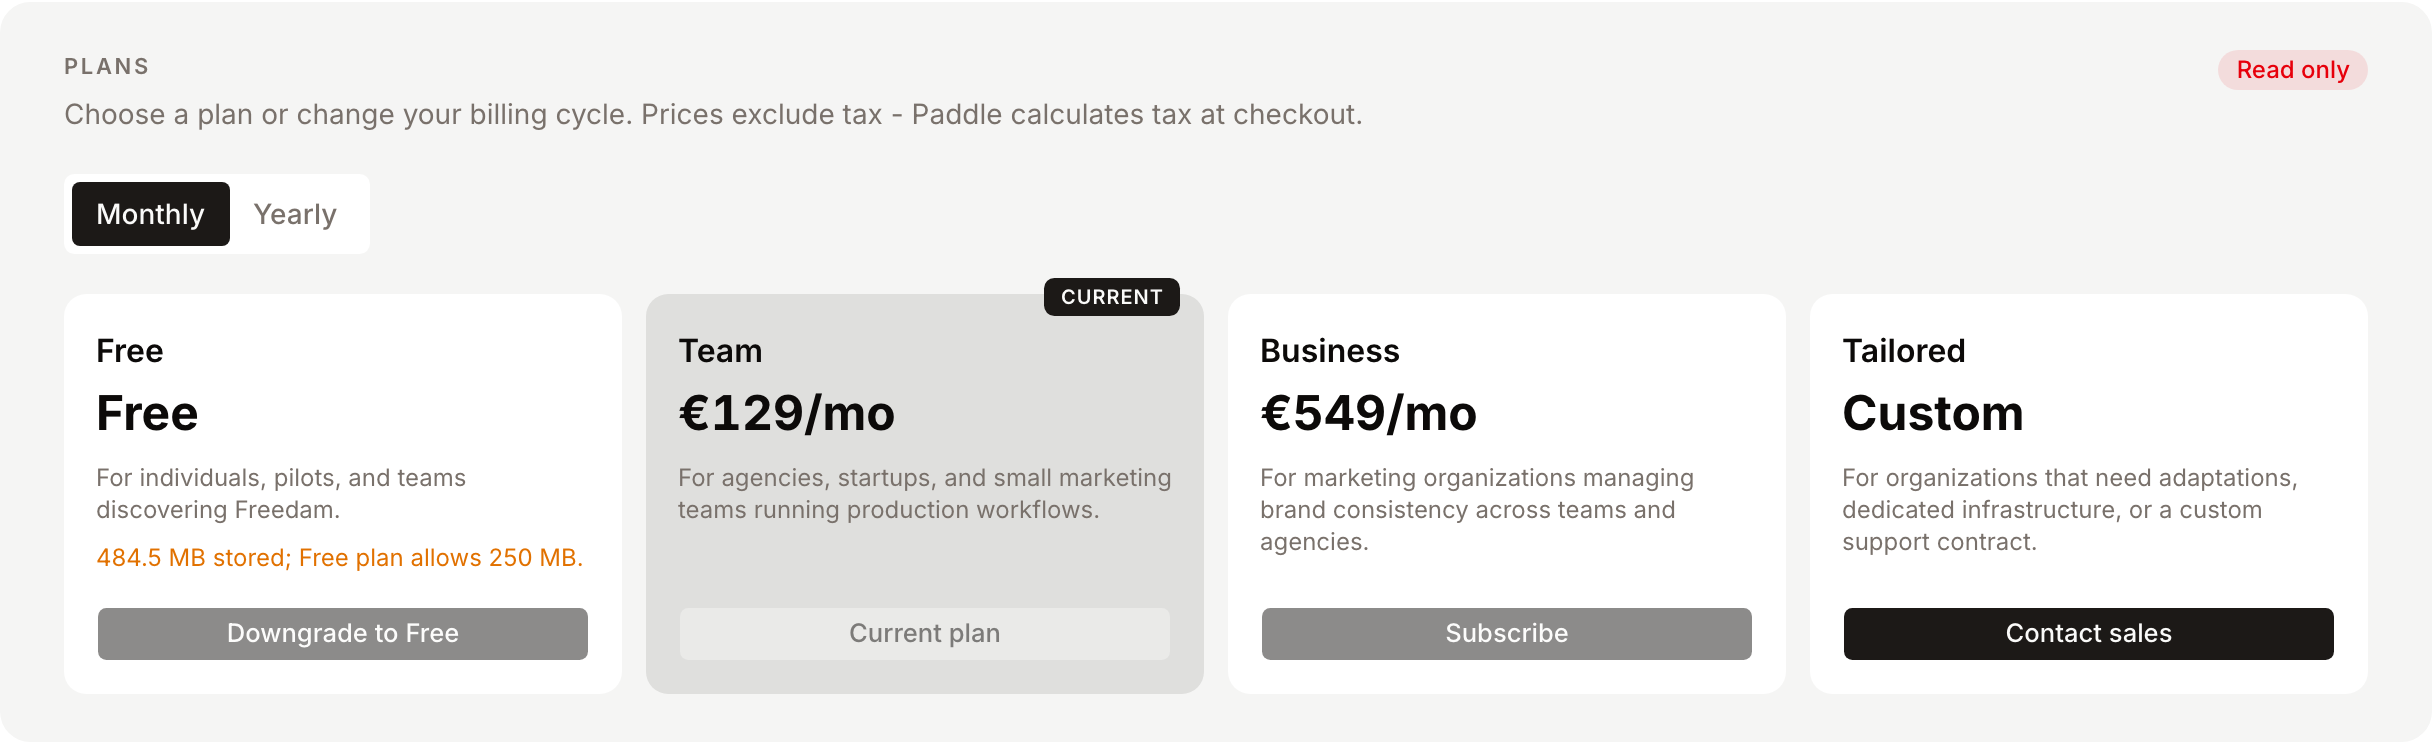
- If it does not fit, your workspace becomes read-only. Administrators receive an email titled "Action required: [workspace] trial has ended" listing which limits are exceeded.
To keep every feature, choose a paid plan before the trial ends. Your workspace administrators can do this from Administration → Plan & Usage. See Plan & Usage.
What a read-only workspace can still do
Read-only holds the workspace to the Free plan's limits while you decide. Your team keeps working as usual: signing in, browsing, downloading, sharing, editing metadata, organizing collections and deleting assets all keep working.
Three things are paused, because they add to what the workspace uses:
- Uploads and new versions, since storage is over the Free plan's limit.
- New administrators, beyond the number the Free plan allows.
- AI features, such as the assistant, Studio, AI enrichment and transcription. Search keeps working.
Trying one of these shows a message pointing to the Plan & Usage page. Deleted assets keep counting towards storage until they leave the trash, so empty the trash to free space.
Leaving read-only
An administrator can lift read-only from Administration → Plan & Usage, which stays available in read-only mode:
- Choose a paid plan. Read-only ends as soon as the subscription starts.
- Move to Free. Free up enough storage (and administrator seats) to fit the Free plan, then click Downgrade to Free. The button is available once your usage fits, and the switch is immediate. It does not happen automatically.
Related pages
- Signing In: passwords, single sign-on, and account requests.
- First Steps: finding your way around once you are signed in.
- Admin Overview: every administration screen in one place.